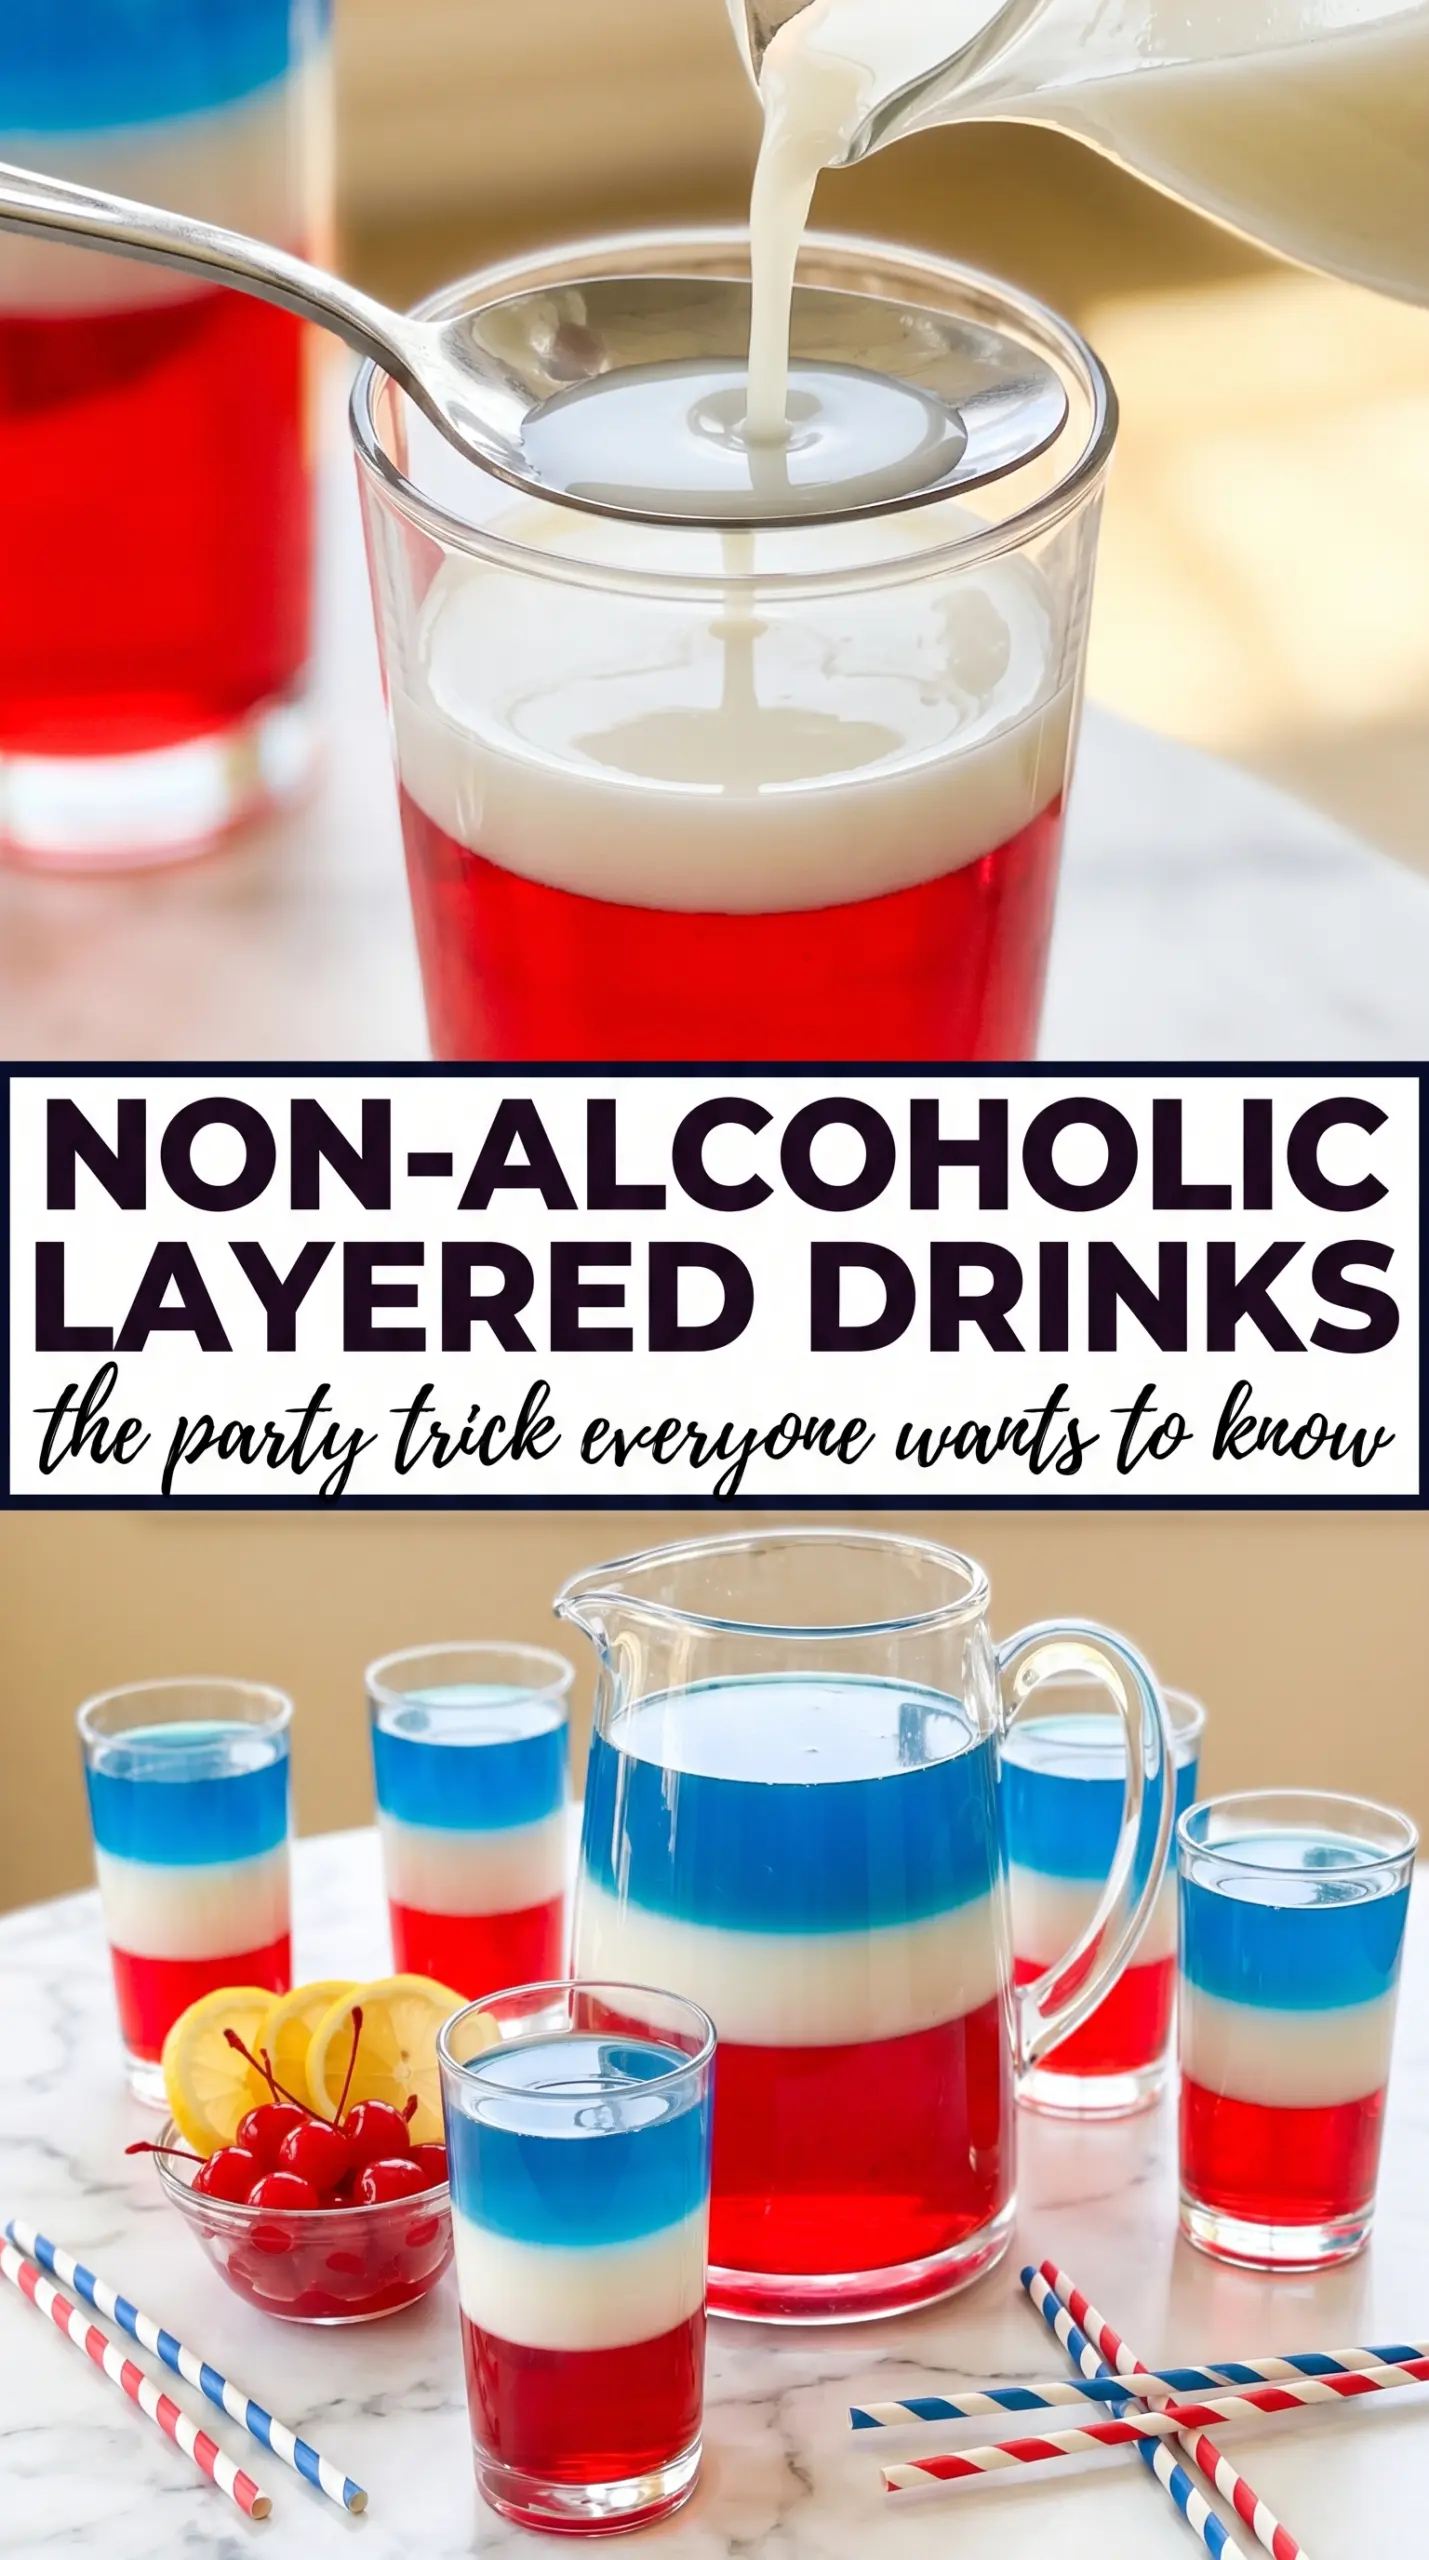
Three bright layers in one glass always get a second look, and these non-alcoholic layered drinks deliver that moment every time. The grenadine settles into a deep red base, the lemonade holds the middle in a clean golden band, and the blue raspberry drink floats on top for a glass that looks far more complicated than it is. The best part is that the layers stay crisp long enough to carry to the table without turning into a single muddy color.
The trick is all in temperature and pouring speed. Cold ingredients layer better, ice gives the liquids something to rest against, and a slow pour over the back of a spoon keeps the streams from punching through the glass. Grenadine is the heaviest of the three, so it drops right down first; the lighter lemonade and blue drink need a gentler hand. Once you understand that, the drink becomes easy to repeat for parties, cookouts, or any time you want something festive without alcohol.
Below, I’ve included the one step that matters most if your layers keep blending, plus a few easy swaps if you want to change the colors or make a bigger batch.
The layers held perfectly, and the blue raspberry stayed on top even after I carried the glasses outside. I used the spoon trick and it made the cleanest stripes I’ve ever gotten in a mocktail.
Layered mocktails with grenadine, lemonade, and blue raspberry are the kind of party drink that looks polished the second you pour them.
Save these grenadine, lemonade, and blue raspberry layers to Pinterest
Why the Layers Hold Instead of Turning Cloudy
Layered drinks fall apart for two reasons: warm liquids and aggressive pouring. Warm lemonade or blue raspberry drink slides through the glass and drags the color with it, which is why chilled ingredients matter here more than fancy technique. Ice helps, too, because it slows the pour and gives each layer a little resistance so the colors can settle separately.
The spoon isn’t just a prop. Pouring over the back of a spoon spreads the liquid out and softens the impact, which keeps the middle and top layers from drilling into the grenadine below. If your layers start to mix, the most common culprit is pouring from too high or trying to rush the step. Slow beats fast every time with this drink.
- Grenadine — This is the anchor layer because it’s dense and naturally sinks. Cheap grenadine works fine here, since you’re using it for color and sweetness rather than complexity.
- Lemonade — Chilled lemonade creates the bright middle band. A homemade version or a good bottled one both work as long as it’s cold and not pulpy.
- Blue raspberry sports drink or blue raspberry lemonade — This is the top layer and the easiest one to swap. Use whichever version you have, but keep it cold so it floats more cleanly.
- Ice cubes — More than garnish, the ice acts like a buffer between the layers. Fill the glass nearly to the top so the liquid has less distance to fall.
What Each Ingredient Is Actually Doing in This Recipe
- Primary ingredient (the star) — Quality matters most. Choose the best you can find.
- Cooking medium (oil, butter, or broth) — This carries flavors and prevents dryness.
- Seasonings (salt, pepper, spices, herbs) — Layer flavors so nothing overpowers. Build depth gradually.
- Aromatics (garlic, onion, herbs) — Cook with fat to bloom flavors. Become the foundation.
- Supporting ingredients — Complement the main ingredient without overpowering it.
- Sauce or liquid (if applicable) — Brings flavors together. Balance richness with acid.
- Acid (lemon, vinegar, wine, or other) — Brightens and prevents flat-tasting results.
- Final finish (garnish, glaze, or sauce) — Prevents one-dimensional taste and adds visual appeal.
How to Stack the Colors Without Stirring Them Together
Building the Grenadine Base
Fill a tall clear glass with ice cubes almost to the top, then pour the grenadine slowly over the ice. It should sink right down and pool at the bottom without much effort. If you pour too quickly, it can splash up the sides and tint the ice instead of forming a clean base. Give it a second to settle before moving on.
Floating the Middle Layer
Hold a spoon just above the ice and pour the chilled lemonade over the back of it in a thin stream. The spoon spreads the liquid out so it lands gently on top of the grenadine instead of crashing through it. If the lemonade is warm, it’s much harder to keep that middle band distinct, so keep it straight from the fridge. A little patience here is what gives you that sharp color break.
Adding the Blue Top Layer
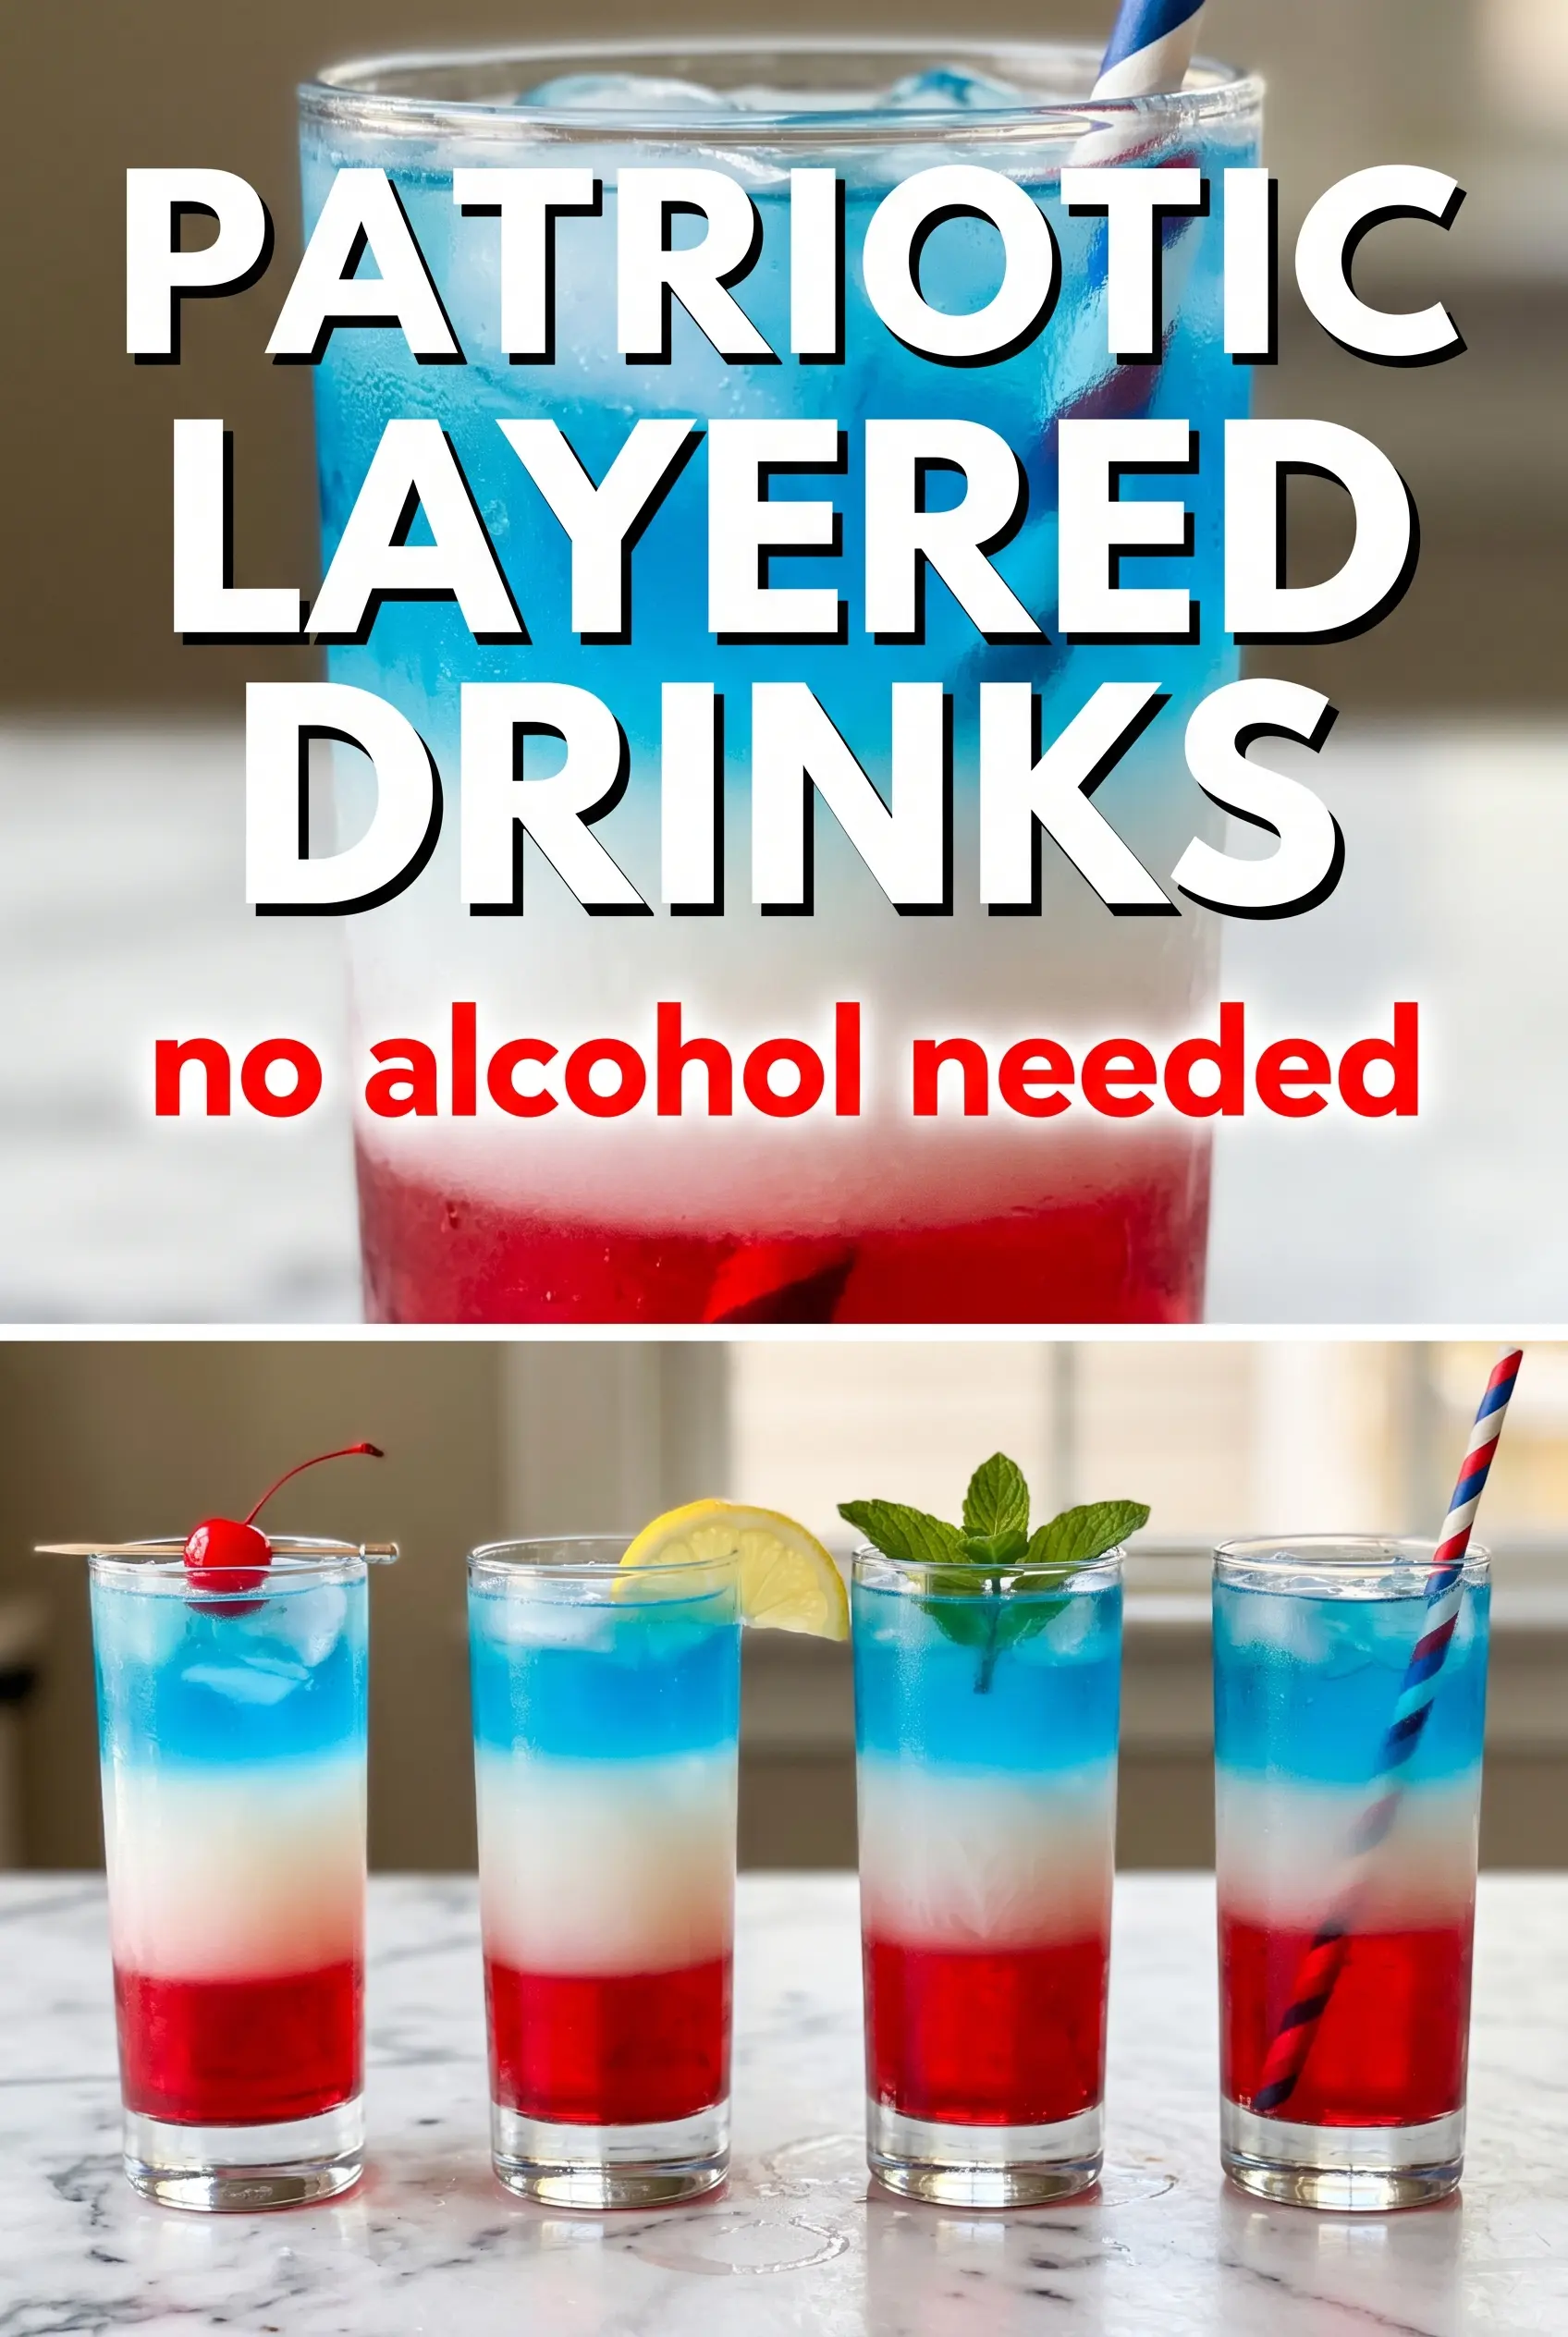
Use the same spoon trick for the blue raspberry drink and pour it in slowly so it floats above the lemonade. Stop as soon as the glass looks full, because overfilling makes the top layer spill down the side and blur the whole effect. Garnish with a maraschino cherry and a striped straw, then serve right away. This drink is at its prettiest in the first few minutes, before the ice starts to melt and loosen the lines.
Three Ways to Change the Look Without Losing the Layers
Make it dairy-free, gluten-free, and party-safe as written
This recipe is naturally dairy-free and gluten-free, which makes it easy to set out for a crowd without extra labels or special shopping. Just check the blue raspberry drink if you’re serving someone with a strict gluten sensitivity, since flavored beverages can vary by brand. The layering technique stays the same no matter which compliant drinks you use.
Swap the blue raspberry drink for another bold blue soda
Any chilled blue drink with a similar sweetness can work on top, though the color may shift slightly and the flavor will lean sweeter or more citrusy. The main thing is to keep the liquid cold and pour it slowly, since carbonation can make the top layer bubble up if you rush. If you use a fizzy option, pour a little less per glass so it doesn’t overflow.
Turn it into a larger punch for a crowd
For a batch version, build each glass individually instead of trying to layer a whole bowl of punch. The colors stay cleaner when each serving gets its own ice and spoon-pour treatment. If you need to prep ahead, chill everything first and keep the garnishes separate until the last minute.
Storage and Service Timing
- Refrigerator: The components can be chilled for up to 2 days before serving, but the finished drink should be made right before drinking so the layers stay clean.
- Freezer: Don’t freeze the assembled drink. The texture and color separation both suffer once ice crystals start forming in the liquids.
- Reheating: Not applicable. This drink is served cold, and the best result comes from very cold ingredients and immediate serving after assembly.
Answers to the Questions Worth Asking
Non-Alcoholic Layered Drinks (Virgin Layered Mocktail)
Ingredients
Method
- Fill a tall clear glass with ice cubes almost to the top.
- Pour grenadine syrup slowly over the ice so it sinks to the bottom as the first layer.
- Hold a spoon just above the ice and gently pour chilled lemonade over the back of the spoon to create a clean middle layer.
- Using the same spoon method, pour the chilled blue raspberry drink over the back of the spoon to float it as the top layer.
- Garnish with a maraschino cherry and a striped straw, then serve immediately without stirring.