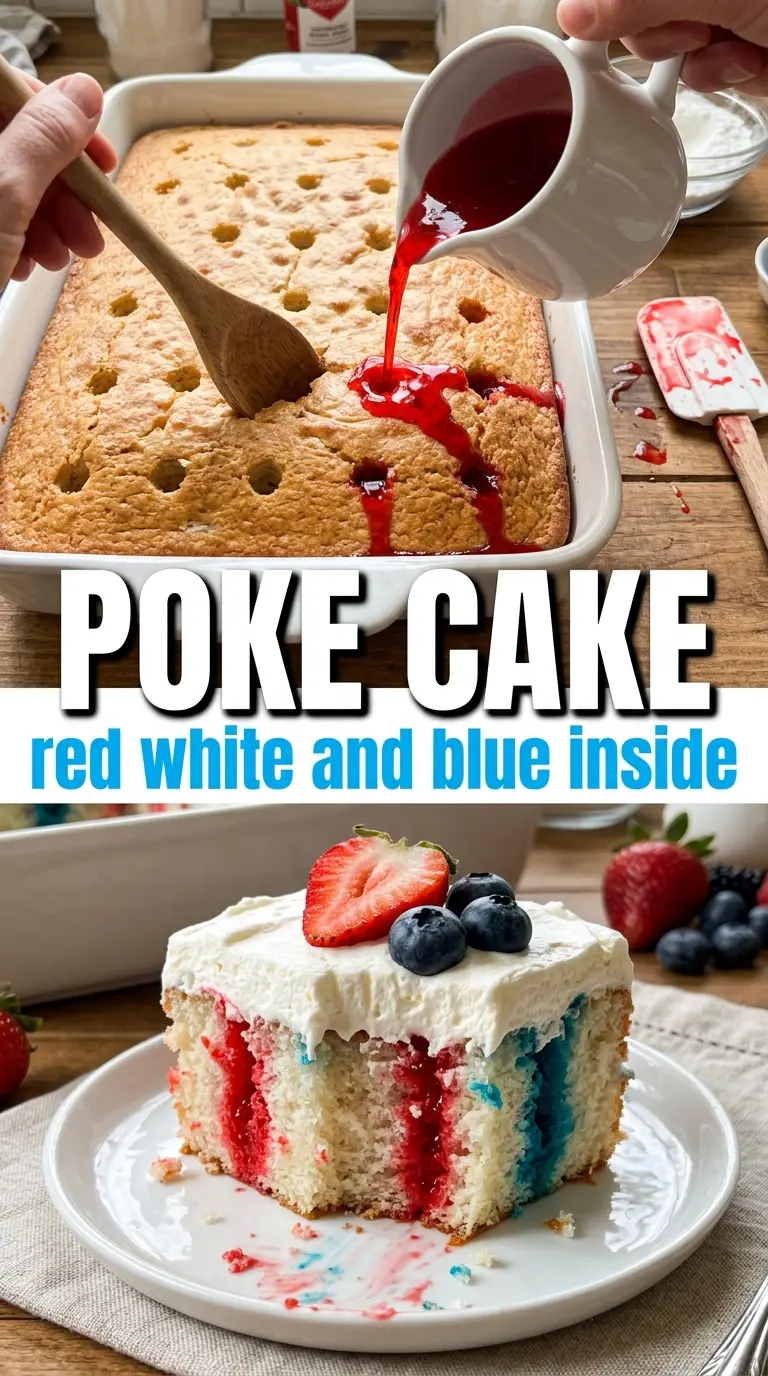
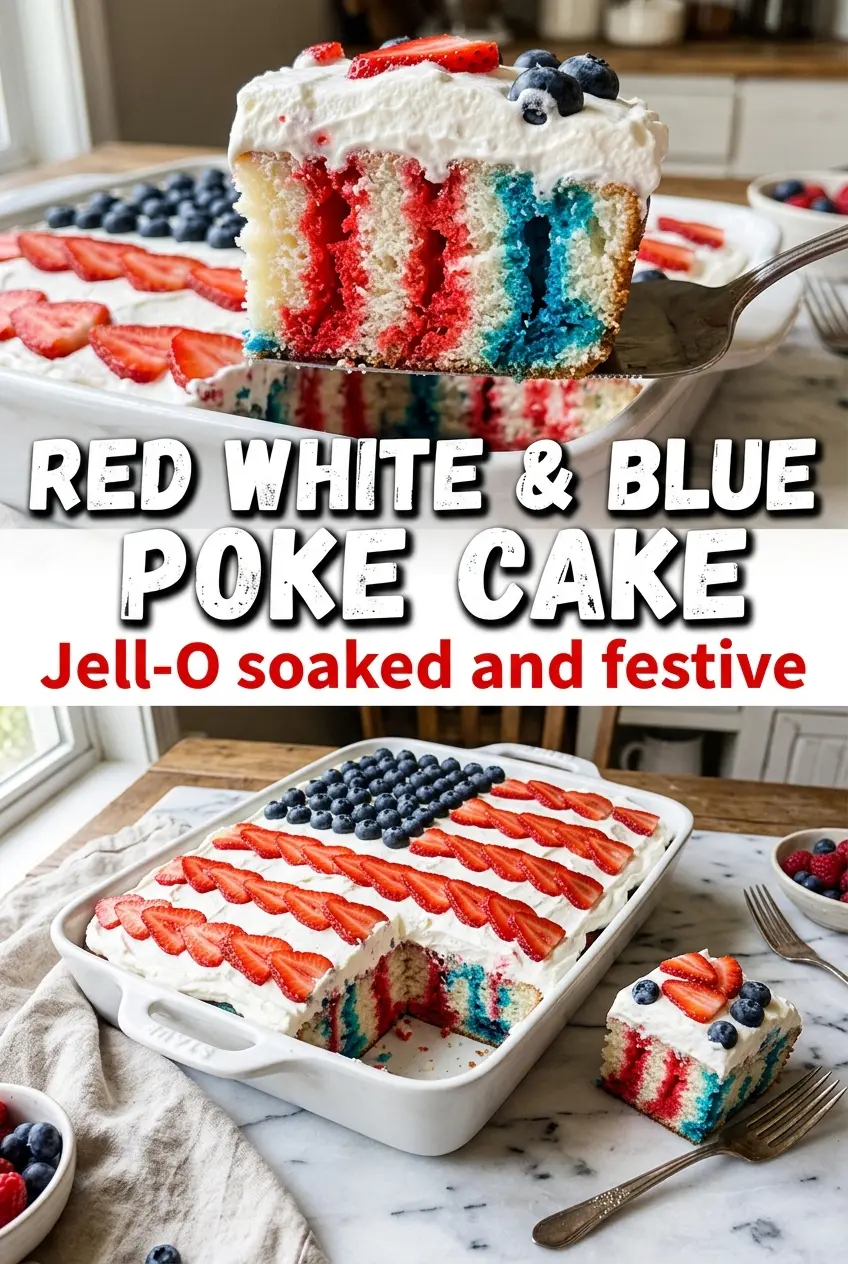
Red, white, and blue poke cake is one of those desserts that looks festive the second you slice into it, but the real payoff is in the texture: soft white cake soaked through with bright strawberry and berry blue Jell-O, then finished with a cool cloud of whipped topping. Each bite has that fun mix of fluffy cake, chilled filling, and a clean vanilla base that keeps the fruit flavors from turning muddy.
The trick here is timing and restraint. The cake needs to cool just enough that it won’t tear when you poke it, but it should still be warm enough to absorb the gelatin before the surface tightens up. Pouring the Jell-O slowly over each half of the cake lets the color stay distinct instead of running together, which is what gives you those bold stripes when you cut in.
Below, I’ve included the detail that matters most for getting neat layers instead of a soggy sheet cake, plus a few easy swaps if you want to change the colors, make it ahead, or use what you already have in the pantry.
The Jell-O soaked in all the way down and the cake sliced clean instead of getting mushy. I used the spoon handle like you said and the red and blue layers came out sharp and pretty.
Save this red, white, and blue poke cake for the next cookout when you want bold stripes, chilled Jell-O filling, and a cake that slices with real color.
The Part That Keeps the Colors Clean Instead of Muddy
The biggest mistake with poke cake is flooding the whole pan at once and hoping the colors stay separate. They usually don’t. This version works because each Jell-O flavor goes over only half the cake, and the cake is poked while it’s still slightly warm, so the gelatin can sink into the holes instead of pooling on top.
The other detail that matters is the spacing of the holes. About one inch apart is close enough for even coverage without turning the cake into crumbs. If you poke too aggressively or too close together, the top layer gets fragile and the whipped topping can slide around later when you frost it.
- White cake mix — A plain white cake gives you the cleanest canvas for the red and blue stripes. A yellow cake works in a pinch, but the color contrast won’t look as sharp.
- Strawberry Jell-O and berry blue Jell-O — These are doing more than coloring the cake; they’re what create the signature juicy, set-in layers. Generic gelatin will work if you need to swap flavors, but you want bright, bold colors with enough sweetness to stand up to the cake.
- Whipped topping — Cool Whip holds up better than soft whipped cream here because it spreads smoothly over the chilled cake and stays put. If you use homemade whipped cream, serve the cake the same day or it will soften and weep.
- Fresh strawberries and blueberries — These are for the finish, but they also echo the flavor inside the cake. Pat them dry before garnishing or the topping will streak.
What Each Ingredient Is Actually Doing in This Recipe
- Primary ingredient (the star) — Quality matters most. Choose the best you can find.
- Cooking medium (oil, butter, or broth) — This carries flavors and prevents dryness.
- Seasonings (salt, pepper, spices, herbs) — Layer flavors so nothing overpowers. Build depth gradually.
- Aromatics (garlic, onion, herbs) — Cook with fat to bloom flavors. Become the foundation.
- Supporting ingredients — Complement the main ingredient without overpowering it.
- Sauce or liquid (if applicable) — Brings flavors together. Balance richness with acid.
- Acid (lemon, vinegar, wine, or other) — Brightens and prevents flat-tasting results.
- Final finish (garnish, glaze, or sauce) — Prevents one-dimensional taste and adds visual appeal.
How to Build the Jell-O Layer Without Breaking the Cake
Bake and Cool to the Right Point
Bake the white cake in a 9×13 pan and let it cool for about 15 minutes before poking it. It should still feel warm, not hot, and the surface should have set enough that the spoon handle won’t drag the top off in chunks. If you wait until it’s fully cold, the gelatin won’t soak in as evenly.
Poke Deep, Even Holes
Use the handle of a wooden spoon and press straight down all over the cake, spacing the holes about an inch apart. Go deep enough that the Jell-O can travel through the crumb, but don’t twist the spoon around or the cake will tear. A neat grid gives you those pretty streaks when you slice it later.
Pour Each Color Slowly
Dissolve each Jell-O flavor in boiling water, then add the cold water and pour it over its half of the cake. The key is slow pouring, not speed. If you dump it in too fast, it runs across the top instead of filling the holes, and the colors blend where they shouldn’t. Stop when the surface looks saturated and let the cake do the rest.
Chill Before Frosting
Refrigerate the cake for at least 2 hours so the gelatin sets completely inside the crumb. If you frost too early, the topping can sink into the warm cake and pick up color. Once it’s fully chilled, spread the whipped topping in an even layer and decorate right before serving so the sprinkles stay crisp.
How to Adapt This Cake for Different Crowds and Pantry Swaps
Make it dairy-free
Use a dairy-free white cake mix if your brand calls for it, then swap the whipped topping for a dairy-free whipped topping that holds its shape. The texture stays light, but the topping may soften a little faster, so chill the cake until serving time.
Change the colors for another holiday
Swap the strawberry and berry blue gelatin for any two colors you want, but keep one flavor for each half so the cake still slices into clean sections. Lime and cherry make a fun Christmas version, while orange and grape work well for Halloween.
Use homemade whipped cream instead of Cool Whip
You can use whipped cream if you’re serving the cake the same day. Beat it to medium peaks so it spreads without melting into the cake, and keep the finished cake cold right up until slicing. It tastes fresher, but it won’t stay as neat for long as stabilized whipped topping.
Storage and Reheating
- Refrigerator: Store covered for up to 4 days. The cake stays moist, though the topping softens a bit after the second day.
- Freezer: I don’t recommend freezing the finished cake because the gelatin layer can turn watery when it thaws. If you need to work ahead, bake the cake base and freeze that plain, then add the Jell-O and topping later.
- Reheating: Don’t reheat this cake. It’s meant to be served chilled, and warming it will melt the topping and loosen the gelatin layers.
Answers to the Questions Worth Asking
Red, White and Blue Poke Cake
Ingredients
Equipment
Method
- Bake the white cake in a 9x13 pan according to package directions, then let it cool for 15 minutes.
- Poke holes all over the cake about 1 inch apart using the handle of a wooden spoon.
- Dissolve the strawberry Jell-O in 1 cup boiling water, stir in 1/2 cup cold water, then pour slowly over the left half of the cake so it soaks into the holes.
- Dissolve the blue Jell-O in 1 cup boiling water, stir in 1/2 cup cold water, then pour over the right half of the cake so it fills the holes evenly.
- Refrigerate the cake for at least 2 hours until the Jell-O is fully set inside the cake (visual cue: the center looks firm, not liquidy).
- Spread the whipped topping evenly over the top of the chilled cake, then decorate with red and blue sprinkles and fresh strawberries and blueberries before serving.