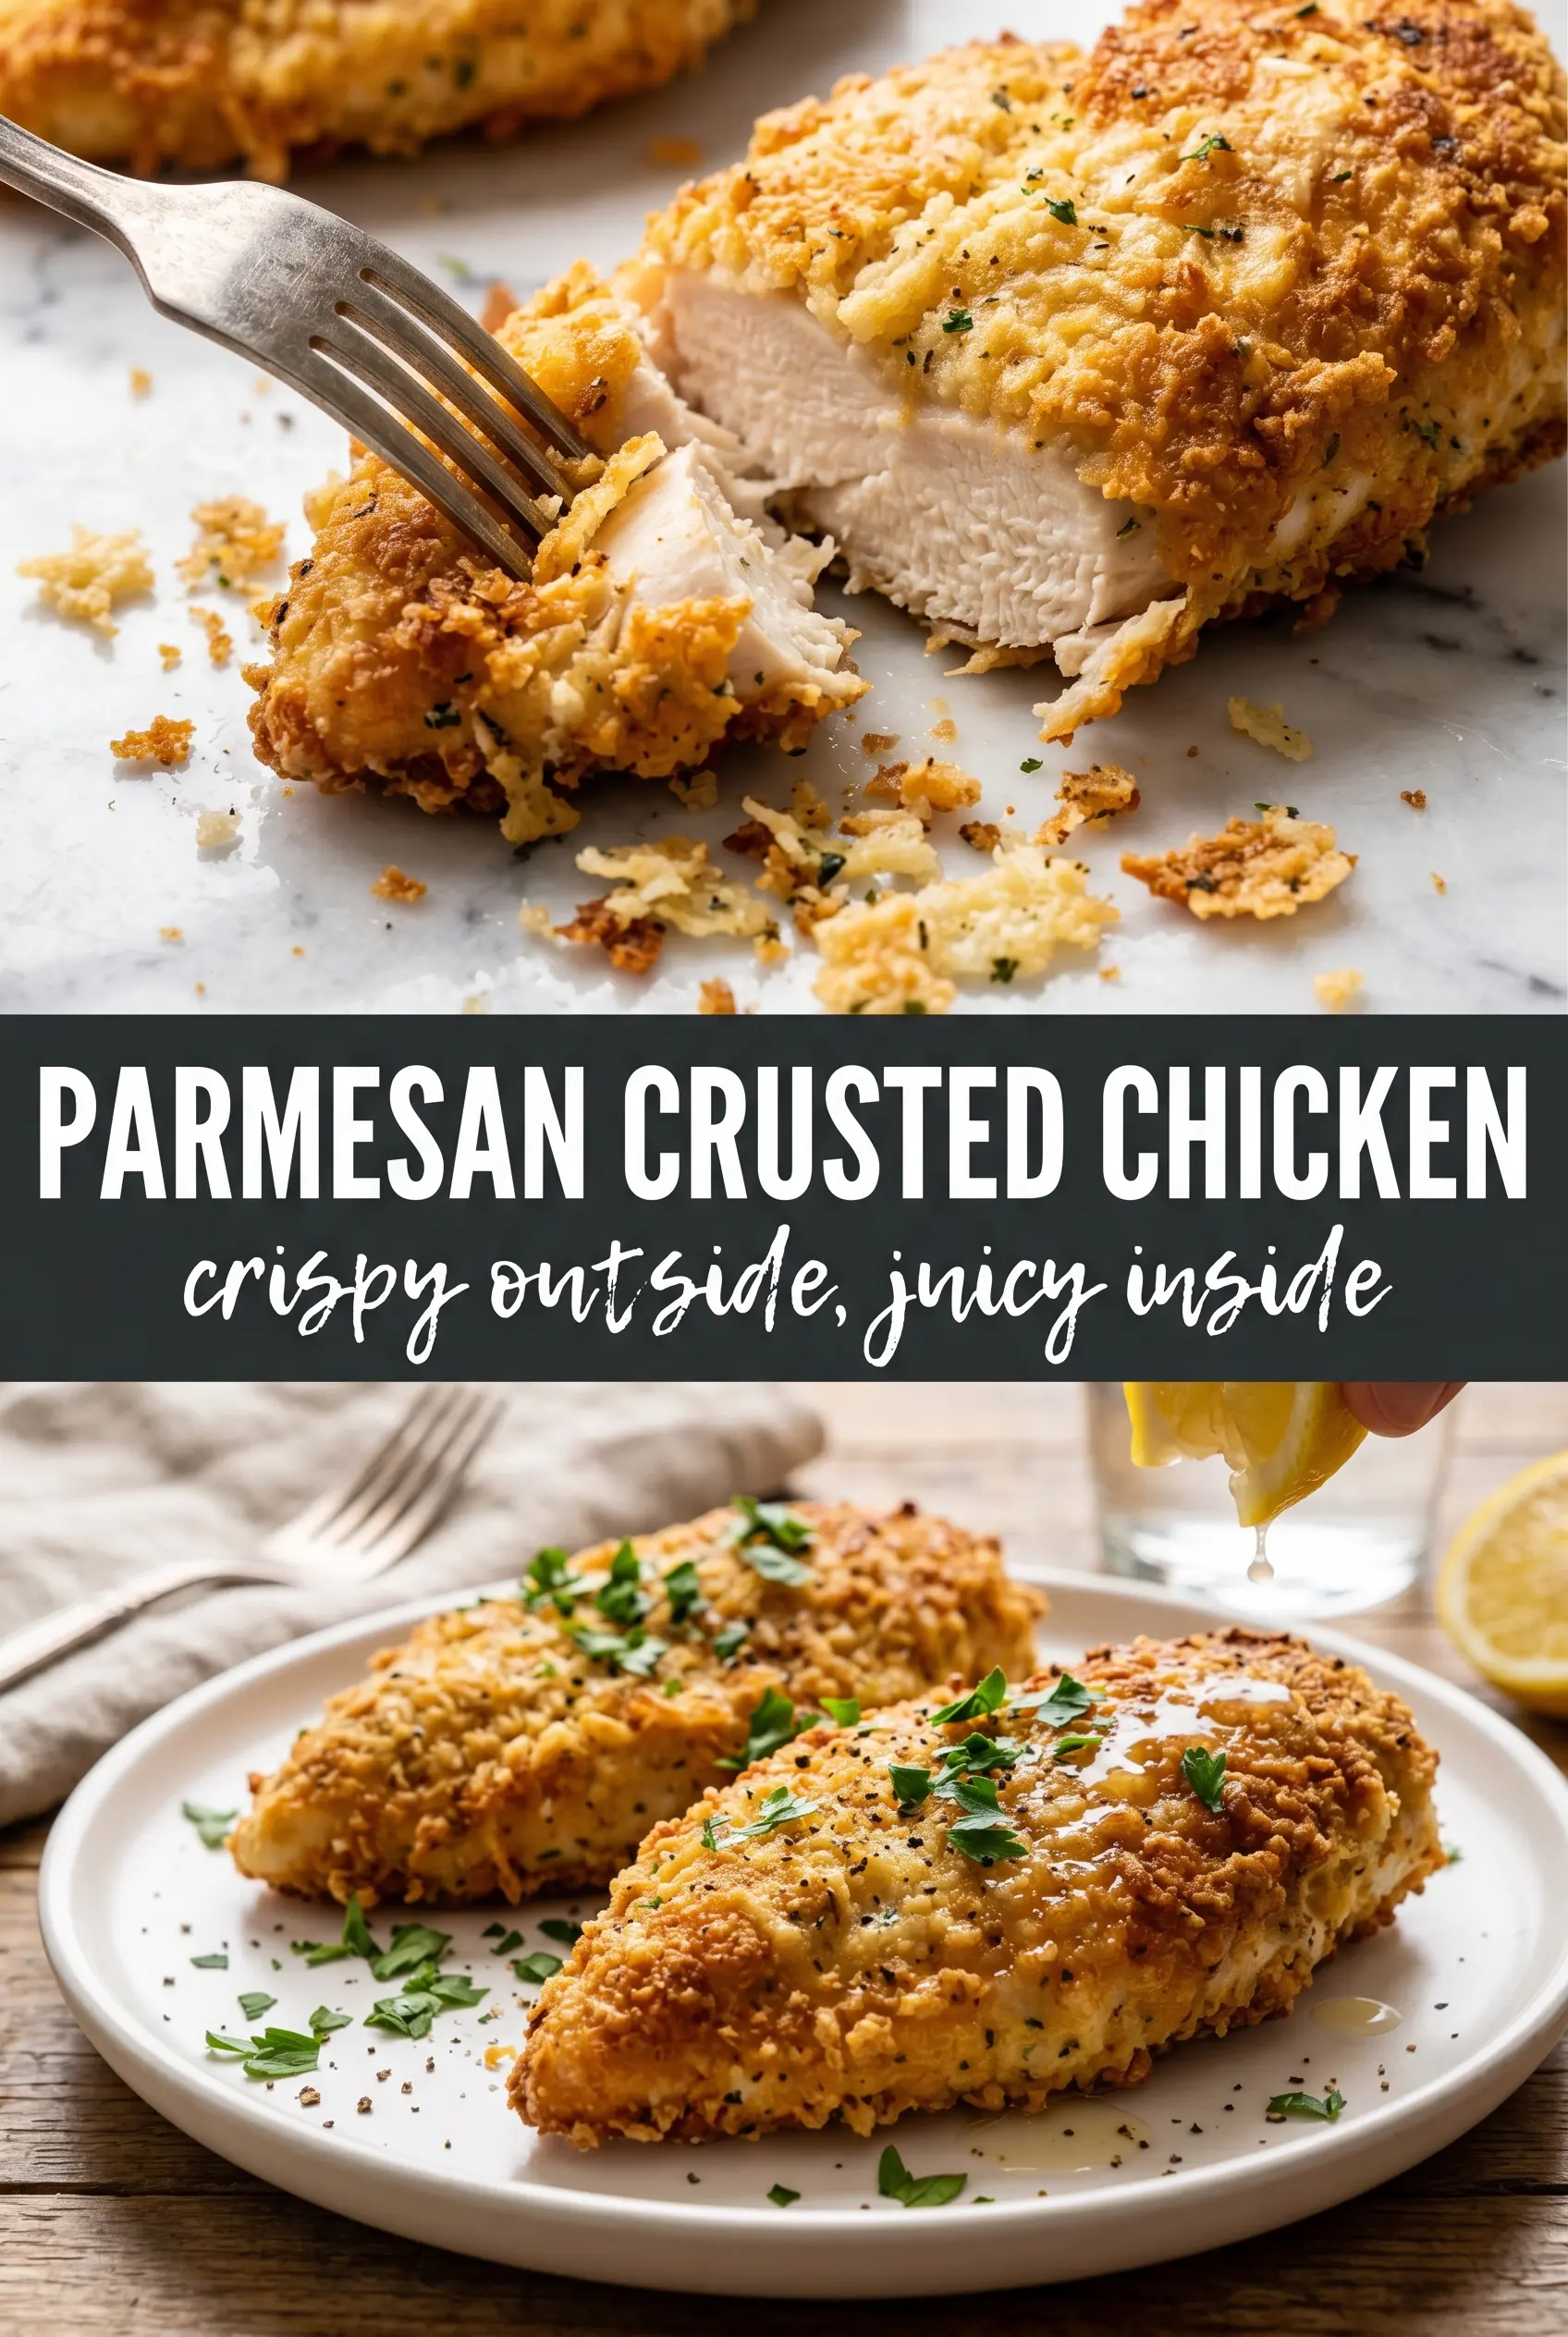
Shatteringly crisp on the outside and juicy in the middle, Parmesan crusted chicken earns its place in the weeknight rotation because it delivers a proper crunch without frying a pan full of oil. The crust bakes up golden and fragrant, with the Parmesan melting into the panko so every bite tastes toasted, salty, and a little nutty. When it’s done right, the coating stays put when you cut into it instead of sliding off in one sad sheet.
The trick is in the texture of the breading. Panko gives you the light, dry structure that regular breadcrumbs can’t match here, while freshly grated Parmesan helps the crust brown fast and brings the sharp, savory edge that makes the whole dish taste finished. A wire rack matters too, because it lets hot air move around the chicken instead of trapping steam underneath and softening the bottom.
Below, I’ve included the small details that keep the coating crisp, plus a few easy variations if you want to swap the cheese, make it gluten-free, or stretch it into more servings without losing that crackly crust.
The crust came out crisp all the way around, and the chicken stayed juicy instead of drying out. I loved that the Parmesan browned before the panko burned.
Craving that crunchy Parmesan panko crust? Save this chicken for the nights when you want crispy baked chicken without frying.
The Crust Needs Heat From Above and Below, Not Just the Pan
The mistake that ruins baked breaded chicken most often is steam. If the chicken sits directly on a baking sheet, the bottom coating steams against the hot metal and turns soft before the top ever gets a chance to turn crisp. A rack fixes that by lifting the chicken so the hot air can circulate underneath, which gives you a crust that stays crisp instead of going leathery.
The other thing that matters is the cheese. Parmesan browns faster than plain breadcrumbs, so the oven needs to be hot enough to set the crust before the chicken dries out. That’s why this recipe uses a 425°F oven and a light coating of oil on top; the heat drives the browning, and the fat helps the panko toast instead of looking dry and pale.
- Chicken breasts — Pound them to an even thickness so the thin ends don’t dry out before the center reaches temperature. Thick, uneven breasts are the main reason breaded chicken bakes unevenly.
- Freshly grated Parmesan — It melts and browns better than the shelf-stable stuff in the green can. Pre-grated cheese often has anti-caking agents that can make the crust less cohesive.
- Panko breadcrumbs — These give the crust its light, crisp structure. Regular breadcrumbs work in a pinch, but the texture comes out denser and less jagged.
- Olive oil — A small amount on top helps the breading bake into a deep golden crust. Spray or drizzle it evenly so dry patches don’t stay powdery.
Building the Breading So It Stays Attached in the Oven

- Flour — This first coat gives the egg something to grip. Skip it and the crust can slide right off after baking.
- Eggs — Beat them until fully smooth so the coating goes on evenly. Thick streaks of egg make clumpy patches in the crust.
- Italian seasoning, garlic powder, smoked paprika — These season the crust itself, not just the chicken. That’s what keeps every bite flavorful, even where the cheese coverage is a little thinner.
- Parsley and lemon — Don’t skip the lemon at the end. The acidity cuts through the richness of the cheese and makes the crust taste sharper and cleaner.
The Breading Line and Bake Time That Give You the Crunch
Season the chicken first
Season both sides of the pounded chicken with salt, pepper, and garlic powder before it ever touches the flour. That base layer matters because the crust is thin, and if the chicken itself is bland, the whole dish tastes flat. Let the seasoned chicken sit for a minute or two so the surface isn’t wet with condensation, which helps the flour cling better.
Set up a dry-to-wet-to-crisp assembly line
Dip each breast lightly in flour, then in egg, then press it firmly into the Parmesan-panko mixture. Pressing is the difference between a patchy coating and a crust that bakes into one solid shell. If the breading starts clumping on your fingers, use one hand for the dry ingredients and the other for the wet so you don’t gum up the whole bowl.
Bake until the crust is deep golden
Set the breaded chicken on the wire rack, then coat the top with olive oil before it goes into the oven. Bake until the crust is deeply golden and the thickest part of the chicken reaches 165°F, which usually takes 20 to 22 minutes. If the top looks pale at the end, give it one extra minute or two rather than extending the bake much longer, because the chicken dries out faster than the crust finishes browning.
Rest before slicing
Let the chicken rest for 3 minutes before cutting. That short pause keeps the juices from flooding the crust and softening the bottom right after it comes out of the oven. Slice too soon and you lose both the moisture and the crunch.
What to Change When You Need a Different Version of Parmesan Crusted Chicken
Gluten-Free Version
Swap the all-purpose flour for a gluten-free flour blend and use gluten-free panko. The texture stays close to the original because the crunch comes from the panko and the Parmesan, not from the flour itself. Press the coating on firmly, since gluten-free crumbs can be a little looser.
Dairy-Free Version
Replace the Parmesan with a dairy-free Parmesan-style topping that grates or crumbles finely. You’ll lose some of the nutty, salty depth from real cheese, so add a little extra salt and a pinch of nutritional yeast if you want more savory backbone.
Chicken Cutlet Version
If you want faster cooking and an even crispier crust-to-chicken ratio, slice the breasts into cutlets instead of leaving them thick. They’ll cook in less time and brown more evenly, but they’ll be less juicy than the thick-breast version, so watch the oven closely.
Extra-Crunch Topping
Add 2 tablespoons of finely crushed cornflakes to the panko if you want a heavier, shaggier crust. It makes the coating louder and crunchier, but it also browns a little faster, so keep an eye on the last few minutes in the oven.
Storage and Reheating
- Refrigerator: Store leftovers in an airtight container for up to 3 days. The crust softens a bit in the fridge, but the flavor holds well.
- Freezer: Freeze cooked chicken on a sheet pan until firm, then wrap and store for up to 2 months. Reheat from thawed for the best texture, since freezing right after baking can make the crust slightly less crisp.
- Reheating: Warm on a wire rack in a 375°F oven or air fryer until hot and re-crisped. Avoid the microwave if you care about the crust; it turns the breading limp and steamy.
Questions I Get Asked About This Recipe
Parmesan Crusted Chicken
Ingredients
Equipment
Method
- Preheat the oven to 425°F and line a sheet pan with a wire rack; spray the rack with cooking spray so the crust can crisp on contact.
- Season the chicken breasts with salt, pepper, and garlic powder to taste, then arrange a three-station breading line: flour, beaten eggs, and the panko mixture.
- Mix the panko with Parmesan cheese, Italian seasoning, garlic powder, and smoked paprika until evenly combined for an all-over crust.
- Dredge each chicken breast in the flour, shaking off excess so the next layer clings well.
- Dip the chicken into the beaten eggs, letting excess drip briefly for a dry, even coating surface.
- Press the chicken firmly into the Parmesan-panko mixture to coat all sides, ensuring thick coverage and minimal bare spots.
- Drizzle or spray the olive oil over the breaded chicken and place it on the prepared rack so airflow browns the crust evenly.
- Bake for 20-22 minutes at 425°F until the crust is deep golden and the internal temperature reaches 165°F for safe, juicy chicken.
- Rest the chicken for 3 minutes so juices redistribute and the crust sets slightly before slicing.
- Garnish with fresh parsley and serve with lemon wedges for bright, fresh flavor against the cheesy crust.