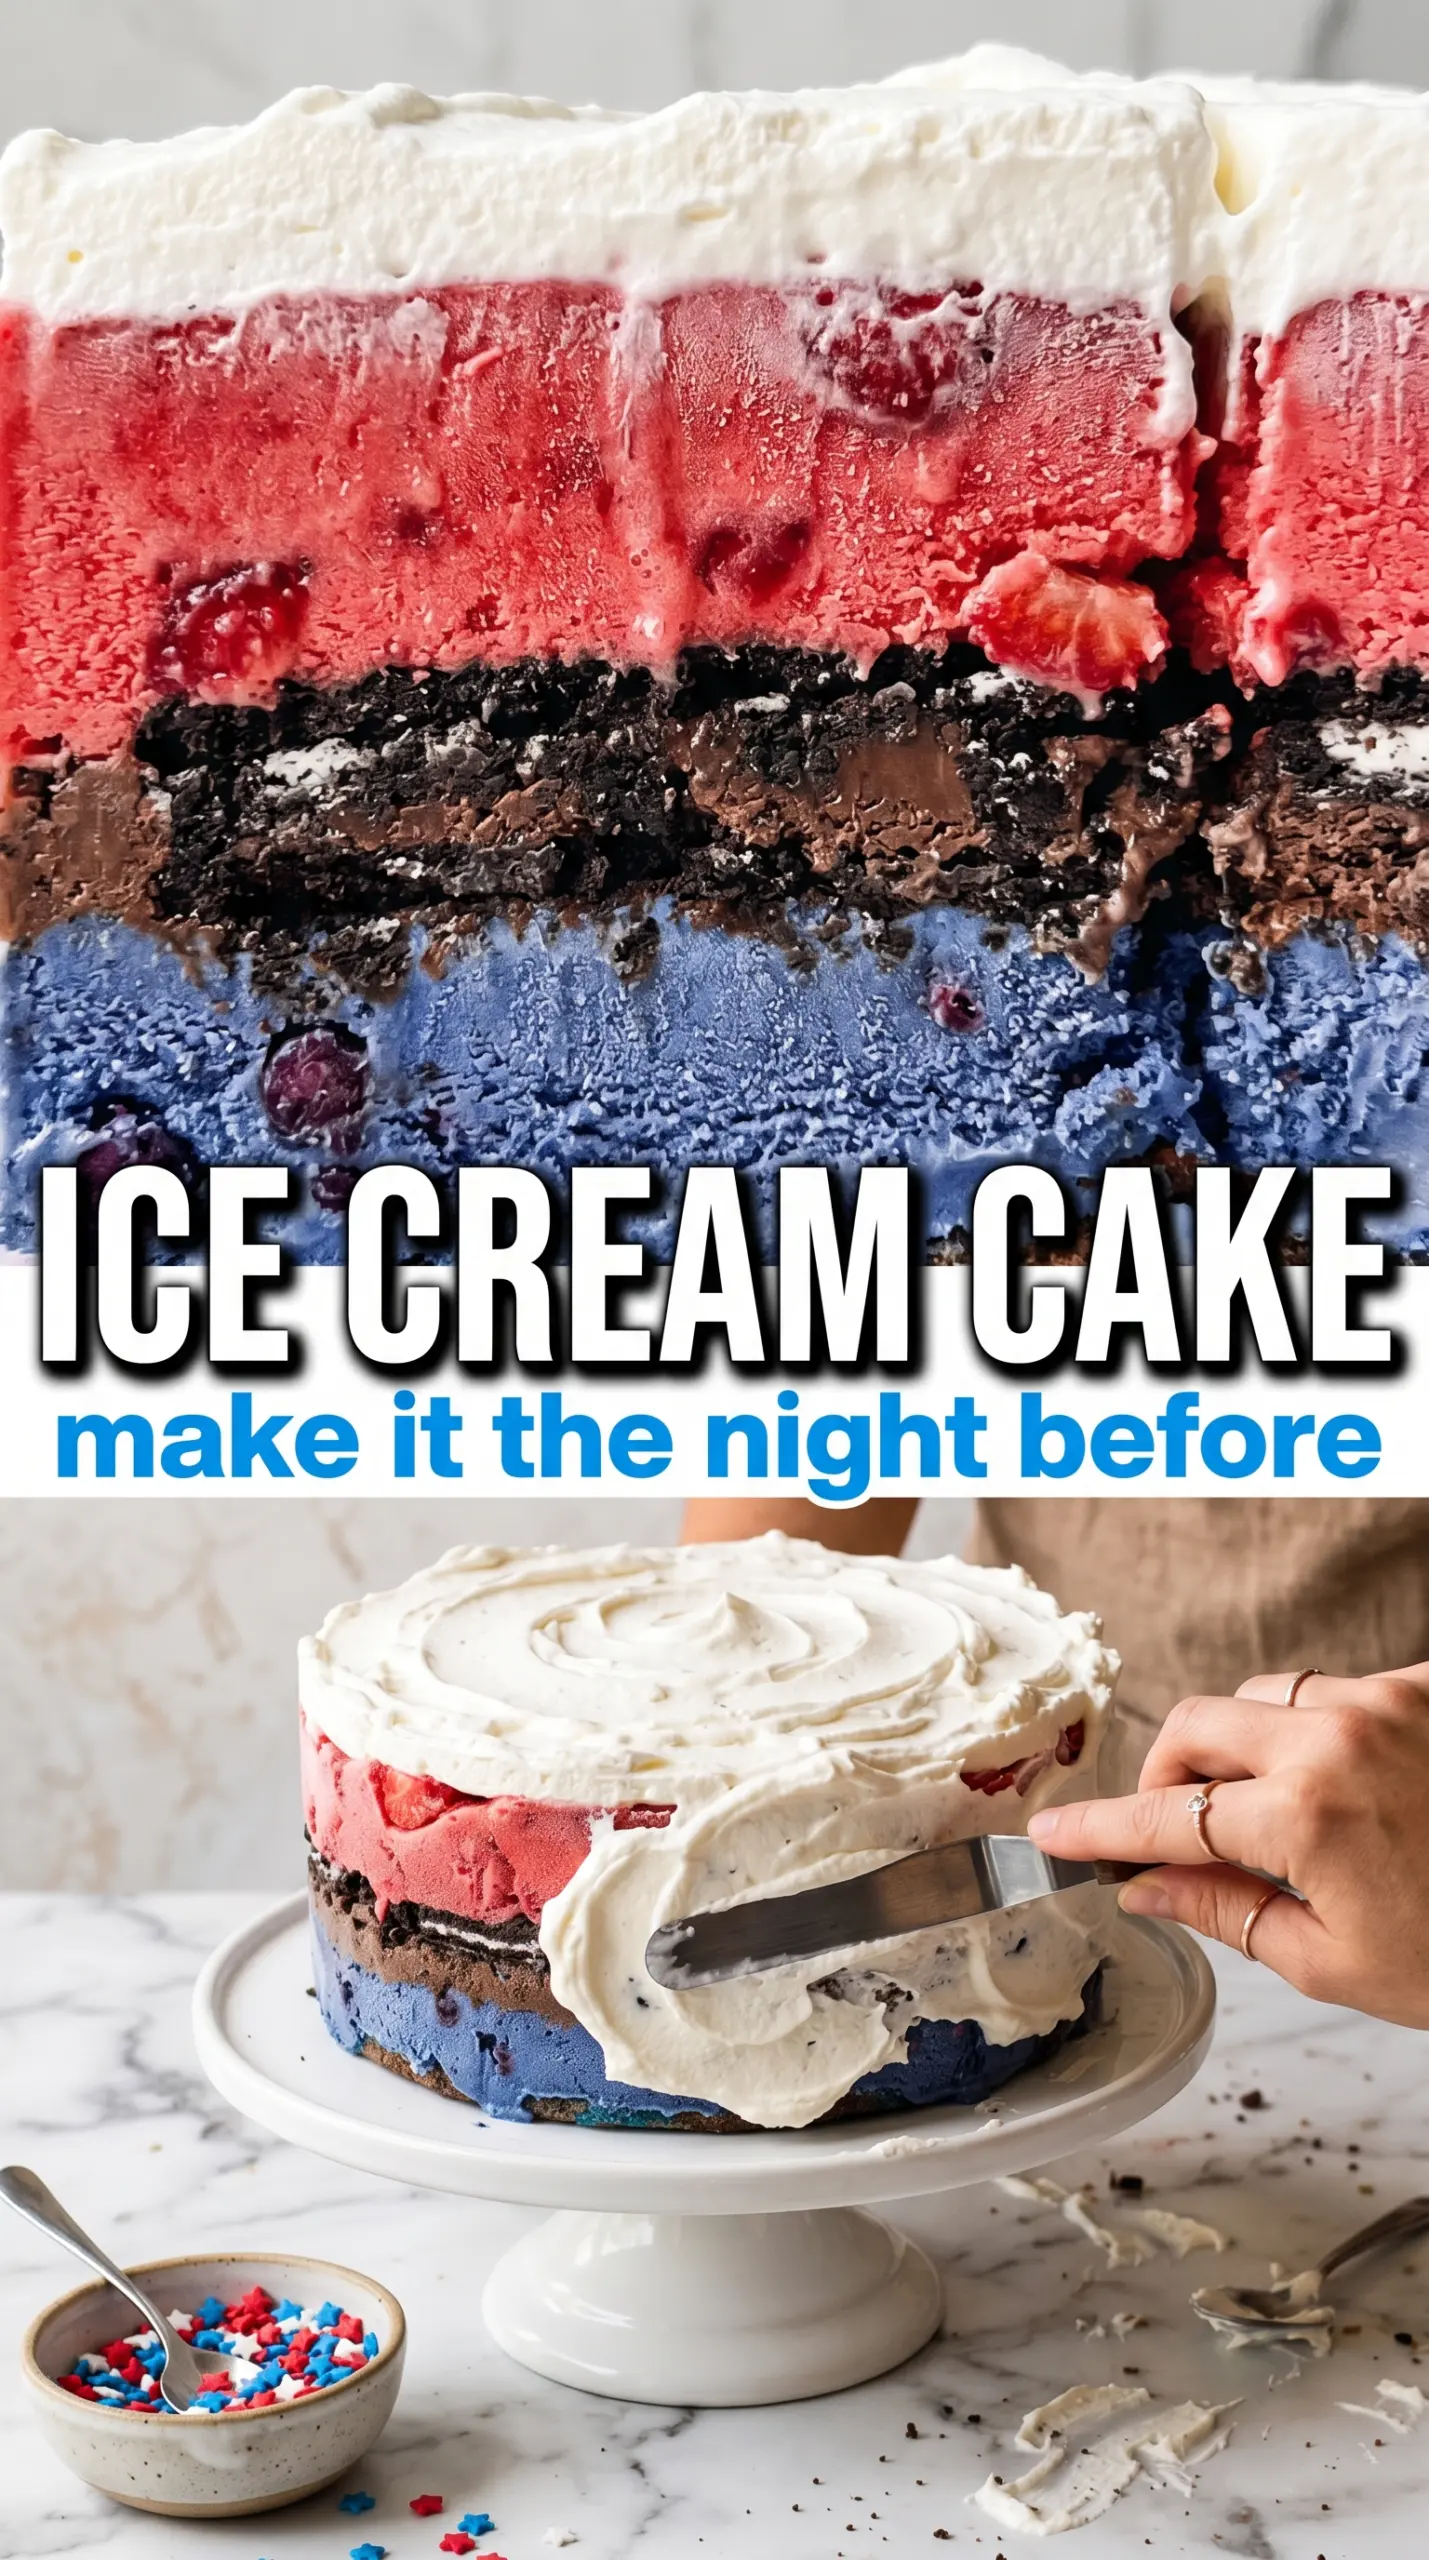
Ice cream cake gets its best texture when every layer stays distinct: a buttery Oreo crust that holds its shape, a clean line of vanilla ice cream, a ribbon of fudge that cuts through without smearing, and strawberry ice cream that freezes into a firm, sliceable top. When it’s built right, the first piece comes out with sharp edges, and the second slice looks just as good as the first.
The trick is working in short freezes between layers. That keeps the vanilla from melting into the crust and stops the fudge from sinking all the way through the cake. I also let the fudge cool a bit before it goes in, because hot fudge poured straight from the pan will melt tunnels into the ice cream and turn neat layers into a marbled mess.
Below, I’ll show you exactly when each layer should go into the freezer, how to get clean slices, and a couple of easy swaps if you want to change the flavor without losing that classic layered look.
The layers held perfectly and the fudge stayed as a clean ribbon instead of sinking. I used a warm knife for slicing and the pieces came out bakery-neat.
Like this Oreo ice cream cake? Save it to Pinterest for birthdays, summer parties, and the easiest make-ahead dessert with clean layers.
The Freezer Timing That Keeps the Layers Sharp
The part that separates a neat ice cream cake from a slumped one is patience between layers. Each layer needs enough time to firm up before the next goes on, or the weight above it starts to sink and blur the edges. That’s why the crust gets a short freeze first, the vanilla layer gets a full hour, and the fudge gets only a brief set before the strawberry ice cream goes on top.
Springform pans earn their keep here because they release without wrestling the cake out of a regular pan. If your kitchen is warm, work quickly and return the pan to the freezer as soon as a layer is spread. Softened ice cream should be spreadable, not soupy; if it’s too loose, it will melt the layer underneath instead of sitting on it.
What Each Layer Is Doing in This Ice Cream Cake
- Oreo cookies — These make the crust without any extra baking. Crushing them finely gives you a base that slices cleanly, while leaving a few small crumbs adds a little texture. Don’t swap in sandwich cookies with a soft filling that won’t firm up the same way unless you’re prepared for a looser crust.
- Melted butter — This is what turns cookie crumbs into a crust that actually holds together. Use enough to coat the crumbs evenly, then press firmly so the base doesn’t crumble when you cut into the cake.
- Vanilla ice cream — This gives the cake a creamy middle layer and balances the chocolate crust and fudge. Slightly softened ice cream spreads smoothly; if it’s too soft, it will melt the crust and turn icy later.
- Strawberry ice cream — The berry layer brings color and a little tang, which keeps the cake from tasting one-note. Any fruit-forward ice cream works here, but a low-quality one can freeze harder and taste a little waxy, so use a brand you already like eating plain.
- Hot fudge sauce — This is the flavor bridge between the vanilla and strawberry layers. Let it cool until it’s just pourable; if it’s hot, it will bore holes into the ice cream and muddle the layers.
- Whipped topping or stabilized whipped cream — This finishes the cake and helps hold the sprinkles in place. Stabilized whipped cream gives you the best texture if the cake sits out for a few minutes before serving.
Building the Cake So the Layers Stay Clean
Pressing the Oreo Crust
Mix the crushed Oreos with melted butter until every crumb looks damp, then press the mixture firmly into the bottom of a 9-inch springform pan. Use the flat bottom of a measuring cup to pack it down evenly; a loose crust will break apart when you slice the cake. Freeze it for 15 minutes so the base sets before the first ice cream layer goes in.
Spreading the Vanilla Layer
Spread the softened vanilla ice cream over the chilled crust in an even layer, working from the center outward so you don’t drag crumbs up through the ice cream. The top should look smooth and level, not ridged or loose. Freeze it for about an hour until it feels firm to the touch; if it’s still soft, the fudge will sink instead of staying on top.
Adding the Fudge Ribbon
Drizzle the cooled hot fudge sauce over the vanilla layer in a thin, even layer. You want it pourable, not warm enough to melt the ice cream beneath it. Give it a short freeze so it firms up before the strawberry layer goes on, or the top layer will drag the fudge into streaks.
Finishing with Strawberry Ice Cream
Spread the strawberry ice cream over the set fudge layer and smooth the top as evenly as you can. Cover the pan with plastic wrap and freeze it for at least 4 hours, though overnight gives you the cleanest slices. If the top still dents when you press it lightly, it needs more time; cutting too early turns the middle into a soft wedge instead of a cake slice.
Decorating and Slicing
Run a warm knife around the edge before releasing the springform ring, then move the cake to a serving plate. Pipe whipped cream swirls around the edge and add sprinkles right before serving so the color stays bright. For clean slices, dip a long knife in hot water, wipe it dry, and cut straight down; if the knife is cold, it will snag the crust and crack the top.
How to Change the Flavor Without Losing the Structure
Chocolate-vanilla version
Swap the strawberry ice cream for chocolate if you want a deeper, classic cookies-and-cream style cake. The flavor gets richer and less fruity, but the layering method stays exactly the same. Keep the fudge layer thin so the chocolate doesn’t overwhelm the crust.
Dairy-free ice cream cake
Use dairy-free vanilla and strawberry frozen desserts, plus a dairy-free fudge sauce and whipped topping. The cake still freezes and slices well, but the texture is a little less creamy and a little more firm once frozen. Choose brands with a lower ice crystal texture so the layers don’t taste icy.
Different cookie crust
Chocolate graham crackers or peanut butter sandwich cookies both work if you want a different base. Just keep the crumbs fine and press them firmly, because a crumbly crust is the first thing that falls apart when serving. Peanut butter cookies add salt and nuttiness, while graham crackers make the cake a little lighter.
Storage and Reheating
- Refrigerator: This cake doesn’t belong in the fridge for more than a few minutes before serving. It softens fast and loses its shape.
- Freezer: Keep leftovers covered tightly in the freezer for up to 1 week. For the cleanest slices, wrap the whole cake or individual slices in plastic wrap, then foil.
- Reheating: There isn’t a reheating step here. Set slices at room temperature for 5 to 10 minutes before serving so the knife glides through the crust and ice cream instead of cracking the top.
Questions I Get Asked About This Recipe

Ice Cream Cake
Ingredients
Equipment
Method
- Mix the crushed Oreo cookies with melted butter until the crumbs look evenly coated, then press firmly into the bottom of a 9-inch springform pan with the back of a spoon. Freeze for 15 minutes until set.
- Spread the slightly softened vanilla ice cream in an even layer over the Oreo crust and smooth the top with a spatula, then return to the freezer. Freeze for 1 hour until firm.
- Drizzle the slightly cooled hot fudge sauce over the vanilla layer in a thin ribbon, letting some streaks form for visible layers. Freeze for 15 minutes to set.
- Spread the slightly softened strawberry ice cream over the fudge layer and smooth the top, then cover with plastic wrap so it doesn’t touch the surface. Freeze for at least 4 hours or overnight until completely firm.
- Run a warm knife around the inside edge, release the springform, and transfer the cake to a serving plate for clean, intact layers.
- Pipe whipped topping swirls around the top edge and scatter rainbow or patriotic sprinkles across the center so they catch the light. Slice with a hot knife and serve immediately.