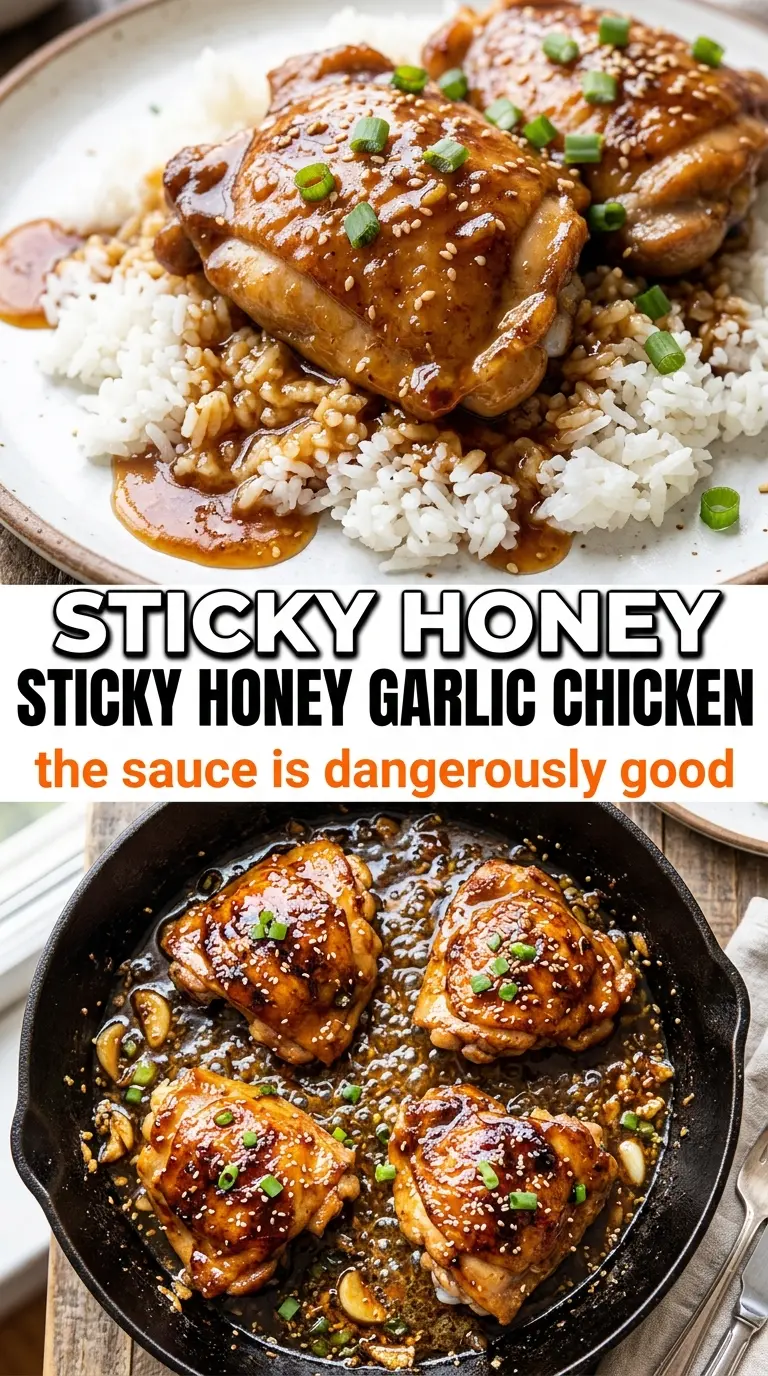
Sticky honey garlic chicken earns its spot on the weeknight rotation because the glaze clings to the chicken instead of running off the pan. You get deeply browned edges on the meat, then a glossy sauce that hits sweet, savory, and garlicky all at once. When it’s done right, the chicken tastes like it spent hours being coaxed into dinner, even though the whole thing comes together fast.
The trick is keeping the chicken sear separate from the sauce until each part has done its job. Brown the chicken first so you build flavor in the pan, then use those browned bits to deepen the honey garlic glaze. A little cornstarch slurry finishes the sauce with that sticky, lacquered texture that coats every bite instead of turning watery.
Below, I’ll walk through the exact point where the sauce thickens, the substitutions that still keep the glaze balanced, and the small details that keep the garlic from tasting harsh.
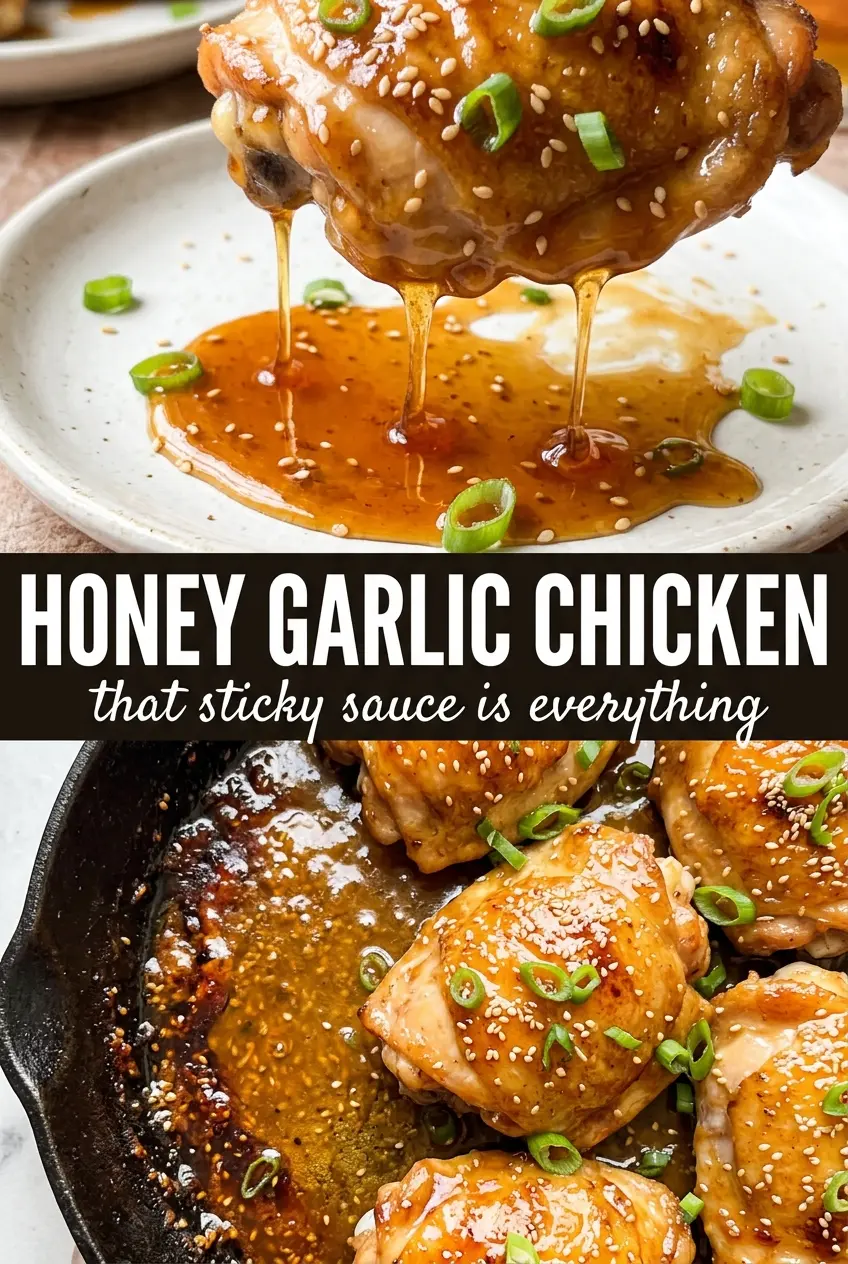
The sauce thickened into that sticky glaze I was hoping for, and it coated the chicken instead of pooling at the bottom. My husband kept sneaking bites straight from the skillet.
Like this honey garlic chicken? Save it for the nights when you want a sticky pan sauce, fast seared chicken, and dinner that tastes like more effort than it took.
The Sear Comes First, Or the Glaze Never Gets the Same Depth
The biggest mistake with honey garlic chicken is trying to build everything at once. If the chicken goes into sauce before it’s browned, you lose the caramelized surface that gives this dish its backbone. The pan needs those browned bits from the chicken because they dissolve into the sauce and make it taste rounded instead of one-note sweet.
Medium-high heat is the right place for the sear, but the chicken has to stay still long enough to color. If you keep nudging it, the surface steams and the glaze later has less to cling to. Once the chicken releases easily and looks deep gold at the edges, it’s ready to come out.
- Chicken breasts — These cook quickly and slice neatly once they rest. If yours are very thick, pound them to an even thickness so the outside doesn’t overcook before the center reaches 165°F.
- Honey — This is the body of the glaze, and there isn’t a substitute that gives the same shine or cling. Maple syrup works in a pinch, but the sauce will taste less floral and set a little looser.
- Soy sauce — It keeps the honey from tasting flat and gives the sauce its salty depth. Low-sodium soy sauce works well if you want more control over the final seasoning.
- Rice vinegar — The small amount of acid keeps the sauce from turning candy-sweet. If you don’t have it, use apple cider vinegar sparingly; it’s a little sharper, so don’t overdo it.
- Cornstarch slurry — This is what turns the sauce from thin and shiny into sticky and spoon-coating. Don’t dump the dry cornstarch straight in, or you’ll get little clumps instead of a smooth glaze.
What Each Ingredient Is Actually Doing in This Recipe
- Primary ingredient (the star) — Quality matters most. Choose the best you can find.
- Cooking medium (oil, butter, or broth) — This carries flavors and prevents dryness.
- Seasonings (salt, pepper, spices, herbs) — Layer flavors so nothing overpowers. Build depth gradually.
- Aromatics (garlic, onion, herbs) — Cook with fat to bloom flavors. Become the foundation.
- Supporting ingredients — Complement the main ingredient without overpowering it.
- Sauce or liquid (if applicable) — Brings flavors together. Balance richness with acid.
- Acid (lemon, vinegar, wine, or other) — Brightens and prevents flat-tasting results.
- Final finish (garnish, glaze, or sauce) — Prevents one-dimensional taste and adds visual appeal.
Building the Glaze Without Burning the Garlic
Searing the Chicken
Season the chicken well before it ever hits the skillet. You want the surface to taste like something before the sauce arrives. Let it cook undisturbed until the underside is deep golden and the chicken lifts cleanly from the pan; if it sticks hard, it needs another minute. Pull it off once the center reaches 165°F, because the last minute in the sauce is just for coating, not fully cooking.
Blooming the Garlic in Butter
Garlic only needs about a minute in the melted butter. Longer than that and it can turn bitter, especially once the honey goes in. The goal is fragrant, not browned. If the garlic starts to darken before the liquid ingredients are added, lower the heat immediately and move fast.
Turning the Pan Juices Into Sauce
Pour in the honey, soy sauce, and vinegar, then stir up the browned bits from the skillet bottom. That’s where the best flavor lives. Once the cornstarch slurry goes in, the sauce should change from loose to glossy and lightly bubbling within a couple of minutes. If it still looks thin, let it simmer another 30 to 60 seconds; if it gets too thick, loosen it with a splash of water.
Coating the Chicken
Return the chicken to the skillet and turn it until every side is lacquered. This final pass should be short, just long enough to warm the chicken through and let the glaze grab. The sauce will keep tightening as it cools, so take the pan off the heat when it looks a touch looser than the texture you want on the plate.
How to Adapt This Honey Garlic Chicken Without Losing the Sticky Finish
Use chicken thighs for a juicier result
Boneless skinless thighs stay more forgiving if you’re worried about overcooking. They take a little longer to sear, but they give you a richer bite and hold up well under the sticky sauce. Use the same glaze, and expect a slightly deeper savory flavor.
Make it gluten-free with tamari
Swap the soy sauce for tamari in a 1:1 amount. The sauce will still be salty and dark, but tamari usually tastes a little smoother and less sharp. Check that your cornstarch is certified gluten-free if that matters for your kitchen.
Make it dairy-free by using oil instead of butter
Butter adds a little richness, but the sauce still works if you swap in an equal amount of neutral oil or plant-based butter. You’ll lose some roundness, so keep the vinegar in place to balance the sweetness. The glaze will still coat beautifully.
Turn it into a pan sauce for rice bowls
Slice the chicken before returning it to the skillet so the glaze catches on more edges. This gives you more saucy coverage for rice or vegetables, though the chicken won’t stay in thick fillets as neatly. It’s the version I’d make when I want the sauce to stretch farther.
Storage and Reheating
- Refrigerator: Store leftovers in an airtight container for up to 4 days. The glaze will thicken more in the fridge, which is normal.
- Freezer: It freezes well for about 2 months, though the sauce may loosen a little after thawing. Freeze in sauce with the chicken so the meat stays protected.
- Reheating: Warm gently in a covered skillet over low heat with a splash of water to loosen the sauce. High heat can make the glaze seize up and the chicken turn dry before the center is hot.
Answers to the Questions Worth Asking
Honey Garlic Chicken
Ingredients
Equipment
Method
- Season the boneless skinless chicken breasts with salt, pepper, and garlic powder. Heat olive oil in a large skillet over medium-high heat and sear until golden, about 5-6 minutes per side, until the center reaches 165°F; remove to a plate.
- In the same pan, melt butter and cook the minced garlic for 1 minute until fragrant. Add honey, soy sauce, and rice vinegar, stirring to combine.
- Stir in the cornstarch slurry (cornstarch mixed with water) and simmer over medium heat for 2-3 minutes, until the sauce thickens into a sticky glaze with a glossy sheen.
- Return the chicken to the pan and turn to coat in the honey garlic glaze, letting any pooled sauce cling to the surface. Cook for 1-2 more minutes until the glaze looks blistered and deeply amber around the edges.
- Sprinkle sesame seeds and add sliced green onions over the honey garlic chicken. Serve hot over steamed rice, spooning any extra sticky glaze from the pan on top.