Glazed pumpkin cookies bake up soft, cakey, and fragrant, with a thick glaze that settles into a smooth shell instead of soaking straight in. The cookies stay tender in the middle, with just enough structure at the edges to hold that generous vanilla glaze, and the whole thing lands somewhere between a quick drop cookie and a little frosted bakery cookie.
What makes this version work is the balance between moisture and spice. Pumpkin brings softness, but it can also make cookies heavy if the dough is overmixed or overloaded with flour. Here, the butter gets creamed with sugar first for a lighter texture, then the dry ingredients are folded in just until combined so the cookies bake up cakey instead of dense. The glaze is intentionally thick, which matters more than people think. A thin glaze disappears into the cookie; a thicker one sets on top and gives you that pretty finish and sweet bite in every mouthful.
Below, I’ve included the cue I watch for when these are done baking, plus the glaze texture that keeps them from turning sticky on the tray. That one detail makes the difference between a cookie that looks homemade in the best way and one that ends up sloppy.
The cookies came out soft and cakey, and the glaze set up just like the photos instead of running off the sides. I let them cool all the way before glazing and that made a huge difference.
Save these glazed pumpkin cookies for the days when you want soft pumpkin spice cookies with a thick glaze that actually sets.
The Part That Keeps Pumpkin Cookies Soft Instead of Heavy
Pumpkin cookie dough can go wrong fast if it gets worked like regular sugar cookie dough. Pumpkin adds a lot of moisture, and if you keep mixing after the flour goes in, the cookies start to bake up tight and bready instead of tender and cakey. The goal is a dough that looks finished as soon as the flour disappears.
The other thing that matters here is portion size. Two-tablespoon mounds give you cookies that spread enough to feel substantial but still stay soft in the center. If you make them too small, the edges dry out before the middle gets that plush texture. If you make them much bigger, they can stay underbaked in the center and never set up well under the glaze.
- Butter and sugar — Creaming them first gives the cookies a little lift and keeps the texture lighter. If the butter is too soft or melted, the dough turns greasy and the cookies spread too much.
- Pumpkin — Use plain pumpkin puree, not pumpkin pie filling. Pie filling has added sugar and spices, which throws off the balance and can make the cookies taste muddled.
- Pumpkin pie spice plus cinnamon — The spice blend gives the broad warm note, and the extra cinnamon sharpens it. You can swap in more cinnamon if that’s what you have, but the blend is what makes the cookies taste rounded instead of flat.
- Flour — Spoon and level it. Packed flour is the fastest way to get dry, cakey-in-the-wrong-way cookies.
What the Glaze Is Doing Besides Looking Pretty

- Powdered sugar — This is the body of the glaze. There isn’t a great substitute here if you want that opaque, set finish.
- Melted butter — It gives the glaze a little richness and helps it taste less powdery. You can use a neutral oil in a pinch, but the flavor gets flatter.
- Milk — Add it slowly. The glaze should be thick enough to spoon on and spread just a bit, not pour like icing. Too much milk is the mistake that makes it run off the cookies.
- Vanilla and cinnamon — Vanilla makes the glaze taste warm and bakery-like, while cinnamon ties it back to the cookies. If you want a maple version, replace the vanilla with maple extract and use a light hand.
The Bake Time That Gives You Soft Centers and Clean Edges
Creaming the Base
Beat the butter and sugar until the mixture looks fluffy and a little paler in color. That step builds the texture, so don’t rush through it. Once the pumpkin, egg, and vanilla go in, the mixture will look looser and slightly curdled, and that’s fine. It comes back together when the dry ingredients are added.
Bringing the Dough Together
Fold in the flour, baking soda, baking powder, spices, and salt just until no dry streaks remain. The dough will be soft and scoopable, not stiff like rolled cookie dough. If you keep mixing past that point, the cookies lose their tender crumb and bake up tougher than they should.
Baking to the Right Finish
Drop 2-tablespoon rounds onto the pan and bake at 350°F for 10 to 12 minutes. The cookies are done when the tops look set and the edges have just started to firm up, even if the centers still look a little soft. Pull them before they look fully browned; they finish setting as they cool on the pan, and that’s what keeps them cakey instead of dry.
Glazing After They Cool
Let the cookies cool completely before you add the glaze. If they’re even slightly warm, the glaze thins out and slides off instead of sitting in that pretty thick layer. Spoon it on, spread gently, then give the cookies 20 to 30 minutes so the glaze sets before stacking or serving.
How to Adjust These Cookies Without Losing the Soft Texture
Dairy-Free Version
Use a plant-based butter that behaves like stick butter, not a soft tub spread. The cookies will still bake soft, and the glaze can be made with an unsweetened non-dairy milk. The flavor gets a little less rich, but the texture stays close if you don’t overbake them.
More Maple, Less Vanilla
Swap part of the vanilla in the glaze for maple extract, or use maple flavor in the glaze only and leave the cookie dough as written. That gives you a deeper fall-style finish without changing the cookie texture. Use a light hand, though, because maple extract can take over fast.
Gluten-Free Adaptation
A 1:1 gluten-free baking blend usually works well here because the cookies are already meant to be soft and cakey. If your blend doesn’t include xanthan gum, use one that does or the cookies can fall apart a little when glazed. The dough may need a few extra minutes to firm up before baking.
Storage and Reheating
- Refrigerator: Store in an airtight container for up to 4 days. The glaze stays set, but the cookies soften a little more as they sit.
- Freezer: Freeze the unglazed cookies for up to 2 months. Glaze them after thawing for the cleanest finish.
- Reheating: These are best at room temperature, not warmed. If you want the cookie itself a little softer, let frozen cookies thaw covered so they don’t dry out before the glaze goes on.
Answers to the Questions Worth Asking
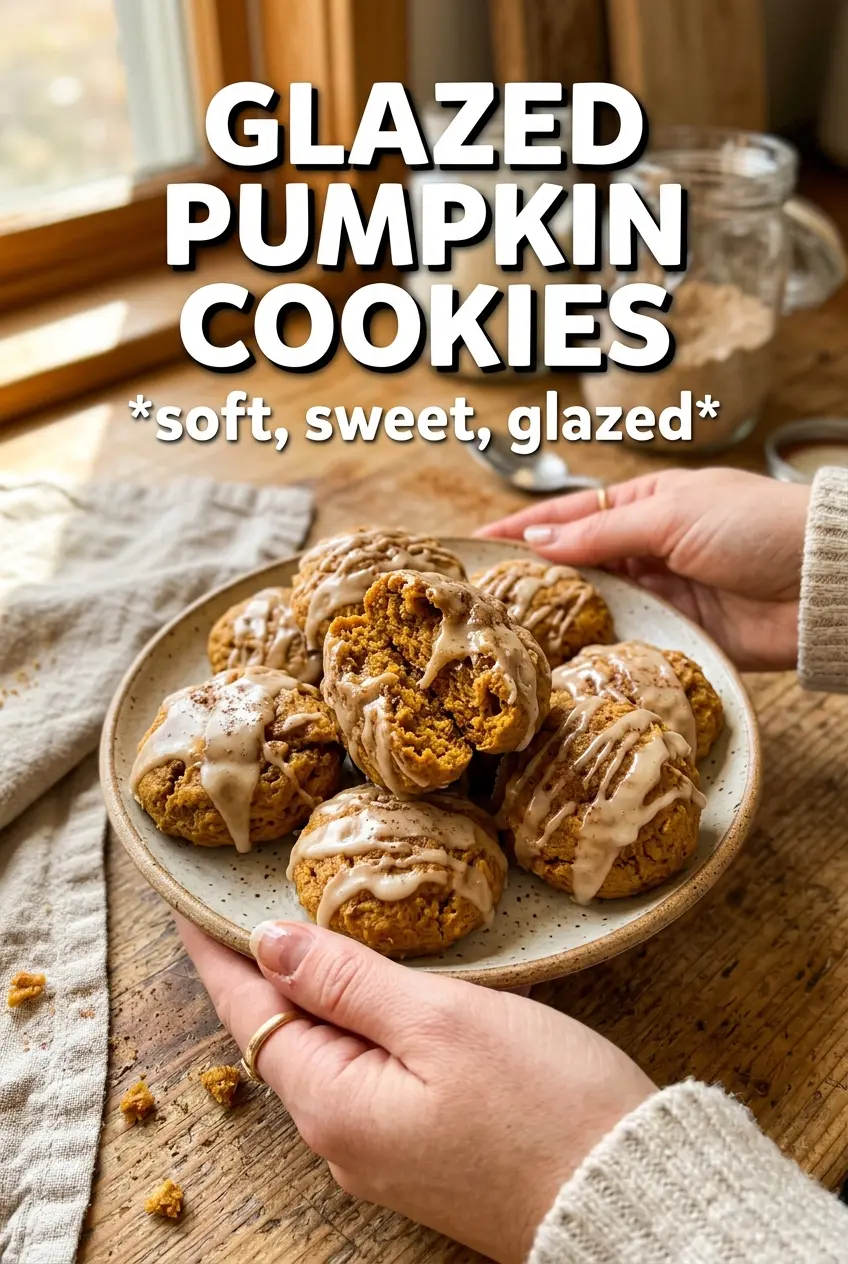
Glazed Pumpkin Cookies
Ingredients
Equipment
Method
- Beat the butter and sugar together until smooth. Add the pumpkin, egg, and vanilla and beat again until the mixture looks thick and evenly combined.
- Fold in the flour, baking soda, baking powder, pumpkin pie spice, cinnamon, and salt until just incorporated. The dough should be cohesive with no visible dry streaks.
- Drop the dough in 2-tablespoon rounds onto a sheet pan, spacing them a few inches apart. If the dough looks soft, pause 5 minutes so the rounds hold their shape.
- Bake at 350°F for 10-12 minutes, until the edges look set and the centers still look slightly soft. A light golden color on top is your visual cue.
- Cool the cookies completely on the pan before glazing. Waiting for full cooling helps the glaze stay thick and not melt off.
- Whisk powdered sugar, melted butter, milk, vanilla, and cinnamon until smooth and thick. The glaze should ribbon slowly and hold its shape rather than running.
- Spoon a generous amount of glaze over each cookie, spreading slightly so it covers the top. Let it settle so it partially drips toward the edges.
- Let the glazed cookies set for 20-30 minutes before serving. Look for a matte surface that feels firm to the touch.