Golden chicken breast with a garlicky butter sauce is the kind of pan dinner that disappears fast, especially when the edges of the chicken are deeply seared and the sauce clings to every slice. The best part is that it feels rich without being fussy: one skillet, a short ingredient list, and a sauce that tastes like it took far more effort than it did.
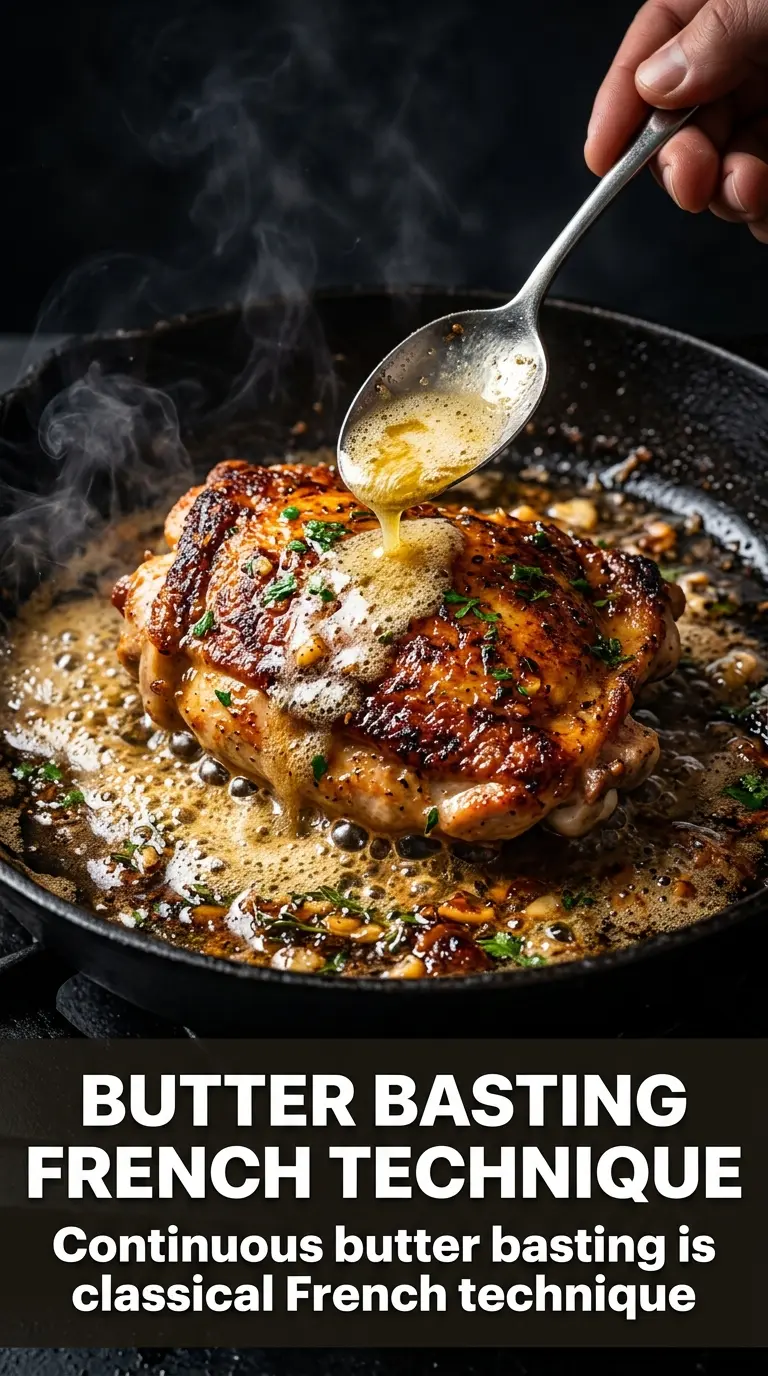
What makes this version work is the order. The chicken gets a hard sear first, which leaves behind browned bits in the pan, and those bits become the base of the sauce instead of getting wiped away. Then the garlic goes into butter only after the heat comes down, so it turns fragrant instead of bitter. A splash of broth loosens everything just enough to make a spoonable sauce, and lemon at the end keeps the butter from tasting flat.
Below you’ll find the little details that keep the chicken juicy, the sauce glossy, and the garlic from burning. If you’ve ever had a butter sauce turn greasy or grainy, the process notes here will help you avoid that.
The chicken browned beautifully and the sauce thickened just enough to coat the pan without breaking. I added a little extra lemon at the end and my husband kept sneaking bites straight from the skillet.
Garlic butter chicken with a glossy pan sauce is the one to pin for nights when you want crisp edges, juicy chicken, and barely any cleanup.
The Sear Is What Keeps the Sauce from Going Flat
Garlic butter chicken works best when the chicken is seared hard enough to build flavor before the sauce ever starts. If you rush that part, the pan stays pale and the final sauce tastes one-note, even if the garlic and butter are good. The goal is a deep golden crust that lifts cleanly when the chicken is ready to flip.
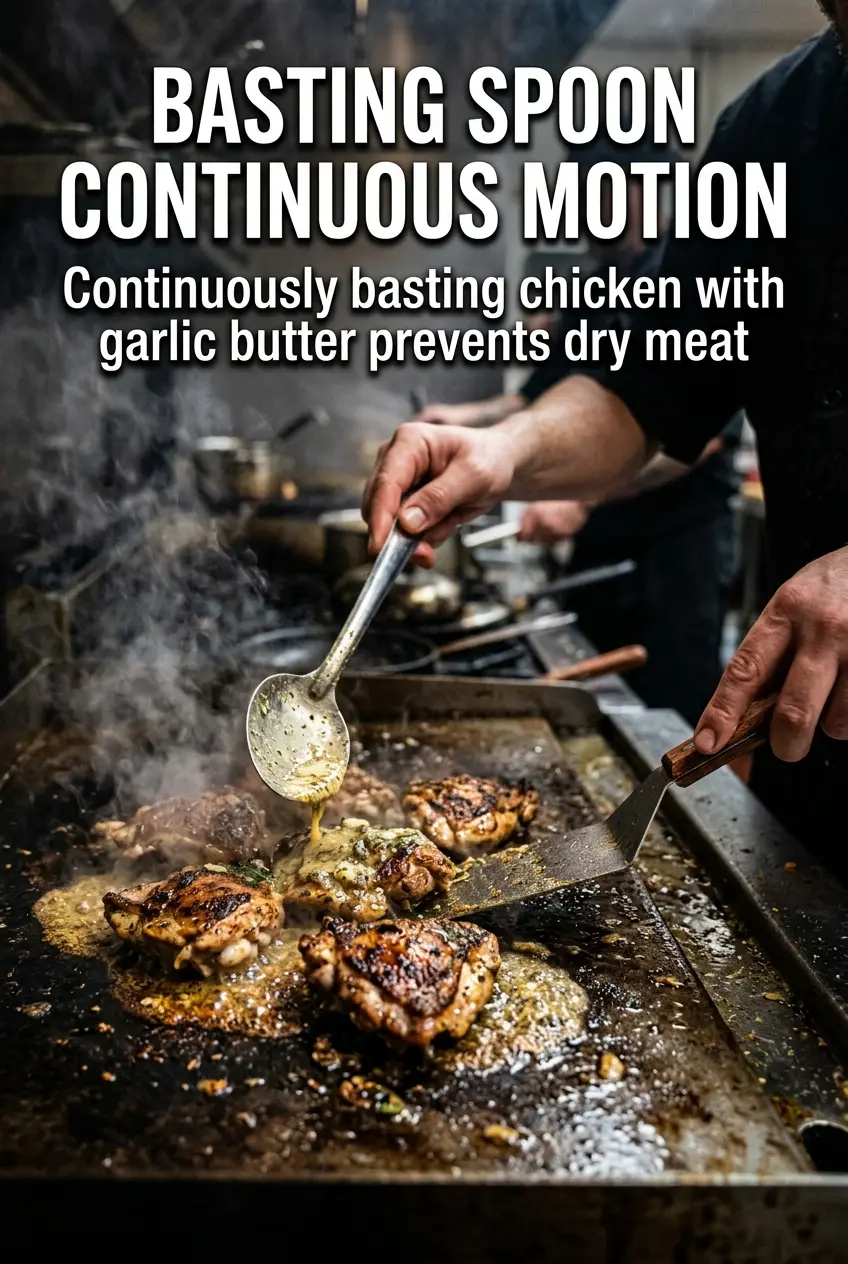
The other mistake is crowding the pan. If the breasts are packed together, they steam instead of browning, and the juices dilute the butter sauce later. Give each piece room, let the first side develop color without moving it, and pull the chicken only when it reaches 165°F in the thickest part. That way the sauce gets poured over meat that stays tender, not overcooked.
What Each Ingredient Is Actually Doing in the Skillet
- Chicken breasts — Boneless breasts cook fast and slice neatly for serving, but they dry out if they go past temperature. If yours are thick on one end, pound them to an even thickness so the thinner section doesn’t overcook while the center catches up.
- Olive oil — This gives you the first high-heat sear without burning like butter would. A neutral oil works too, but olive oil adds a little backbone to the pan flavor before the butter goes in.
- Butter — Butter is the body of the sauce, not just the finish. Use real butter here; the flavor matters, and the slight milkiness helps the sauce coat the chicken. Add it after the heat drops so it melts without browning too fast.
- Garlic — Fresh minced garlic is the whole point of the dish. Pre-minced garlic from a jar can work in a pinch, but it won’t give you the same sharp, fragrant finish. Keep it moving in the butter so it perfumes the pan instead of turning bitter.
- Chicken broth — This loosens the browned bits from the skillet and turns them into sauce. Stock works too, but broth is usually saltier and better balanced here, so start with less salt on the chicken if yours is strong.
- Dried thyme — Thyme gives the sauce a savory, slightly woodsy note that keeps it from tasting like straight garlic butter. If you only have fresh thyme, use about three times as much and strip the leaves from the stems before adding.
- Lemon juice and parsley — Lemon wakes up the sauce at the end, and parsley gives the dish a fresh finish that cuts through the butter. Add both off the heat or right at the end so they stay bright instead of dulling in the pan.
Building the Sauce Without Letting the Garlic Burn
Get the Chicken Browned First
Season the chicken generously, then sear it in hot oil over medium-high heat until the surface is deep gold and the meat releases easily from the skillet. If it sticks, give it another minute; forcing it early tears off the crust. Cook until the center reaches 165°F, then move the chicken out of the pan so it doesn’t keep overcooking while you build the sauce.
Turn Down the Heat Before the Butter Goes In
Once the chicken is out, lower the heat to medium before adding butter and garlic. Butter catches fast in a hot pan, and garlic goes from fragrant to bitter in a matter of seconds. Stir until the garlic smells sweet and sharp at the same time, not brown and toasted.
Use the Broth to Pull the Flavor off the Pan
Add the chicken broth and thyme, then scrape the bottom of the skillet with a wooden spoon. Those browned bits dissolve into the liquid and give the sauce its depth. Let it simmer for a couple of minutes so it reduces slightly; if it stays too thin, it runs off the chicken instead of coating it.
Finish with Lemon and Parsley
Return the chicken to the skillet and spoon the sauce over the top until each piece looks glazed. Add lemon juice little by little so the sauce stays balanced, then scatter in the parsley right before serving. The sauce should look glossy, not oily, and smell like garlic first, butter second, and lemon at the end.
How to Adapt Garlic Butter Chicken Without Losing the Point
Use chicken thighs for a juicier finish
Boneless thighs bring more richness and are harder to dry out, but they take a few extra minutes to cook through. The sauce works the same way, and the extra fat from the thighs makes the garlic butter taste a little rounder.
Make it dairy-free with olive oil and a plant butter
Use a good dairy-free butter substitute and keep the same garlic-broth method. The sauce won’t have quite the same richness as real butter, but the sear, broth, and lemon still give you a silky pan sauce with plenty of flavor.
Swap in gluten-free broth and serve with rice or potatoes
The recipe is naturally gluten-free as long as your broth is, but serving it with rice or mashed potatoes is the easiest way to catch every drop of sauce. If you use a packaged broth, check the label because some brands sneak in wheat-based additives.
Stretch it into a pasta dinner
Slice the chicken and toss it with hot pasta and a few spoonfuls of the pan sauce. A splash of reserved pasta water helps the sauce cling, but don’t add so much that it turns watery.
Storage and Reheating
- Refrigerator: Store leftovers in an airtight container for up to 3 days. The sauce will thicken as it chills.
- Freezer: Freeze the chicken and sauce together for up to 2 months, though the butter sauce may separate a little when thawed. It’s still usable, but the texture is best fresh.
- Reheating: Warm gently in a covered skillet over low heat with a splash of broth. High heat can make the chicken tough and can break the sauce, so keep the temperature low and slow.
Answers to the Questions Worth Asking
Garlic Butter Chicken
Ingredients
Equipment
Method
- Season the chicken breasts generously with salt and pepper (even coverage helps browning).
- Heat the olive oil in a large skillet over medium-high heat, then sear the chicken for 6-7 minutes per side until golden and cooked through to 165°F (watch for deep golden edges).
- Remove the chicken to a plate and set aside, then reduce the heat to medium (leave the browned bits in the pan).
- Add the butter and garlic to the skillet and cook for 1-2 minutes until fragrant (stir so garlic pieces toast without burning).
- Add the chicken broth and dried thyme, scraping up any browned bits, then simmer for 2-3 minutes (the sauce will look slightly reduced and glossy).
- Return the chicken to the pan, spoon the sauce over top, then add lemon juice and parsley and serve immediately (finish with fresh green flecks on top).