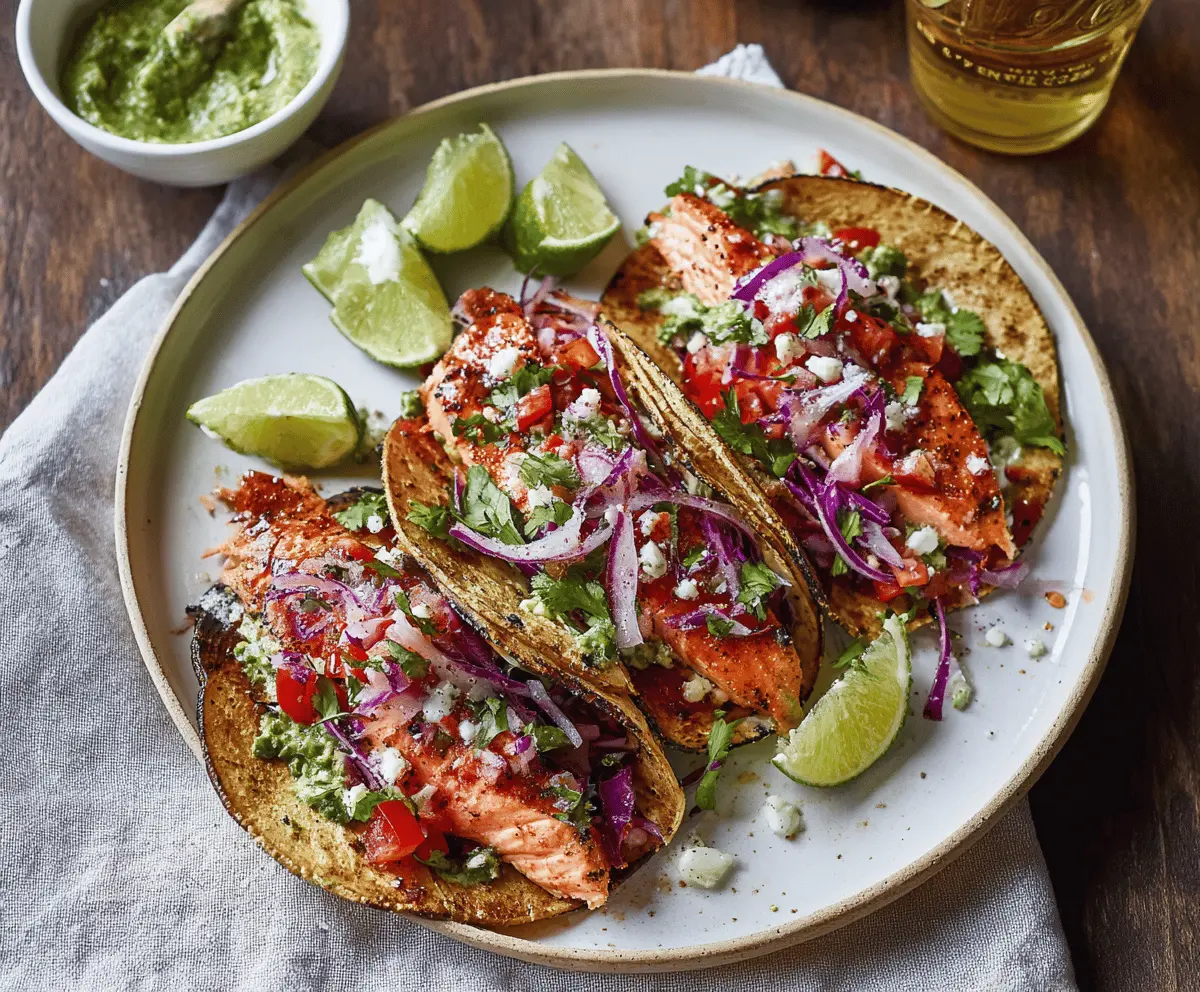
These Chile Lime Salmon Tacos are a fun and zesty meal! With soft tortillas filled with flaky salmon, fresh veggies, and a kick of lime, they are simply mouthwatering.
Honestly, who doesn’t love tacos? I usually pile on the toppings like salsa and avocado for that extra yum! You won’t be able to eat just one, trust me! 🌮
Making these tacos is a breeze! Just season the salmon, bake it, and throw everything into the tortillas. Quick, easy, and oh-so-tasty—perfect for any night of the week!
Key Ingredients & Substitutions
Salmon: Fresh salmon fillets are the star here. If you’re in a pinch, you can use canned salmon or even another fish like tilapia or cod, but adjust cooking times accordingly.
Tortillas: Small corn tortillas are classic for tacos, but if you prefer, you can use flour tortillas or even lettuce wraps for a low-carb option.
Cabbage: Red cabbage adds a nice crunch and color. You can swap it for green cabbage or even coleslaw mix if that’s what you have. Shredded carrots would also work well!
Cheese: Queso fresco is lovely for its mild flavor. If you can’t find it, feta cheese or crumbled goat cheese makes a good substitute.
What’s the Best Way to Roast Salmon for Tacos?
Roasting salmon is straightforward but requires attention to timing. You want it perfectly flaky, not dry. Preheat your oven and use this method:
- Mix your spices well for an even coating. Don’t rush this step!
- Roast salmon on parchment for easy cleanup, and keep an eye on it after 12 minutes—salmon cooks quickly.
- When it flakes easily with a fork, it’s done. Break it into chunks for your tacos!
How Do I Make the Perfect Green Sauce?
The green sauce adds a refreshing kick! Here’s a quick way to make it smooth:
- Start with your sour cream or yogurt as the base. Greek yogurt is tangy and thick!
- Blend in cilantro and lime juice for freshness. Adjust salt as needed to taste!
- If you like heat, toss in a jalapeño, but remember to seed it for less spice.
Enjoy creating your Chile Lime Salmon Tacos—happy cooking! 🌮
Chile Lime Salmon Tacos
Ingredients You’ll Need:
For the Tacos:
- 1 lb salmon fillets, skin removed
- 1 tbsp olive oil
- 1 tsp chili powder
- 1/2 tsp cumin
- 1/2 tsp smoked paprika
- Salt and freshly ground black pepper, to taste
- 1 lime, zested and juiced
- 6 small corn tortillas
- 1 cup shredded red cabbage
- 1/2 cup diced tomatoes
- 1/4 cup chopped fresh cilantro
- 1/4 cup finely sliced red onion
- 1/4 cup crumbled queso fresco or feta cheese
- Lime wedges, for serving
- Optional: avocado slices or green salsa
For the Green Sauce (optional):
- 1/2 cup sour cream or Greek yogurt
- 1/4 cup fresh cilantro
- 1 tbsp lime juice
- 1 small jalapeño, seeded (optional)
- Salt to taste
How Much Time Will You Need?
This recipe takes about 15 minutes of prep time and around 15 minutes to cook. In total, you’ll spend about 30 minutes getting these delicious tacos on the table!
Step-by-Step Instructions:
1. Preheat the Oven:
Start by preheating your oven to 400°F (200°C). This temperature is perfect for baking the salmon to a flaky perfection. Line a baking sheet with parchment paper or foil for easy cleanup.
2. Prepare the Seasoning:
In a small bowl, mix together the olive oil, chili powder, cumin, smoked paprika, lime zest, salt, and pepper. This spicy mix will give your salmon a delicious flavor!
3. Season the Salmon:
Brush the salmon fillets generously with the seasoning mixture, making sure they’re coated evenly. This will ensure that every bite is bursting with flavor!
4. Bake the Salmon:
Place the seasoned salmon on the prepared baking sheet and bake in the preheated oven for 12-15 minutes. It’s ready when it flakes easily with a fork. Keep an eye on it to avoid overcooking.
5. Warm the Tortillas:
While the salmon is baking, warm the corn tortillas on a dry skillet over medium heat, or you can pop them in the oven until they are soft and slightly charred. This will make them more pliable and delicious!
6. Make the Green Sauce:
In a blender, combine the sour cream or Greek yogurt, fresh cilantro, lime juice, jalapeño (if using), and a pinch of salt. Blend until smooth and creamy. Set aside for a fresh taste!
7. Break the Salmon:
Once the salmon is cooked, carefully break it into large chunks. The salmon should be flaky and flavorful!
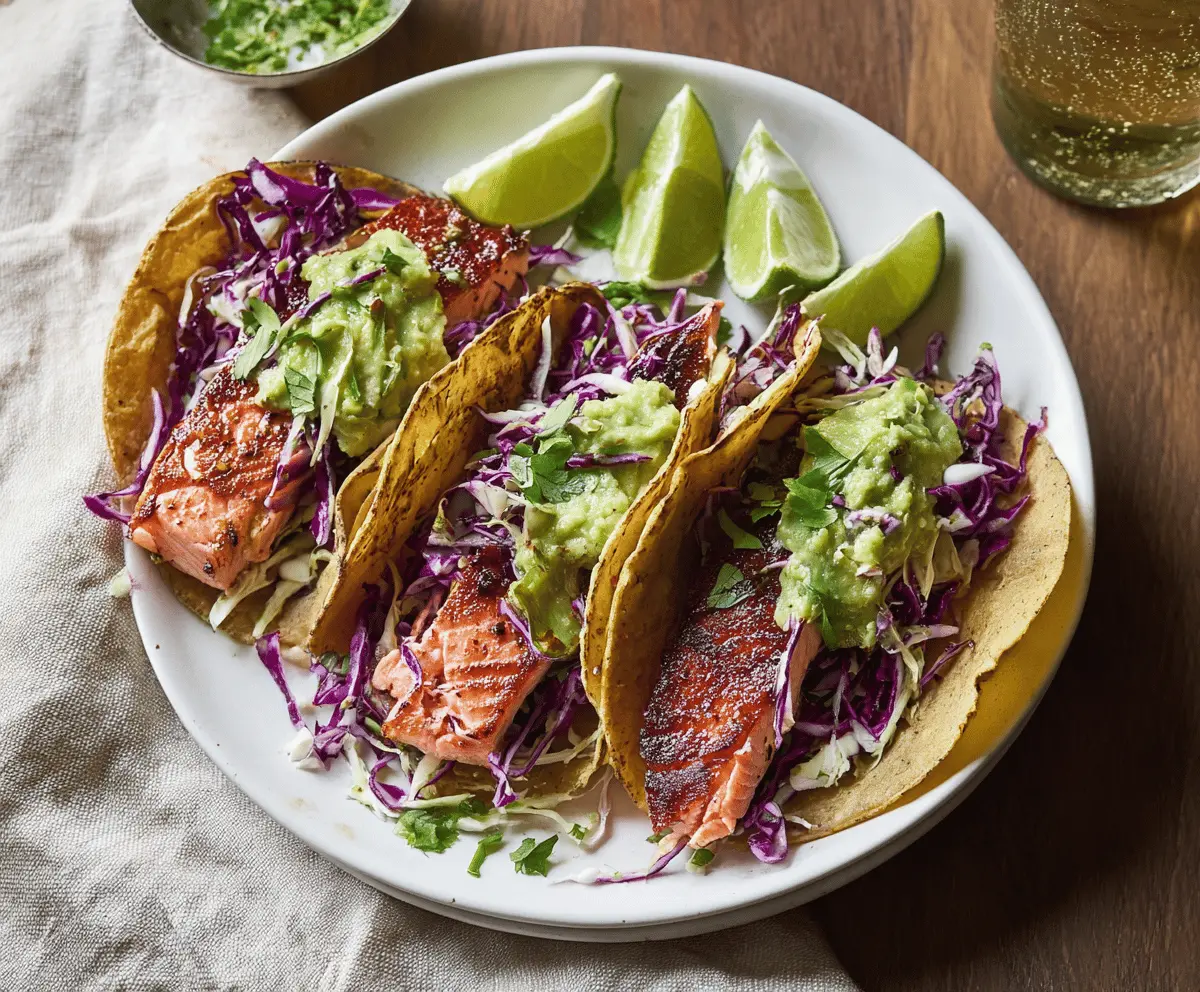
8. Assemble the Tacos:
Now it’s time to build your tacos! Spread a bit of the green sauce on each tortilla, then layer on the salmon chunks, shredded cabbage, diced tomatoes, red onion, cilantro, and sprinkle with crumbled queso fresco.
9. Serve and Enjoy:
Serve your tacos immediately with lime wedges on the side for extra zing. Squeeze fresh lime juice over the top for added flavor!
10. Optional Extras:
If you want to elevate your tacos further, add some creamy avocado slices or a drizzle of green salsa. The possibilities are endless!
Enjoy your fresh, zesty Chile Lime Salmon Tacos packed with vibrant flavors and a hint of smoky chili!
Can I Use Frozen Salmon for This Recipe?
Absolutely! Just make sure to thaw the salmon completely before seasoning and baking. You can thaw it overnight in the refrigerator or place it in a sealed plastic bag and submerge it in cold water for a quicker method.
Can I Make These Tacos Ahead of Time?
You can prep the salmon and the green sauce in advance. Just store them separately in the refrigerator and assemble the tacos right before serving for the best taste and texture.
How Do I Store Leftover Tacos?
If you have leftovers, store them in an airtight container in the fridge for up to 2 days. To reheat, gently warm the salmon and tortillas, keeping the toppings separate to maintain their freshness.
Can I Substitute Any Ingredients?
Yes! If you’re out of salmon, try another fish like tilapia or even shrimp. For the tortillas, consider using lettuce wraps for a low-carb option or flour tortillas if you prefer. You can also swap out queso fresco for feta or omit it altogether for a dairy-free option!