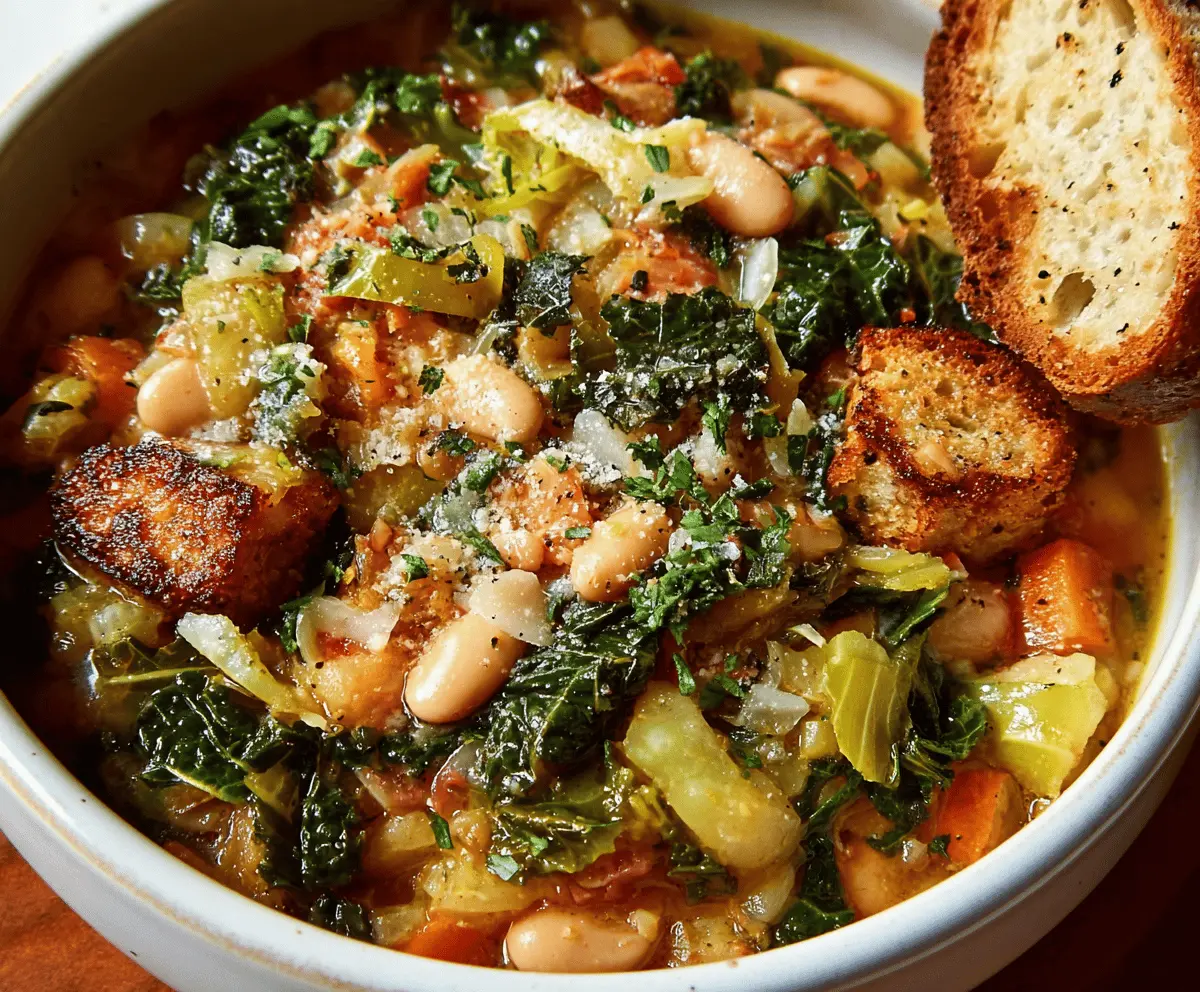
Ribollita is a hearty Italian soup packed with fresh vegetables, beans, and bread. It’s perfect for warming you up on chilly days and is super filling!
This soup is special because it tastes even better the next day. Honestly, I think leftovers are the best part. A bit of cheese on top, and you’re in for a treat! 🥣
Key Ingredients & Substitutions
Olive Oil: Extra-virgin olive oil is a must for flavor. If you’re out, any neutral oil will work, but you might miss that rich taste. I find a good quality oil really elevates the dish!
Onions and Garlic: These are your flavor base. If you’re in a pinch, shallots or leeks can substitute for onions. For garlic lovers, feel free to add more to taste!
Swiss Chard/Kale: Both greens are great choices for Ribollita. If neither is available, spinach is a suitable replacement although it cooks quicker. Just add it later in the cooking process.
Cabbage: Savoy cabbage adds a nice texture, but green cabbage works too. If you want a crunchier bite, try Napa cabbage instead.
Beans: Cannellini beans are traditional, but you can swap them with great northern beans or chickpeas. Canned beans save time—just remember to rinse!
Day-Old Bread: The heart of Ribollita. If you don’t have stale bread, any crusty bread will do. Avoid soft bread as it won’t hold up well in the soup.
How Do I Make Sure My Soup Is Full of Flavor?
The secret to a delicious Ribollita is simmering your ingredients long enough to blend their flavors and getting the seasoning just right. Start by sautéing your onions, carrots, and celery; this builds a solid base. Remember, don’t rush the simmering step!
- Cook the soup uncovered to help evaporate excess water and thicken it. Stir occasionally to prevent sticking.
- During the last 10 minutes, add the torn bread. It should absorb the broth and thicken the soup nicely.
- Don’t forget to taste and adjust the seasoning before serving! A little salt and pepper can make a big difference.
Delicious Ribollita Recipe
Ingredients You’ll Need:
For the Soup:
- 1/4 cup extra-virgin olive oil, plus more for drizzling
- 1 large onion, chopped
- 2 medium carrots, diced
- 2 celery stalks, diced
- 4 cloves garlic, minced
- 1 medium potato, peeled and diced (optional)
- 1 bunch Swiss chard or kale, stemmed and leaves chopped
- 1/2 medium savoy cabbage or green cabbage, chopped
- 2 cups cooked cannellini beans (or 1 can, drained and rinsed)
- 2 cups crushed canned tomatoes
- 4 cups vegetable broth or water
- 4 cups day-old crusty bread, torn into bite-size chunks
- Salt and freshly ground black pepper, to taste
- 1 teaspoon dried thyme or 1 tablespoon fresh thyme leaves
- 1 teaspoon dried rosemary or 1 tablespoon fresh rosemary leaves, finely chopped
For Serving (Optional):
- Grated Pecorino Romano or Parmesan cheese
- Red pepper flakes
How Much Time Will You Need?
This lovely Ribollita soup will take about 15 minutes to prepare and around 1 hour to cook. It’s best to let it sit for a bit before serving, as the flavors develop beautifully overnight! So, in total, you’re looking at about 1 hour and 15 minutes plus some extra time for enjoying your meal.
Step-by-Step Instructions:
1. Sauté the Vegetables:
In a large heavy pot, heat the olive oil over medium heat. Add the chopped onion, diced carrots, and celery. Sauté the mix until the vegetables are soft and the onion is translucent, which should take about 8 to 10 minutes. This step is crucial for building flavor!
2. Add Garlic:
Stir in the minced garlic and continue to cook for about 1 minute, or until you can smell that lovely aroma filling your kitchen.
3. Incorporate the Greens and Potato:
If you’re using potato, add the diced pieces along with the chopped cabbage and Swiss chard or kale. Cook everything for another 5 minutes, stirring occasionally until the greens just begin to wilt.
4. Mix In the Tomatoes and Broth:
Pour in the crushed tomatoes and cannellini beans, followed by the vegetable broth. Add the thyme and rosemary, giving it a good stir to combine everything. Bring the whole mixture to a boil.
5. Simmer the Soup:
Once boiling, reduce the heat to low. Let the soup simmer uncovered for about 45 minutes to 1 hour. Stir occasionally and watch it thicken to perfection! Season with salt and pepper to taste.
6. Add the Bread:
In the last 10 minutes of cooking, take your torn bread chunks and stir them into the soup. This will help them soak up all those delicious flavors.
7. Adjust the Flavor:
Before you serve, taste your Ribollita one more time. Feel free to adjust the seasoning if needed. Remember, it often tastes even better the next day after flavors meld!
8. Serve and Enjoy:
Serve your hot Ribollita in bowls, drizzling a little extra virgin olive oil on top if you like. Finish with a sprinkle of grated cheese and red pepper flakes for some extra flavor. Pair it with extra toasted bread for a comforting meal.
Enjoy your warm, comforting bowl of Ribollita! It’s perfect for cold evenings and great for sharing with friends and family.

Can I Use Different Greens in Ribollita?
Absolutely! While Swiss chard and kale are traditional, you can also use spinach or collard greens. Just be sure to adjust the cooking time—spinach cooks faster, so add it later in the process to prevent it from wilting too much!
What Can I Substitute for Cannellini Beans?
If you don’t have cannellini beans on hand, great northern beans or chickpeas work perfectly as substitutes. If using canned beans, make sure to rinse and drain them first to lessen the salt content.
How Should I Store Leftover Ribollita?
Store any leftovers in an airtight container in the refrigerator for up to 3 days. The soup will thicken as it sits, so add a splash of vegetable broth or water when reheating to achieve your desired consistency.
Can I Freeze Ribollita?
Yes, Ribollita freezes well! Allow it to cool completely, then store it in an airtight container or freezer bag for up to 3 months. Thaw overnight in the fridge before reheating on the stove over low heat.