Fall is here, and you know what that means – pumpkin everything! I love baking and sharing desserts that bring warmth and comfort to your home, and today I’m excited to share two amazing pumpkin tiramisu recipes perfect for the season.
Whether you like classic flavors or something with a bit more spice, these easy ideas will make your kitchen smell wonderful. Get ready to bake some delicious pumpkin treats!
Jump to Recipe:
Pumpkin Chai Tiramisu: A Spiced Dessert
This dessert brings together the creamy texture of tiramisu with the warm spices of chai tea and sweet pumpkin. It’s a wonderful treat for cooler days and a sure crowd-pleaser.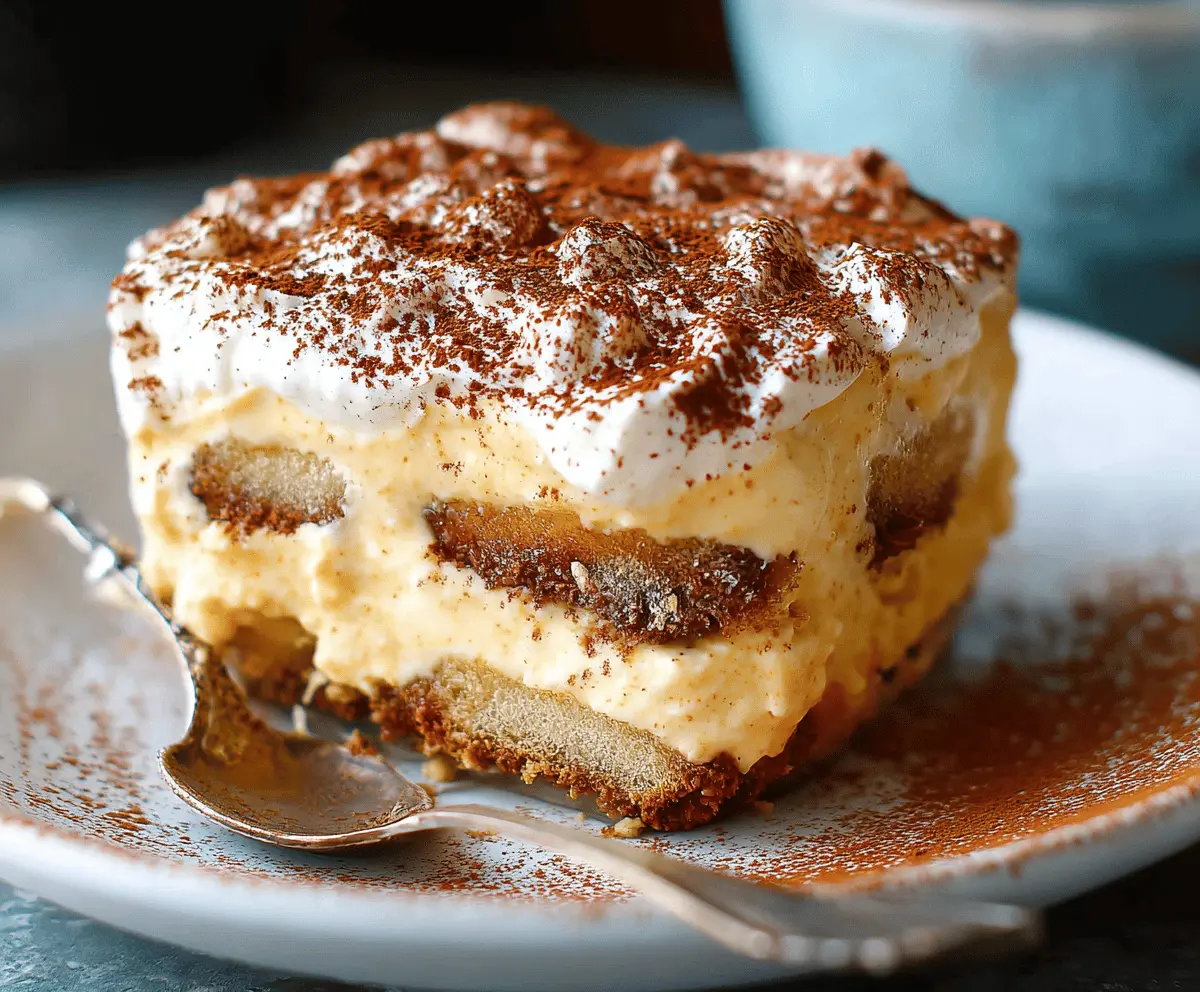
Key Ingredients & Tips
- Chai Tea Soak: Brew strong chai tea to soak the ladyfingers. This gives a deep, fragrant flavor that pairs perfectly with pumpkin.
- Pumpkin Puree: Make sure to use 100% pumpkin puree, not pumpkin pie filling, for the best results in your creamy layers.
What You Need
- Ladyfingers
- Strong chai tea, cooled
- Mascarpone cheese
- Pumpkin puree
- Heavy cream
- Granulated sugar
- Pumpkin pie spice
⏱️ Time: 40 minutes🍽️ Yields: 8 servings
How to Make It
Step 1: Prep the Ladyfingers
Quickly dip each ladyfinger into the strong, cooled chai tea. Arrange a single layer of the soaked ladyfingers in the bottom of your serving dish.
Step 2: Make the Creamy Layers
In a large bowl, beat mascarpone cheese, pumpkin puree, sugar, and pumpkin pie spice until the mixture is smooth. In a separate bowl, whip the heavy cream until it forms soft peaks, then gently fold the whipped cream into the pumpkin mixture. Spread half of this creamy pumpkin mixture over the ladyfingers. Repeat with another layer of dipped ladyfingers and the remaining cream.
📝 Final Note
Chill the tiramisu for at least 4 hours, or even better, overnight, to let the flavors blend and the dessert set properly. You can dust with cocoa powder or extra pumpkin pie spice before serving.
Classic Pumpkin Tiramisu: A Fall Favorite
This recipe takes traditional tiramisu and gives it a lovely fall makeover with rich pumpkin flavors. It’s a comforting dessert that’s simple to make and always a hit.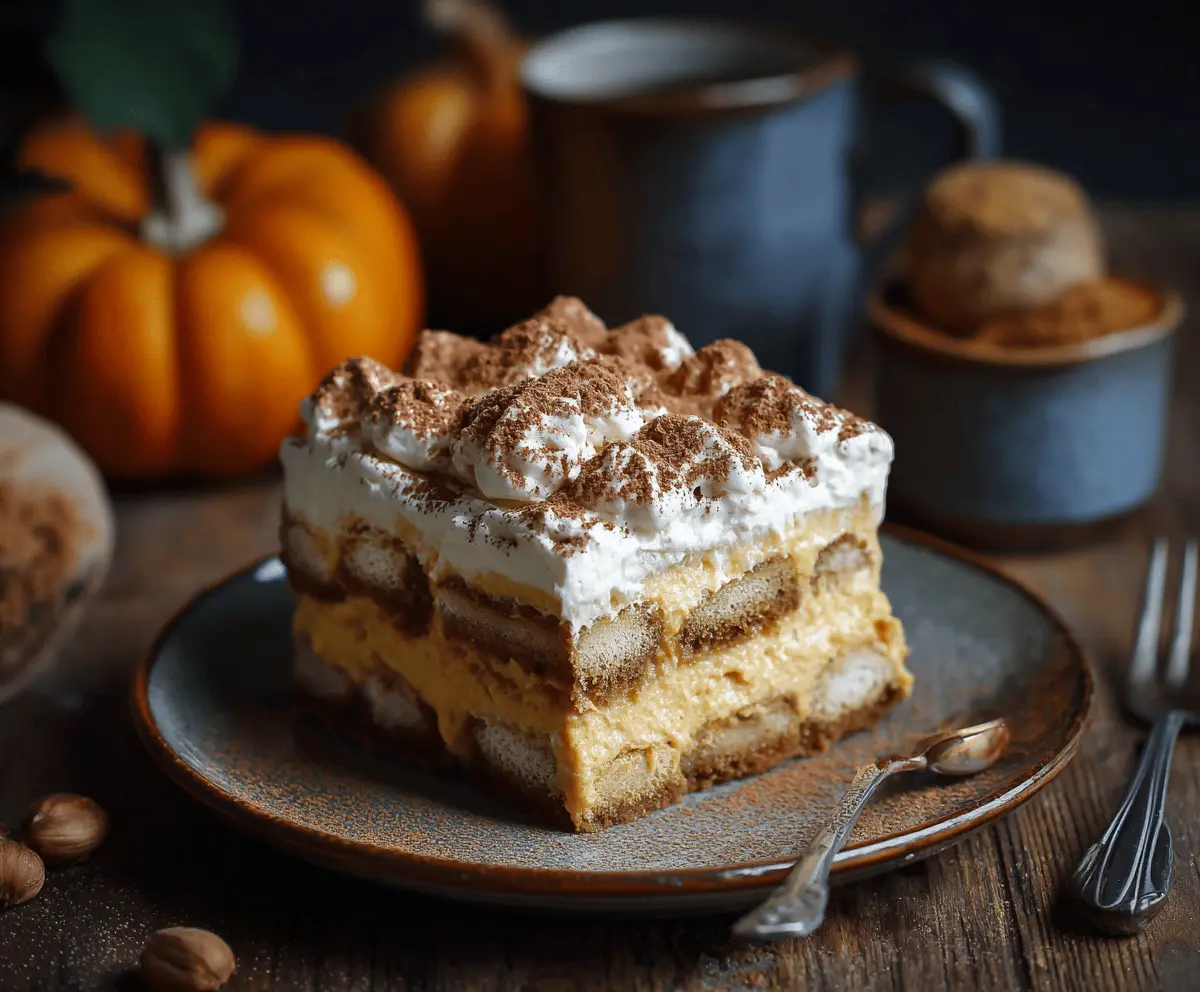
Key Ingredients & Tips
- Coffee Choice: Use a good quality, strong brewed coffee or espresso to soak your ladyfingers. This classic base is key for tiramisu flavor.
- Spice Blend: A mix of cinnamon, nutmeg, and cloves complements the pumpkin perfectly. Adjust amounts to your taste to make it just right for you.
What You Need
- Ladyfingers
- Strong brewed coffee or espresso, cooled
- Mascarpone cheese
- Pumpkin puree
- Heavy cream
- Granulated sugar
- Ground cinnamon
⏱️ Time: 35 minutes🍽️ Yields: 6-8 servings
How to Make It
Step 1: Soak the Ladyfingers
Dip ladyfingers quickly into the cooled, strong coffee. Be careful not to let them get too soggy. Arrange them in a single layer in your chosen serving dish.
Step 2: Layer the Dessert
In a bowl, mix mascarpone cheese, pumpkin puree, sugar, and ground cinnamon until smooth. In another bowl, whip the heavy cream until soft peaks form. Gently fold the whipped cream into the pumpkin mixture. Spread half of this pumpkin cream over the ladyfingers. Add another layer of dipped ladyfingers and top with the remaining cream.
📝 Final Note
For an extra touch, grate some dark chocolate or sprinkle cocoa powder on top before serving. Store any leftovers in the fridge, covered, for up to 3 days.