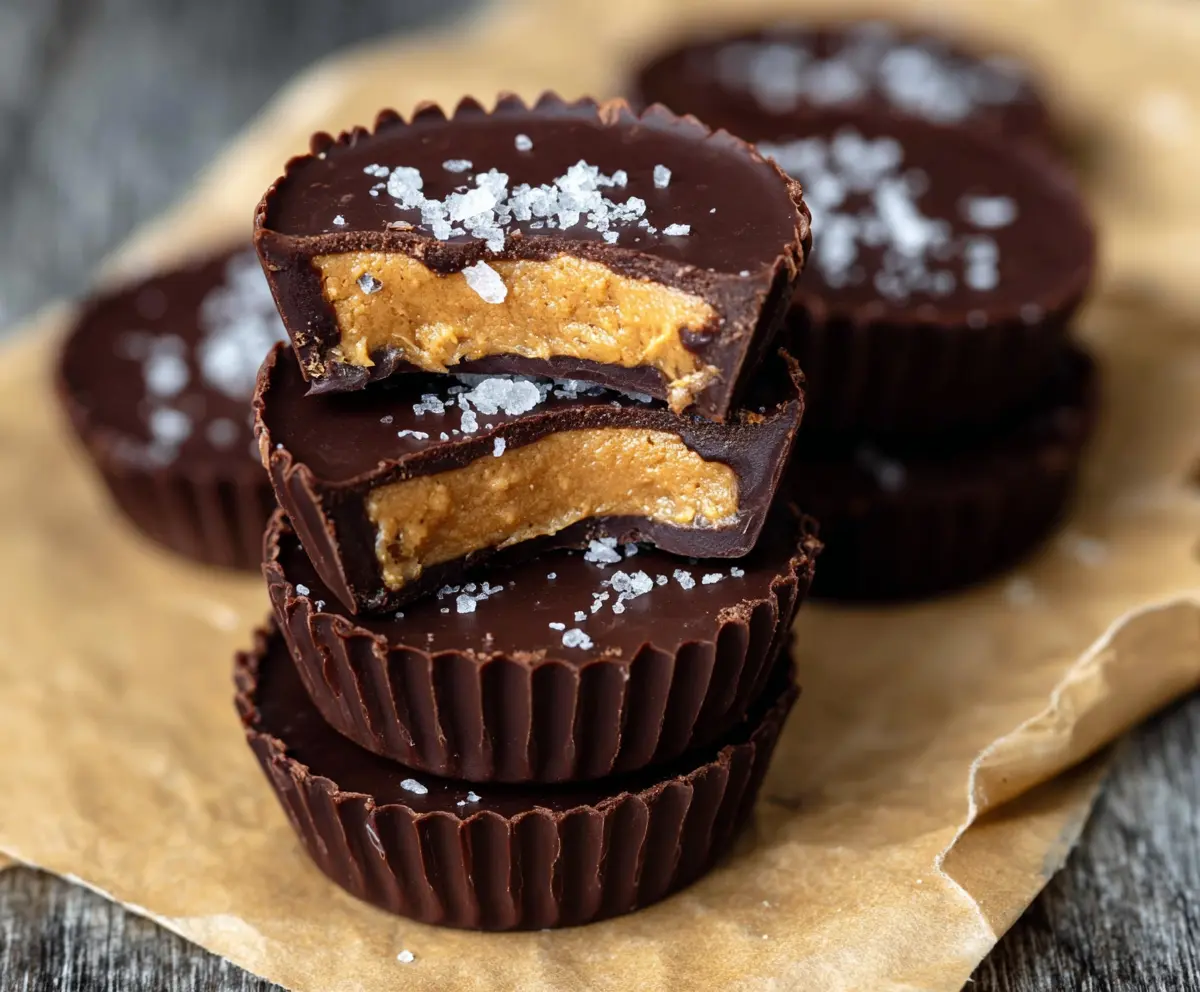
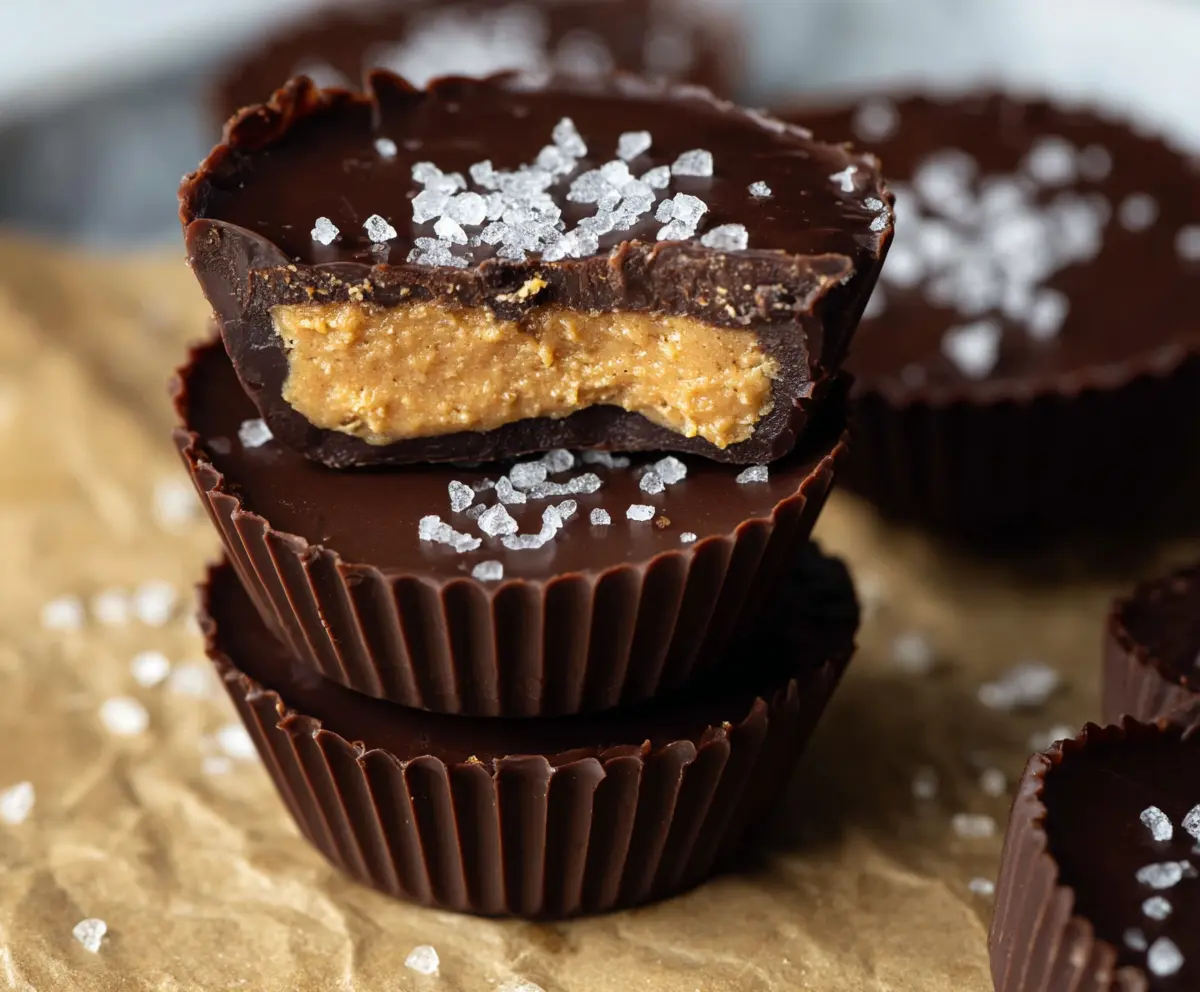
These Protein Peanut Butter Cups are a tasty treat that you can feel good about! Made with creamy peanut butter and a rich chocolate coating, they pack a protein punch!
They’re perfect for a quick snack or dessert. I love making a batch and keeping them in the fridge; it’s hard to stop at just one—who could resist that combination? 😋
Key Ingredients & Substitutions
Peanut Butter: Natural creamy peanut butter is best for this recipe, as it has no added sugars or oils. If you’re looking for an alternative, consider almond butter or sunflower seed butter for a nut-free version!
Protein Powder: You can use vanilla or chocolate protein powder, depending on your taste. If you prefer plant-based protein, pea or hemp protein is great too. Adjust the sweetness based on the type of protein used.
Sweeteners: Honey gives a lovely sweetness, but you can swap it out for maple syrup if you’re looking for a vegan option. Agave syrup also works well if you need a low-GI sweetener.
Chocolate: Dark chocolate is key here, so aim for 70% cocoa or higher. If you need a dairy-free option, look for vegan chocolate chips. You can also use cocoa powder mixed with coconut oil for a lower-calorie alternative.
Coconut Oil: This helps the chocolate to set smoothly. If you don’t have it on hand, you can skip this or use a neutral oil like vegetable oil. It’s not essential but does improve the texture.
How Do I Get the Chocolate to Set Just Right?
The key to getting the chocolate to set beautifully is all in the melting and layering process. Here’s how to ensure perfect chocolate layers:
- **Melting the Chocolate:** Be patient while melting. Use short intervals in the microwave or a double boiler, stirring in between to avoid burning.
- **Chilling between layers:** Always chill the chocolate briefly before adding the peanut butter layer. This helps the layers stay distinct and prevents them from mixing.
- **Topping:** When you add the final layer of chocolate, gently tap the muffin tin on the counter. This will help the chocolate settle evenly and remove any air bubbles.
- **Cooling completely:** Let the cups set in the freezer for at least 30 minutes for the best firmness. If you’re in a rush, even 15 minutes should do, but longer is better!
With these tips, your protein-packed peanut butter cups should turn out deliciously perfect every time!
How to Make Protein Peanut Butter Cups
Ingredients
- 1 cup natural creamy peanut butter (no added sugar or salt)
- 1/4 cup vanilla or chocolate protein powder
- 2 tablespoons honey or maple syrup (adjust based on sweetness preference)
- 1/4 teaspoon sea salt (plus extra flakes for topping)
- 1 1/2 cups dark chocolate chips or chopped dark chocolate (70% cocoa or higher)
- 1 tablespoon coconut oil (optional, for smoother chocolate)
Time Estimate
This recipe takes about 10 minutes to prepare, and 30 minutes to chill. You’ll spend a few minutes mixing and melting, then a little time layering the ingredients. Just let them chill in the fridge or freezer and they’ll be ready to enjoy!
Step-by-Step Instructions
1. Prepare the Peanut Butter Filling
In a mixing bowl, combine the peanut butter, protein powder, honey (or maple syrup), and sea salt. Stir until the mixture is smooth and creamy. If it feels too dry, you can add a little more peanut butter or a teaspoon of water. This will ensure a nice, spreadable texture.
2. Melt the Chocolate
In a microwave-safe bowl, melt the dark chocolate chips along with the coconut oil (if using) in 30-second intervals. Stir well after each interval until the chocolate is completely melted and smooth. Alternatively, you can use a double boiler on the stove to melt the chocolate gently.
3. Create the Chocolate Base
Line a muffin tin with paper cupcake liners. Spoon about 1 to 1.5 teaspoons of the melted chocolate into each liner, spreading it evenly over the bottom. This will create a delicious chocolate base for your cups. Place the tin in the freezer for 5-7 minutes until the chocolate hardens.
4. Add the Peanut Butter Layer
Once the base is firm, spoon about 1 tablespoon of the peanut butter mixture onto the center of each chocolate base. Flatten it slightly, keeping it nice and centered.
5. Top with Chocolate
Using the remaining melted chocolate, spoon another 1 to 1.5 teaspoons over the peanut butter layer. Make sure to cover it completely. Gently tap the muffin tin on the counter to level the tops, which will also help get rid of any air bubbles.
6. Add Finishing Touches
Sprinkle a pinch of flaky sea salt on top of each peanut butter cup for that extra burst of flavor and crunch. It adds a wonderful touch!
7. Chill and Set
Place the muffin tin in the freezer for at least 20-30 minutes, or until the peanut butter cups are fully set and firm. This chilling time is key for the perfect texture!
8. Serve and Store
Once set, remove the peanut butter cups from their liners and enjoy! Store any leftovers in an airtight container in the refrigerator or freezer. They’ll keep firm and fresh, ready for your next sweet craving!
Enjoy your homemade protein-packed peanut butter cups, perfect for a guilt-free snack or dessert!
Can I Use Crunchy Peanut Butter Instead of Creamy?
Absolutely! Crunchy peanut butter will add some delightful texture to your cups. Just make sure it’s natural and doesn’t contain added sugars or oils for the best outcome.
How Can I Store Leftovers?
Store any leftover peanut butter cups in an airtight container in the fridge for up to a week. You can also freeze them for longer storage; just make sure to separate layers with parchment paper to prevent sticking.
Can I Use Milk Chocolate Instead of Dark Chocolate?
Yes, you can use milk chocolate if you prefer a sweeter taste! Just keep in mind that it may have more sugar and less cocoa, so adjust the sweetness of the peanut butter filling accordingly.
What If My Peanut Butter Filling is Too Thick?
If your peanut butter filling seems too thick, don’t hesitate to add a little more honey or a teaspoon of water to achieve a smoother consistency. You want it to be easy to spread but still maintain its shape!