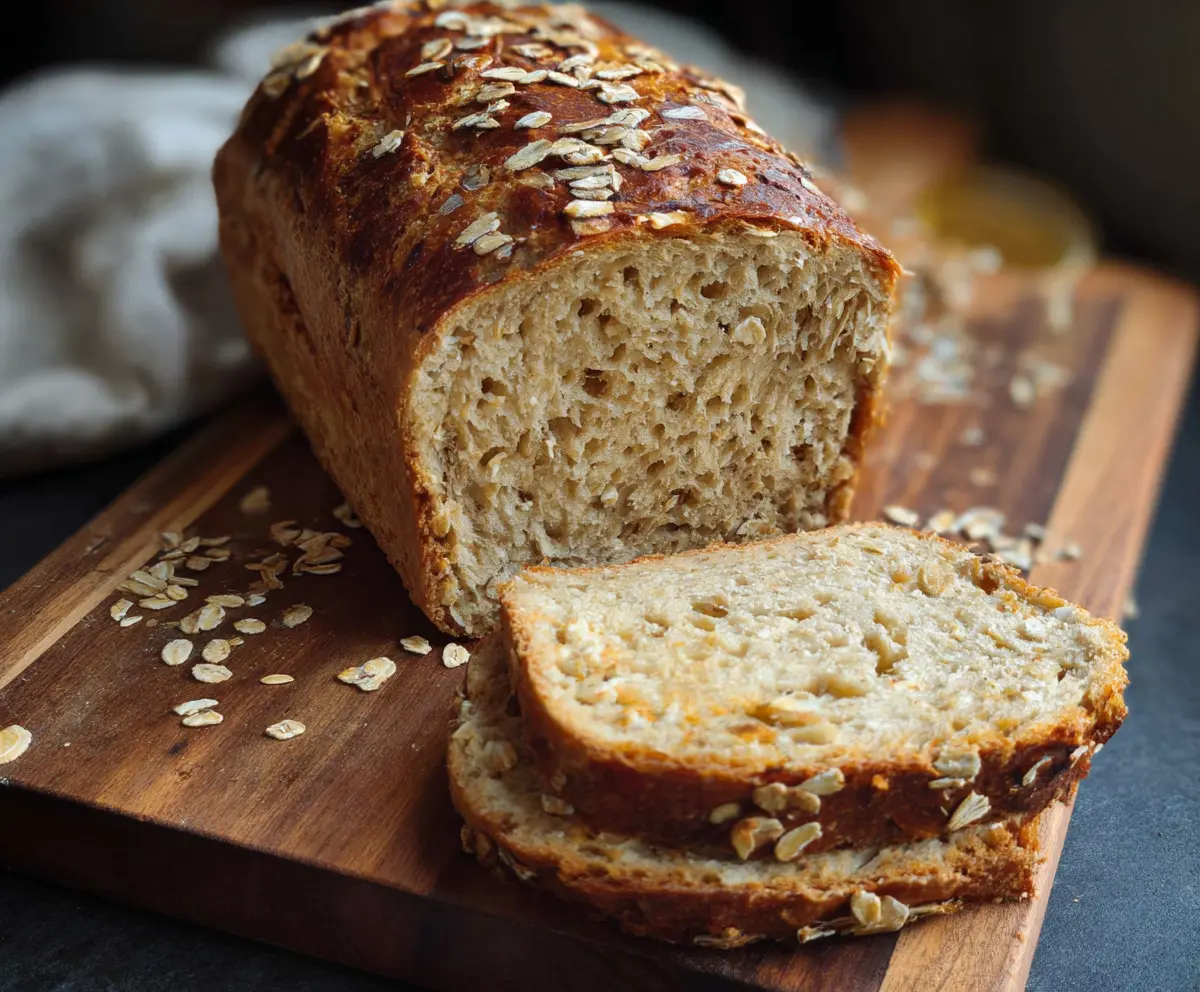
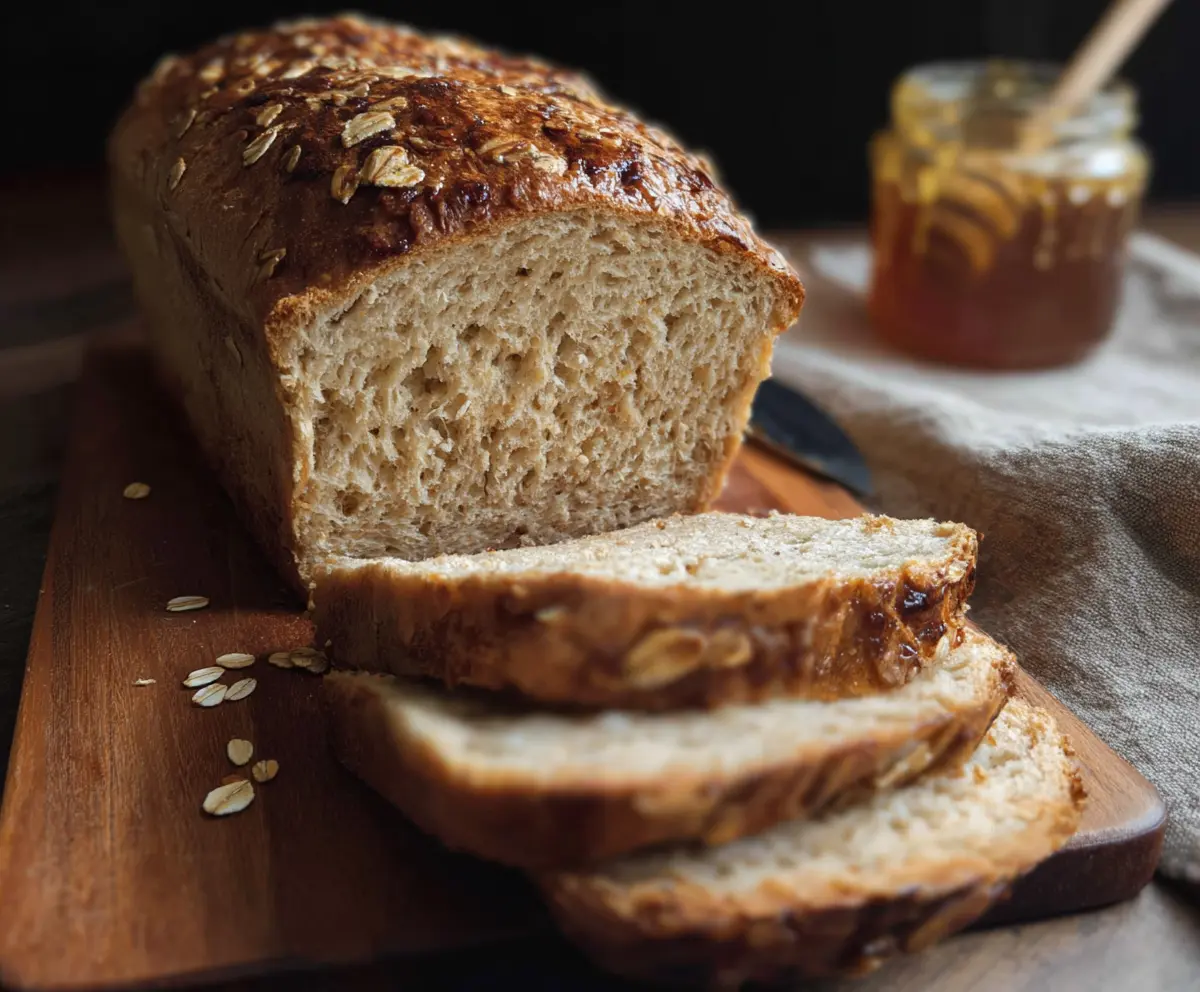
This Honey Oat Sourdough Sandwich Bread is soft, fluffy, and just the right mix of sweet and wholesome. Made with oats and a touch of honey, it’s perfect for tasty sandwiches!
I love how this bread is slightly sweet and has a nice chewy texture. It makes the best toast topped with butter. Just warning you—sharing may be tough! 😄
Key Ingredients & Substitutions
Sourdough Starter: Use a healthy, active starter for the best rise. If you don’t have one, you can look up quick starter recipes, or use store-bought if you’re in a pinch.
Bread Flour: High-protein bread flour gives this bread its structure. If you need a substitute, all-purpose flour can work, but your bread might be slightly less chewy.
Rolled Oats: Add some texture and nutrition. If you have steel-cut oats on hand, they can be used, but you’ll need to cook them first. Quick oats are also fine but might not give the same chewiness.
Honey: For a natural sweetener, honey is great! Maple syrup or agave syrup can be a delicious substitute if needed.
Melted Butter or Oil: For a richer flavor, I recommend butter, but any neutral oil would work fine. Leave it out altogether if you prefer a lighter loaf.
How Do You Properly Knead Dough?
Kneading is an important step in developing gluten for a good rise. It might feel a bit tricky at first, but here’s how to do it:
- Start with a lightly floured surface. Place your dough on it.
- Push the dough away from you with the heels of your hands, then fold it over itself.
- Turn the dough a quarter turn and repeat the process.
- Knead for about 8-10 minutes. The dough is ready when it’s smooth and elastic. If you poke it, it should bounce back.
If you’re using a stand mixer, just keep it on medium speed with a dough hook for the same amount of time.
How to Make Honey Oat Sourdough Sandwich Bread
Ingredients You’ll Need:
- 250g (about 1 cup) active sourdough starter (100% hydration)
- 350g (2 1/3 cups) bread flour
- 100g (scant 1 cup) rolled oats, plus extra for topping
- 1 tablespoon instant yeast (optional, for boost)
- 2 tablespoons honey
- 1 1/4 teaspoons salt
- 260-280g (1 to 1 1/4 cups) warm water (adjust as needed)
- 2 tablespoons melted butter or neutral oil (optional, for richness)
How Much Time Will You Need?
This recipe takes about 4 to 6 hours for the bulk fermentation, plus an additional 1 to 2 hours for proofing. Overall, expect to spend about 45 minutes actively mixing and kneading the dough, with the rest of the time letting it rise. So, make sure you plan ahead!
Step-by-Step Instructions:
1. Mix the Wet Ingredients:
In a mixing bowl, combine your active sourdough starter, honey, and warm water. Give it a good stir until everything is blended well. This base will give your bread its delicious flavor!
2. Combine the Dry Ingredients:
Next, add the bread flour, rolled oats, salt, and instant yeast (if you’re using it) to the wet mixture. Mix everything together until all the flour is hydrated and a rough dough forms. Your dough might be a little sticky, and that’s okay!
3. Knead the Dough:
Now it’s time to knead! You can do this by hand on a floured surface or use a stand mixer with a dough hook. Knead for about 8 to 10 minutes until the dough is smooth and elastic. If it feels too dry, add a teaspoon or two of warm water until it comes together nicely.
4. Bulk Fermentation:
Transfer your well-kneaded dough to a lightly oiled bowl. Cover it with a cloth or plastic wrap, and let it rest at room temperature for about 4 to 6 hours. You’ll know it’s ready when it’s nearly doubled in size. To help develop gluten, you can gently stretch and fold the dough once or twice during this time.
5. Shape the Loaf:
After the fermentation, turn the dough out onto a lightly floured surface. Shape it into a loaf that will fit nicely in a greased 9×5-inch loaf pan. This shaping step helps create tension in the dough for a better rise.
6. Final Proof:
Place the shaped dough in the prepared loaf pan, cover it lightly, and let it proof for another 1 to 2 hours. It should rise just above the rim of the pan when it’s ready!
7. Preheat the Oven:
While your dough is proofing, preheat your oven to 375°F (190°C) so it’s nice and hot when your bread is ready.
8. Add Toppings and Bake:
Once the dough is proofed, brush the top with melted butter or water for a nice shiny finish, then sprinkle some rolled oats over the top for texture. Bake the bread in your preheated oven for 35 to 40 minutes. It’s done when it’s golden brown and sounds hollow when tapped on the bottom.
9. Cool and Enjoy:
After removing the bread from the oven, let it cool completely on a wire rack before slicing. This helps the texture set nicely. Enjoy your homemade Honey Oat Sourdough Sandwich Bread! It’s perfect for sandwiches or just warm with butter.
This bread will fill your kitchen with delicious aroma and delight everyone at the table. Enjoy every bite!
Can I Substitute Whole Wheat Flour for Bread Flour?
Yes, you can use whole wheat flour, but it will result in a denser loaf. If you do, consider using a mix of whole wheat and bread flour for a lighter texture. You may also need to adjust the water amount since whole wheat flour absorbs more liquid.
How Do I Know if My Sourdough Starter is Active?
Your sourdough starter should be bubbly and have doubled in size after feeding, typically within 4-6 hours. If it passes this test and has a pleasant, yeasty smell, it’s good to use!
What Should I Do If The Dough is Too Sticky?
If your dough is too sticky when kneading, sprinkle a little extra flour gradually as you knead until it becomes manageable. Just be careful not to add too much, as this can make the bread dense.
How Do I Store Leftover Bread?
Once your bread has cooled completely, store it in an airtight container or wrap it in plastic wrap at room temperature for up to 3 days. For longer storage, slice it and freeze it in a sealed bag. Just toast or thaw individual slices as needed!