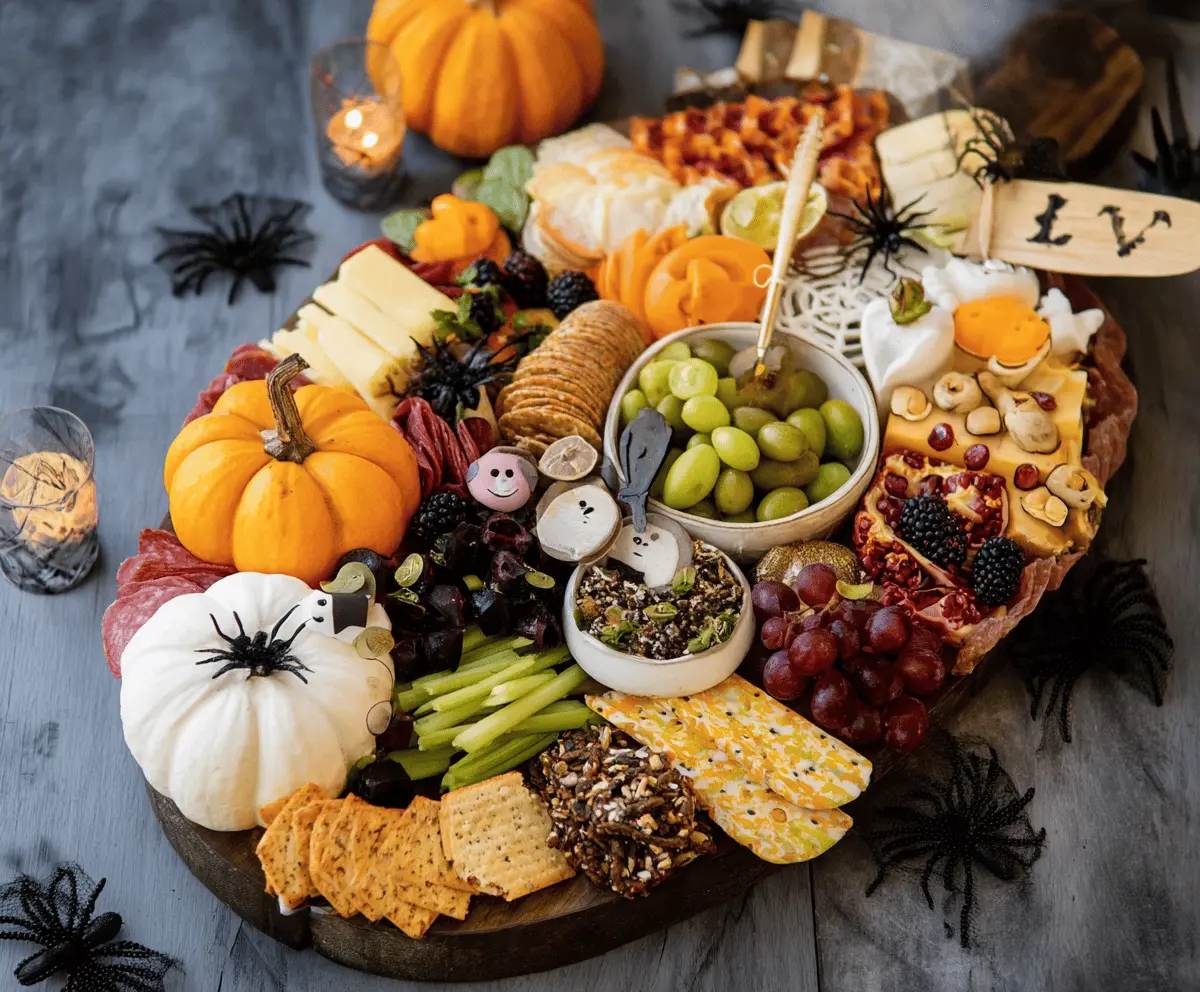
This Halloween Charcuterie Board is a fun and spooky way to celebrate! It’s filled with tasty meats, cheeses, and festive snacks that look delightfully creepy.
Every bite is a little treat, some even shaped like ghosts and pumpkins! I love putting this together with my kids—it always ends up looking a bit messy but that’s part of the fun! 🎃
Key Ingredients & Substitutions
Mini Pumpkins: These not only add a fun decoration but can also be eaten! Use small orange or white pumpkins for a festive touch. If you can’t find them, consider using other seasonal gourds or even vegetables like bell peppers carved into spooky shapes.
Assorted Cheeses: I love using sharp cheddar and colby jack for flavor variety. If you’re dairy-free, try plant-based cheeses or a nut cheese. They can provide similar creaminess and taste!
Crackers: A mix of herb-flavored and seeded crackers adds texture. You can substitute with gluten-free crackers or even sliced veggies like cucumber for a lighter option.
Fruits: Grapes and blackberries are perfect for color and sweetness. You can swap red grapes with apple slices or other seasonal fruit like pears, which also fits the Halloween feel.
Dried Cured Meats: I recommend pepperoni for its bold flavor, but turkey or chicken deli meats work well for a lighter option. You could also use marinated roasted veggies for a vegetarian board.
How Do I Assemble the Perfect Halloween Charcuterie Board?
Creating a Halloween Charcuterie Board is all about balance and creativity! Start with a lovely wooden board or platter to set the stage. Follow these simple steps for a spooky yet delicious creation:
- Place the mini pumpkins at different points on the board to act as eye-catching focal points.
- Arrange cheese slices in small clusters around the board. Neatly fanned slices make for an inviting display.
- Use small bowls for grapes and cheese balls, which helps keep things organized and adds height.
- Fill in empty spaces with crackers and snacks, ensuring variety for aesthetics as well as taste.
- Group sliced meats near the cheeses, and arrange fruits like blackberries and pomegranate to bring color and sweetness.
- Throw in some decorative elements, like black plastic spiders, to enhance the Halloween theme. Use toothpicks or small utensils for serving!
- Finish the board with candles or Halloween-themed decor to set the mood. Your guests will be amazed!
Remember, there are no strict rules—let your creativity shine! The mix of colors, textures, and flavors is what will truly make this board a hit.
How to Create a Spooktacular Halloween Charcuterie Board
Ingredients You’ll Need:
For Decoration:
- Mini pumpkins (small orange and white varieties), for decoration
- Black plastic spiders or spider decorations
For The Cheeses:
- Assorted sliced cheeses (sharp cheddar, colby jack, and a nut-crusted cheese)
For The Snacks:
- Various crackers (herb-flavored, plain, and seeded crackers)
- Waffle chips or sweet potato chips
For The Fruits:
- Green grapes
- Red grapes
- Blackberries
- Pomegranate seeds and pomegranate chunks
- Slices of celery sticks
For The Meats:
- Slices of pepperoni and other dried cured meats
For The Extras:
- Assorted nuts (cashews, pistachios)
- Dark jelly or preserve cubes
- Cream cheese or goat cheese balls decorated with edible faces (ghost and pumpkin designs)
- Lime halves, for garnish
- Small serving bowls for grapes and cheese balls
- A small wooden serving fork or toothpicks
How Much Time Will You Need?
This fun Halloween Charcuterie Board should take about 30-45 minutes to assemble, depending on how detailed you want to get with your decorations. It’s a breeze to put together and perfect for festive gatherings!
Step-by-Step Instructions:
1. Choose Your Base:
Start by selecting a large wooden or rustic serving board. This will be the canvas for your spooky spread!
2. Set the Scene with Mini Pumpkins:
Arrange the mini pumpkins around the board. These create a festive vibe and serve as beautiful focal points.
3. Display Your Cheeses:
Arrange the assorted sliced cheeses in clusters around the board. Fanning out the slices neatly adds a nice touch and makes it easy for guests to grab a piece.
4. Add Bowls of Goodies:
Place the bowls of green grapes and decorated cheese balls in convenient spots. This helps keep everything organized and visually appealing!
5. Fill the Gaps with Crackers:
Use small stacks or scattered piles of various crackers to fill in any empty spaces. Your guests will appreciate the variety and crunch!
6. Include the Meats:
Fold or roll the sliced cured meats and position them near the cheeses to complement the flavors. This creates a cohesive spread!
7. Add Veggies and Chips:
Distribute celery sticks and waffle or sweet potato chips in small bunches around the board for easy snacking. Space them out so they’re easy to reach!
8. Scatter Fruits and Nuts:
Add blackberries, pomegranate seeds, jelly cubes, and assorted nuts all around the board to bring color contrast and additional texture.
9. Garnish with Lime:
Place lime halves near the edges of the board. They not only add a fresh citrus aroma but also enhance the visual appeal!
10. Decorate for Halloween:
Carefully place the plastic spiders around the board and a few in the serving area for a fun, spooky touch that children and adults will enjoy!
11. Serve with Style:
Insert small utensils or toothpicks to help guests serve the cheeses and meats. This makes for easy and sanitary snacking!
12. Create a Spooky Atmosphere:
Light a few candles nearby to enhance the Halloween vibe. The soft glow will make your board even more inviting!
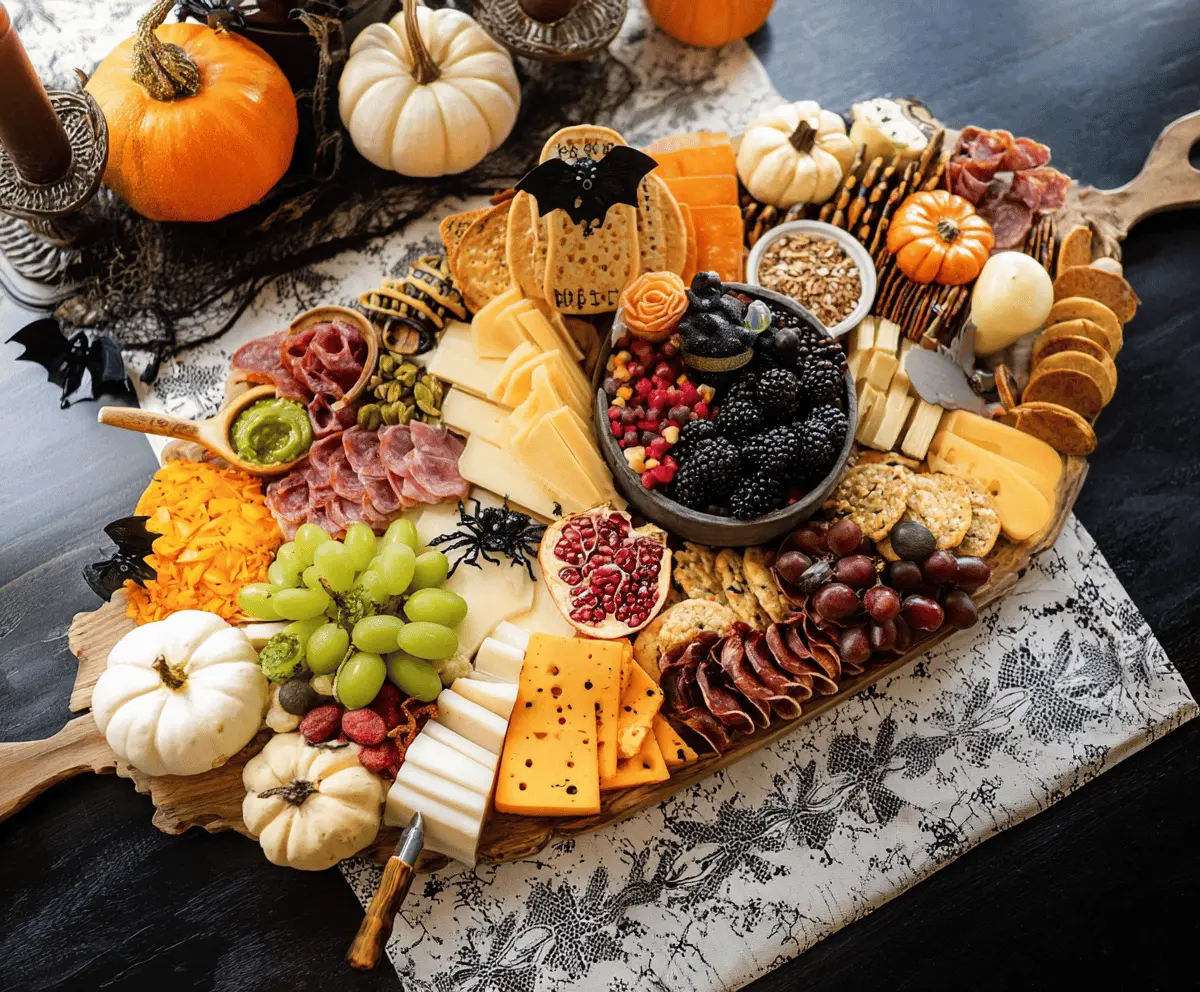
This Halloween Charcuterie Board is a perfect balance of festive decoration and delicious flavors. With its colorful fruits, creamy cheeses, and crunchy elements, it’s sure to be a hit at your party! Enjoy the creative process and have fun celebrating!
Can I Use Different Fruits on the Board?
Absolutely! While green and red grapes, blackberries, and pomegranate are great choices, feel free to swap them with other seasonal fruits like apple slices, pear slices, or even kiwi for a pop of color.
How Do I Store Leftovers?
Any leftovers can be stored in airtight containers in the fridge for up to 3 days. Keep fruits and cheeses separate if possible to maintain freshness. Enjoy the leftover snacks as quick bites or in a salad!
Can I Prepare This Board in Advance?
Yes, you can! Prepare most of the elements a few hours in advance. Just keep the fruits and cheese covered in the fridge. Assemble the board closer to serving time to keep everything looking fresh and inviting.
What Can I Use Instead of Meat for a Vegetarian Board?
For a vegetarian option, load up on more cheeses, add marinated roasted veggies, or include hummus and additional nuts as protein alternatives. You can also use plant-based deli slices if you want a similar texture!