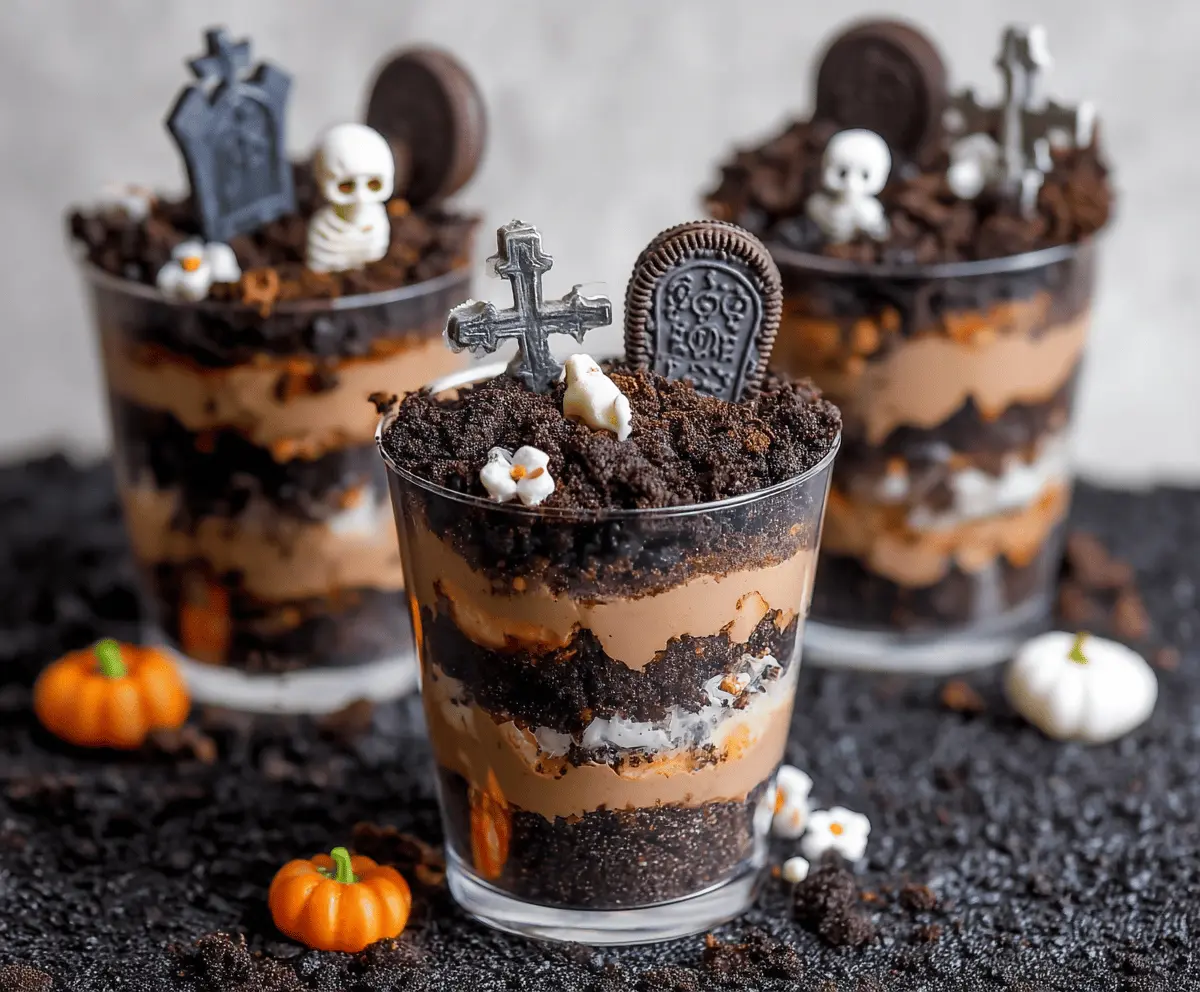
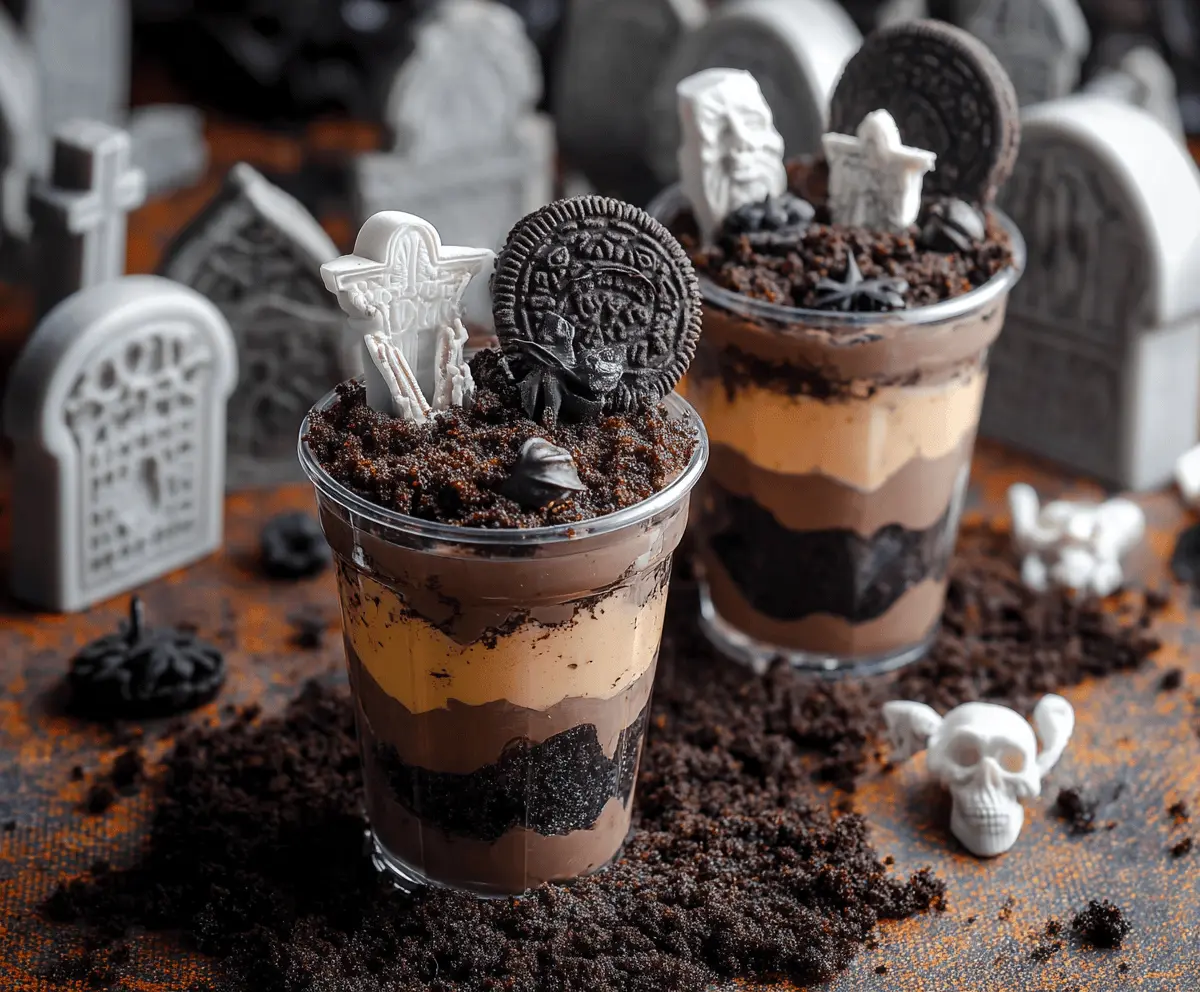
Graveyard Dirt Cups are fun desserts that look like little spooky graveyards! They layer chocolate pudding, crushed cookies, and gummy worms for a treat that’s not just tasty but also a little creepy.
Making these cups is a blast! I love letting the kids help with layering—it’s messy but so much fun! Perfect for Halloween parties or just to add some excitement to dessert time. 🎃
Key Ingredients & Substitutions
Oreo Cookies: The classic choice for that crunchy “dirt” texture! If you’re looking for a non-chocolate option, use chocolate wafer cookies or any other favorite cookie to achieve a similar effect.
Chocolate Pudding: You can use instant pudding for a quick fix or homemade if you want a from-scratch touch. If you’re after a different flavor, try vanilla pudding for a unique twist. Just add a bit of cocoa powder to it.
Whipped Topping: This is optional, but it adds a creamy layer. If you’re looking for a lighter alternative, consider using Greek yogurt or coconut whipped cream for a dairy-free version.
Decorations: While candy skeletons and cookie tombstones are fun, feel free to get creative! Use gummy worms, spooky sprinkles, or different candies that fit your theme or your kids’ favorites.
How Do I Layer the Ingredients for the Best Presentation?
Layering is key to make your Graveyard Dirt Cups both visually appealing and tasty. Here’s a simple way to do it:
- Start with the Dirt: Use enough crushed Oreo cookies to create a thick bottom layer that resembles dirt. This base supports the pudding and adds crunch.
- Add the Pudding: Spoon in the chocolate pudding gently, so it doesn’t mix too much with the cookie layer. This helps maintain the distinct layers.
- Optional Whipped Topping: If you’re using it, add a dollop after the pudding. It gives a lovely creamy texture.
- Repeat Layers: Continue layering until your cups are almost full. Finish with a good amount of cookie crumbs for that dirt look.
- Decorate: The final touches are what make these cups special! Arrange your candy decorations carefully on the top so they stand out. Kids love being involved here!
Chilling these cups helps the layers set nicely. Plus, the longer they chill, the better the flavors meld together!
How to Make Graveyard Dirt Cups
Ingredients You’ll Need:
For the Dirt Layers:
- 3 cups Oreo cookies (about 30 cookies), crushed finely
- 2 cups chocolate pudding (prepared from instant pudding mix or homemade)
- 1 cup whipped topping (e.g., Cool Whip), optional
For Decorations:
- Mini candy skeletons
- Chocolate or cookie tombstones (e.g., Oreo cookies standing as tombstones)
- Candy crosses or other spooky figures
- Candy eyeballs or mini marshmallows decorated as bones
- Small candy pumpkins (optional)
- Candy popcorn or white chocolate popcorn (optional)
How Much Time Will You Need?
This fun treat takes about 15 minutes to prepare, plus about an hour to chill in the refrigerator. It’s the perfect spooky dessert for Halloween parties or themed get-togethers!
Step-by-Step Instructions:
1. Crush the Cookies:
Start by crushing the Oreo cookies into fine crumbs. You can use a food processor for ease or place the cookies in a sealed plastic bag and crush them with a rolling pin. Once they’re nice and crumbly, set them aside.
2. Prepare the Chocolate Pudding:
If you’re using instant pudding mix, follow the package instructions to prepare it. If you prefer making your pudding from scratch, whip up a batch and set it aside to thicken.
3. Build Your Layers:
Grab some clear individual serving cups or small jars. Begin with a few spoonfuls of crushed cookies at the bottom to create the “dirt” layer. Next, add a layer of chocolate pudding over the cookie crumbs. If you’re using whipped topping, add a dollop on top of the pudding layer for extra creaminess. Repeat the layering process of cookie crumbs and pudding until the cups are nearly full, finishing with a good sprinkle of cookie crumbs on top to resemble dirt.
4. Decorate Your Graves:
Now comes the fun part! Decorate the top of each cup with Halloween-themed edible decorations. Place candy skeletons, Oreo cookie tombstones, candy crosses, and candy eyeballs on top to create a spooky graveyard scene.
5. Add Final Touches:
Sprinkle in small candy pumpkins and a few popcorn “bones” or candy flowers for a festive feel.
6. Chill Before Serving:
Cover the dirt cups and chill them in the refrigerator for about 1 hour. This helps the layers set nicely and makes them even more delicious!
7. Enjoy Your Spooky Treat:
Once chilled, grab some spoons and dig into these delightful Graveyard Dirt Cups. They’re sure to be a hit at any Halloween celebration!
These tasty cups are a fun mix of chocolate pudding, cookie crumbs, and spooky decorations, making them a fantastic treat that everyone will love! Happy Halloween!
Can I Use Other Types of Cookies Instead of Oreos?
Absolutely! While Oreos provide a classic taste, you can substitute them with chocolate wafer cookies or even graham crackers for a different flavor. Just make sure they are crushed finely for the “dirt” layer!
How Long Do These Cups Last in the Refrigerator?
Graveyard Dirt Cups can be stored in the refrigerator for up to 2-3 days in an airtight container. They might start to lose some texture, so it’s best to enjoy them fresh for maximum crunchiness!
Can I Make This Recipe Gluten-Free?
Yes, you can! Use gluten-free chocolate sandwich cookies in place of Oreos, and check the pudding mix for gluten-free options. This way, everyone can enjoy these spooky treats!
What Other Decorations Can I Use?
The possibilities are endless! Try adding gummy worms, edible glitter, or spooky sprinkles. Get creative with any Halloween-themed candies you have on hand to personalize your graveyard cups!