
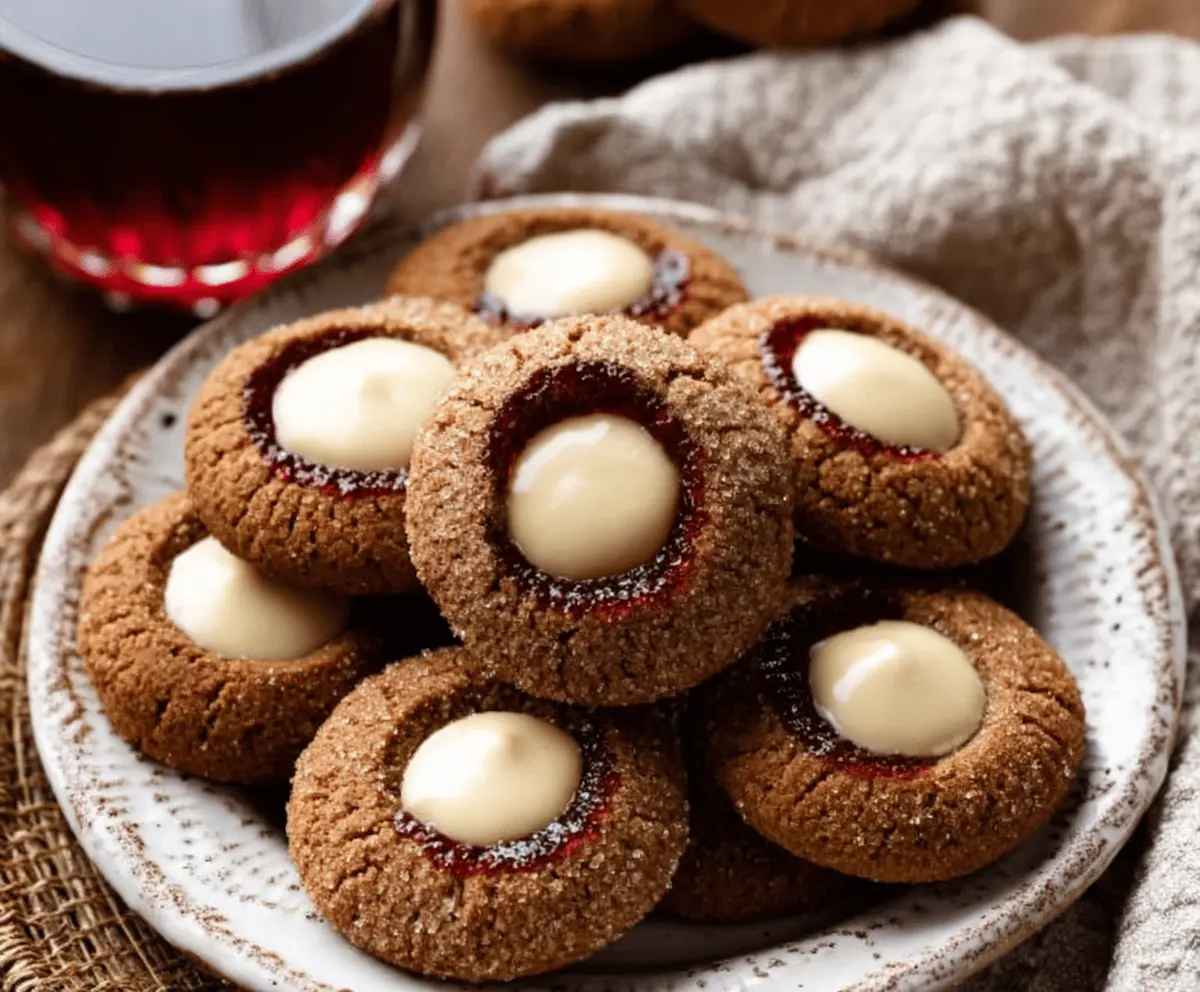
These Gingerbread Thumbprint Cookies are a holiday treat that will warm your heart! They feature a spicy gingerbread base and a sweet filling right in the middle.
Making these cookies is a fun activity! I love watching the filling bubble up while they bake. Perfect for sharing or keeping all to yourself—no judgment here! 😄
Key Ingredients & Substitutions
All-Purpose Flour: This is the base for your cookies. If you want to make them gluten-free, try using a gluten-free all-purpose blend. Just make sure it has xanthan gum to help with texture.
Ground Spices: Ginger, cinnamon, cloves, and nutmeg give these cookies their warm flavor. If you’re missing one, a pumpkin spice blend can work in a pinch! Adjust to taste.
Unsalted Butter: I prefer unsalted butter for better control over saltiness. If you want a plant-based option, coconut oil can substitute, but it might change the flavor a bit.
Molasses: This gives the cookies their distinctive flavor. If you don’t have molasses, you can use honey or maple syrup, but the taste will vary slightly.
Creamy Filling: You can get creative here! I love using cream cheese frosting, but caramel and nut butters are delicious too. If a nut allergy is a concern, go for lemon curd!
How Can I Ensure My Cookies are Light and Chewy?
The key to light and chewy cookies is in the mixing process and baking time. Be sure not to overmix the dough when you combine the dry and wet ingredients. Overmixing can lead to tough cookies.
- After creaming the butter and sugars, add the egg and molasses, then mix just until combined.
- When baking, keep an eye on the cookies. Removing them from the oven while they’re still slightly soft allows them to firm up perfectly as they cool.
- Press down your thumb gently for the perfect indentation—too hard might cause the cookies to crack.
Using these tips will help you enjoy wonderfully textured gingerbread thumbprint cookies every time! Enjoy baking! 😊
How to Make Gingerbread Thumbprint Cookies
Ingredients You’ll Need:
For the Cookie Dough:
- 2 1/4 cups all-purpose flour
- 2 teaspoons ground ginger
- 1 teaspoon ground cinnamon
- 1/2 teaspoon ground cloves
- 1/4 teaspoon ground nutmeg
- 1/2 teaspoon baking soda
- 1/4 teaspoon salt
- 3/4 cup (1 1/2 sticks) unsalted butter, softened
- 1/2 cup granulated sugar
- 1/3 cup light brown sugar, packed
- 1 large egg
- 1/4 cup molasses
- 1 teaspoon vanilla extract
- Granulated sugar or coarse sanding sugar (for rolling)
For the Filling:
- 1/2 cup creamy or slightly thick filling for the thumbprint center (examples include cream cheese frosting, dulce de leche, or lemon curd)
How Much Time Will You Need?
This recipe takes about 20 minutes for preparation and about 10-12 minutes to bake. Allow some time for the cookies to cool completely before serving. Overall, you’ll spend about 45 minutes from start to finish, making these festive goodies a quick and delightful treat for your family and friends!
Step-by-Step Instructions:
1. Preheat the Oven:
Start by preheating your oven to 350°F (175°C). Line your baking sheets with parchment paper or silicone mats to prevent sticking. This will help your cookies bake evenly and come off easily!
2. Mix the Dry Ingredients:
In a medium bowl, whisk together all-purpose flour, ground ginger, cinnamon, cloves, nutmeg, baking soda, and salt. This mix is what gives your cookies that lovely spice flavor. Set it aside while you work on the wet ingredients.
3. Cream the Butter and Sugars:
In a large bowl, use a hand mixer to beat the softened butter with granulated sugar and light brown sugar. Mix it until it’s light and fluffy. This process incorporates air into the batter, making your cookies soft and chewy!
4. Add the Wet Ingredients:
Next, beat in the egg until incorporated. Then add in the molasses and vanilla extract, mixing until everything is well blended. This is where the delicious gingerbread flavor comes from!
5. Combine Wet and Dry Mixtures:
Gradually add the flour mixture to the wet ingredients, mixing just until combined. Be careful not to overmix; you want a soft dough, not a tough one.
6. Form the Cookies:
Scoop tablespoon-sized balls of dough and roll each one in granulated sugar or coarse sanding sugar until coated. This gives your cookies a sweet sparkle!
7. Arrange on Baking Sheet:
Place your dough balls on the prepared baking sheets, making sure to leave about 2 inches of space between each cookie, as they will spread while baking.
8. Make Thumbprints:
Using your thumb or the back of a teaspoon, gently press an indentation into the center of each cookie. This is where your yummy filling will go!
9. Bake the Cookies:
Pop the baking sheets in your preheated oven and bake for 10 to 12 minutes. Keep an eye on them; they should look set but still soft in the middle.
10. Fill the Centers:
As soon as you take the cookies out of the oven, you may need to press the indentation again gently to ensure it’s deep enough. Then, fill each center with about 1/2 teaspoon of your chosen creamy filling.
11. Cool Completely:
Let the cookies cool on the baking sheet until they firm up. This is important—cooling allows them to set and makes them easier to handle!
12. Serve and Enjoy:
Once cooled, these Gingerbread Thumbprint Cookies are ready to be served. Enjoy these delightful treats with friends and family during the holiday season or any time you crave a little sweetness!
This recipe yields about 24 delicious cookies that blend the warm spices of gingerbread with the sweetness of the filling. Perfect for sharing or savoring alone—enjoy every bite!
Can I Substitute Ingredients in This Recipe?
Absolutely! If you need a gluten-free option, use a gluten-free all-purpose flour blend. For the butter, coconut oil can be used as a dairy-free alternative. Just be aware it may slightly change the flavor.
How Should I Store Gingerbread Thumbprint Cookies?
Store these cookies in an airtight container at room temperature for up to 5 days. If you want them to last longer, you can refrigerate them, but be sure to bring them to room temperature before serving for the best flavor and texture!
Can I Make the Dough Ahead of Time?
Yes! You can prepare the dough a day in advance. Just wrap it tightly in plastic wrap and refrigerate. When you’re ready to bake, let it sit at room temperature for about 15 minutes before rolling into balls.
What Filling Can I Use Besides Cream Cheese Frosting?
You have lots of options! Try dulce de leche, lemon curd, or even a flavored nut butter for a tasty variety. Just ensure the filling is thick enough to hold its shape in the thumbprint indentation!