This Easy Cottage Cheese Peanut Butter Ice Cream is a creamy treat that’s both tasty and healthy! It combines smooth cottage cheese with rich peanut butter for a delightful twist.
The best part? You don’t need an ice cream maker! Just blend, freeze, and scoop. I love sneaking spoonfuls of this guilt-free dessert when nobody is watching! 😋
Key Ingredients & Substitutions
Cottage Cheese: Cottage cheese gives this ice cream its creamy texture. You can use low-fat or full-fat based on your preference. If you’re looking for a dairy-free option, try silken tofu for a similar texture!
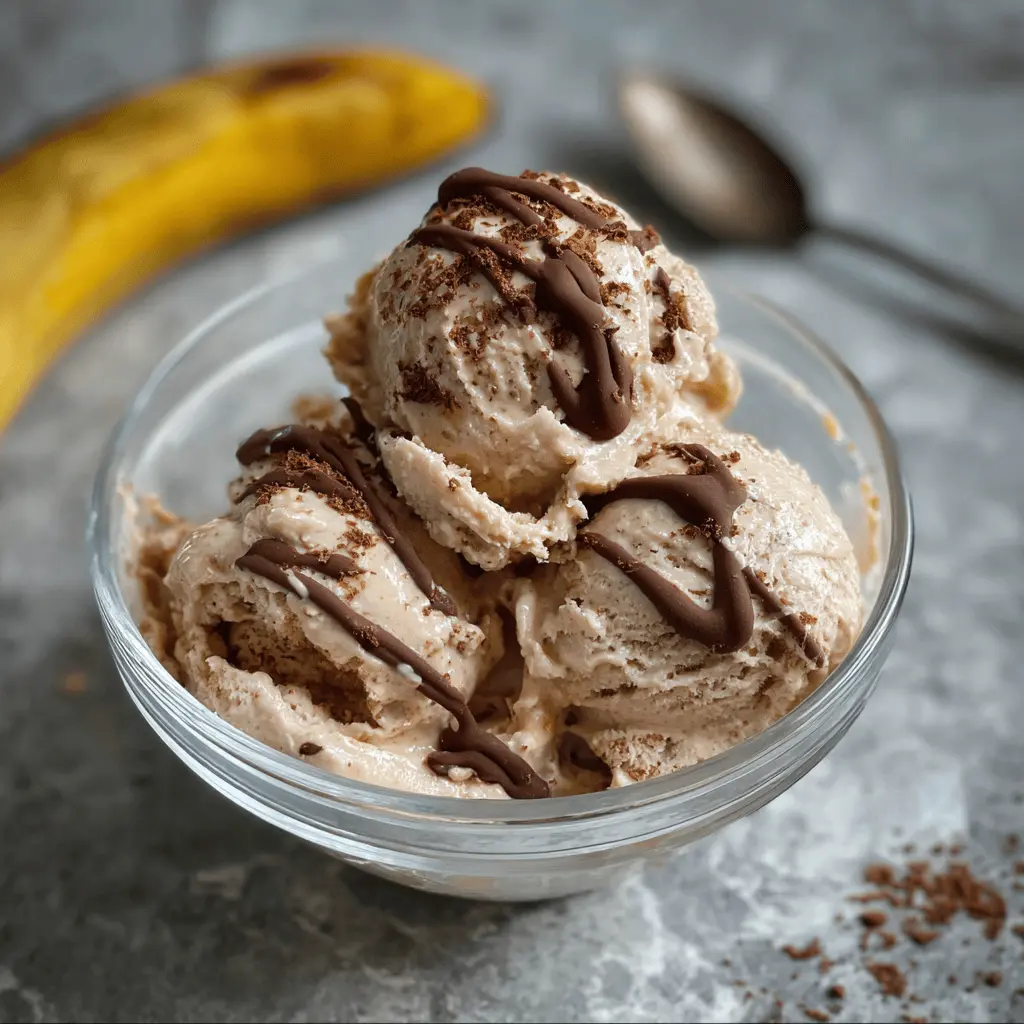
Bananas: Ripe bananas are essential for natural sweetness and creaminess. Don’t worry if they are overripe; that’s perfect! If bananas aren’t your thing, you could swap in frozen mango or even avocado for a unique flavor.
Peanut Butter: I love creamy peanut butter for smoothness, but chunky gives a nice texture. Almond butter or sunflower seed butter are great alternatives, especially for nut allergies.
Cocoa Powder: Unsweetened cocoa powder adds a rich chocolate flavor. If you’re not a chocolate fan, you can skip it entirely or use carob powder for a different taste.
Sweetener: Honey or maple syrup brings sweetness to balance flavors. For a low-calorie alternative, consider using stevia or monk fruit sweetener.
How Do You Achieve Smooth Ice Cream Consistency?
The blending step is crucial for a creamy texture. Make sure your bananas are frozen to get that nice, ice-cream-like consistency. If your mixture is too thick, don’t hesitate to add a splash of milk gradually. It’s all about finding that perfect balance!
- Start by freezing the banana chunks. The riper they are, the sweeter they will be!
- Once frozen, add all ingredients to your blender and start blending on low, gradually increasing speed.
- Scrape down the sides if needed and blend until completely smooth.
- Remember to taste as you go so you can adjust sweetness and peanut butter according to your liking!
Following these tips will transform your creation into a delicious, healthy dessert that you can feel good about enjoying!
Easy Cottage Cheese Peanut Butter Ice Cream
Ingredients You’ll Need:
- 1 cup cottage cheese (preferably low-fat or full-fat based on preference)
- 2 ripe bananas
- 1/3 cup peanut butter (creamy or chunky based on preference)
- 1/4 cup unsweetened cocoa powder
- 2-3 tablespoons honey or maple syrup (to taste)
- 1 teaspoon vanilla extract
- Pinch of salt
- Optional: 1/4 cup milk (dairy or plant-based), if needed to blend smoothly
How Much Time Will You Need?
This recipe takes about 10 minutes to prepare and requires at least 2-3 hours to freeze. So, you’ll spend a bit of time blending, and then you can relax while it firms up in the freezer!
Step-by-Step Instructions:
1. Freeze the Bananas:
Start by peeling the bananas, cutting them into chunks, and placing them in a freezer bag or container. Make sure to freeze them for at least 2 hours or overnight. This step is key to achieving a creamy ice cream texture!
2. Blend the Ingredients:
Once the bananas are frozen, grab a high-speed blender or food processor. Add the cottage cheese, frozen banana chunks, peanut butter, cocoa powder, honey or maple syrup, vanilla extract, and a pinch of salt into the blender. Blend on low to start, gradually increasing the speed until everything is nice and smooth.
3. Check Consistency:
After blending, check the mixture. If it’s too thick or if your blender is having trouble, add a little milk (dairy or plant-based) gradually until you reach your desired ice cream consistency. This step is all about making it just right!
4. Sweeten to Taste:
Before transferring the mixture to a container, give it a quick taste. Adjust the sweetness if necessary by adding more honey or maple syrup, or even a bit more peanut butter if that’s your thing!
5. Freeze the Mixture:
Pour the blended mixture into a freezer-safe container. Cover it and place it in the freezer for at least 2-3 hours. This step allows the ice cream to firm up nicely in texture.
6. Serve & Enjoy:
When you’re ready to serve, take the ice cream out of the freezer and let it sit at room temperature for a few minutes. This will make it easier to scoop. Then scoop out the creamy goodness, and enjoy a delicious scoop of homemade ice cream!
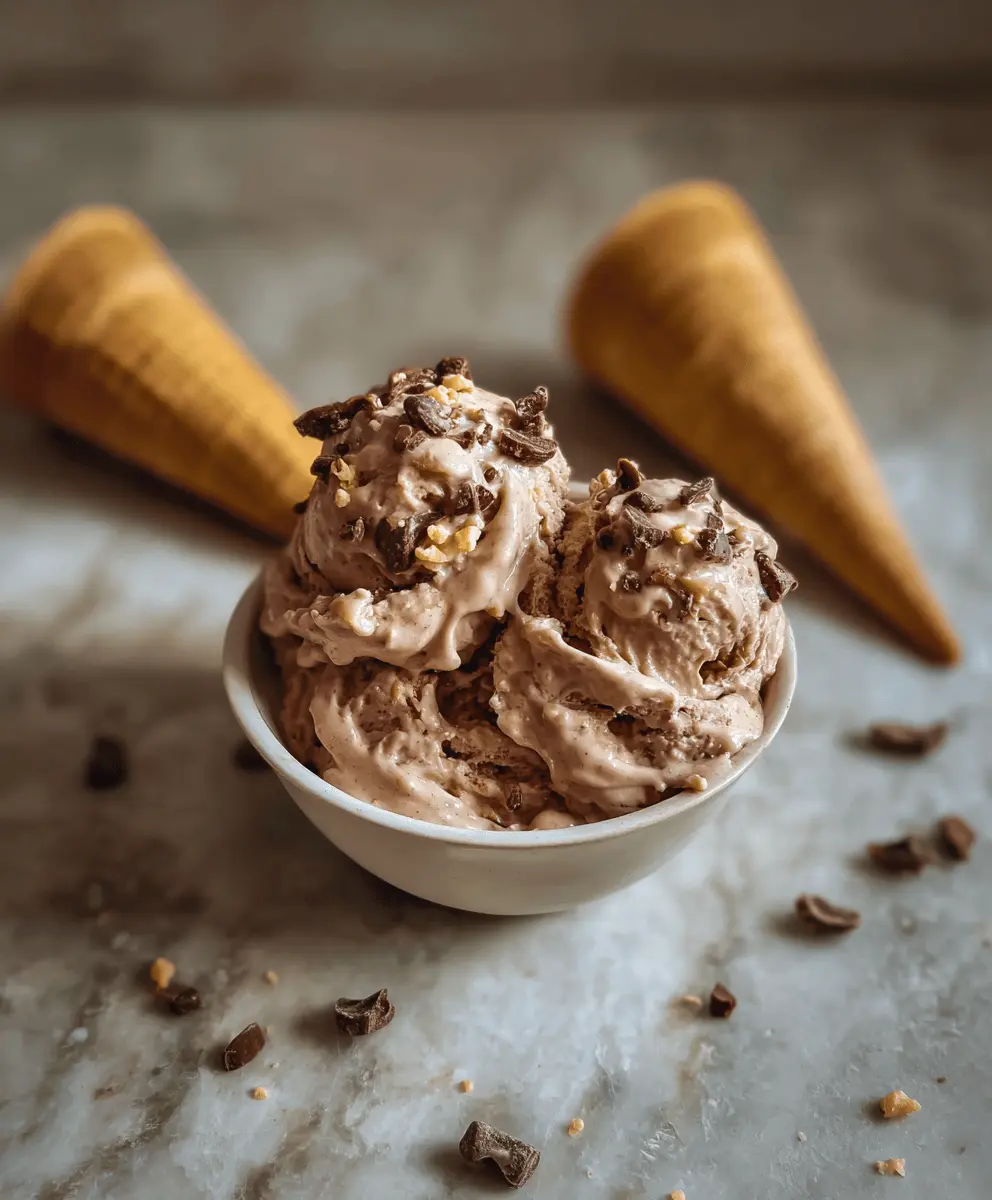
7. Toppings (Optional):
Feel free to add some fun toppings like chopped peanuts, chocolate chips, or a drizzle of peanut butter to take your ice cream to the next level!
This ice cream is not only delicious but also packed with protein from cottage cheese and peanut butter, making it a healthier indulgence!
FAQ for Easy Cottage Cheese Peanut Butter Ice Cream
Can I Use Alternative Sweeteners?
Absolutely! You can substitute honey or maple syrup with alternatives like agave nectar, stevia, or monk fruit sweetener to lower the calories or for a different flavor profile. Start with a small amount and adjust to your taste.
What Should I Do If the Ice Cream Is Too Hard After Freezing?
If your ice cream feels too hard after freezing, let it sit out at room temperature for about 5-10 minutes before scooping. You can also blend it again briefly to soften it up or add a little milk while blending to achieve a creamier consistency.
How Long Can I Store Leftover Ice Cream?
Your homemade ice cream can be stored in the freezer for about 1-2 weeks. Just make sure it’s in an airtight container to prevent ice crystals from forming. For the best texture, consume it within the first week!
Can I Add Mix-Ins?
Definitely! You can mix in chocolate chips, crushed nuts, or even swirls of jam before freezing. Just fold them in gently after blending for a fun texture and added flavor!