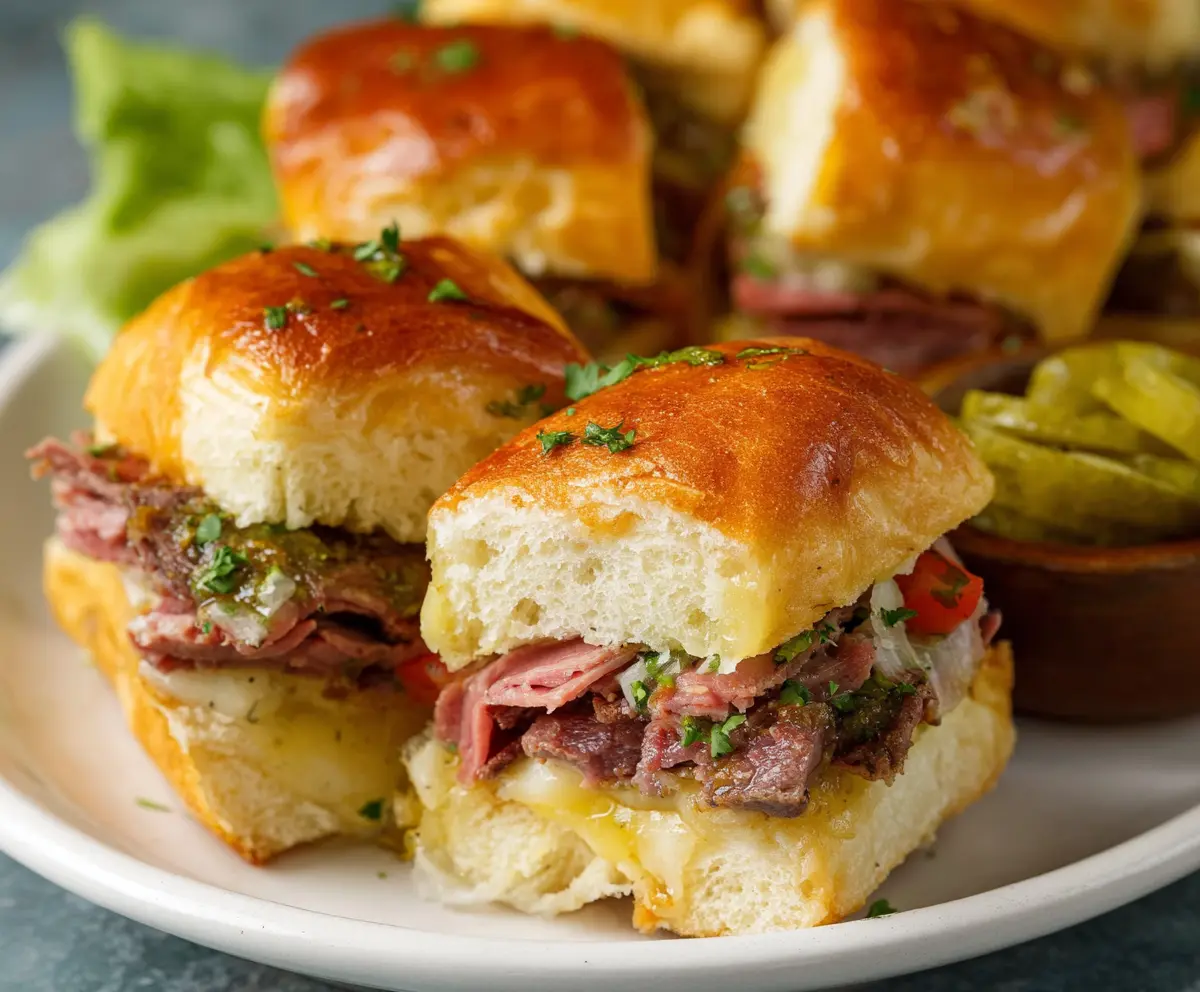
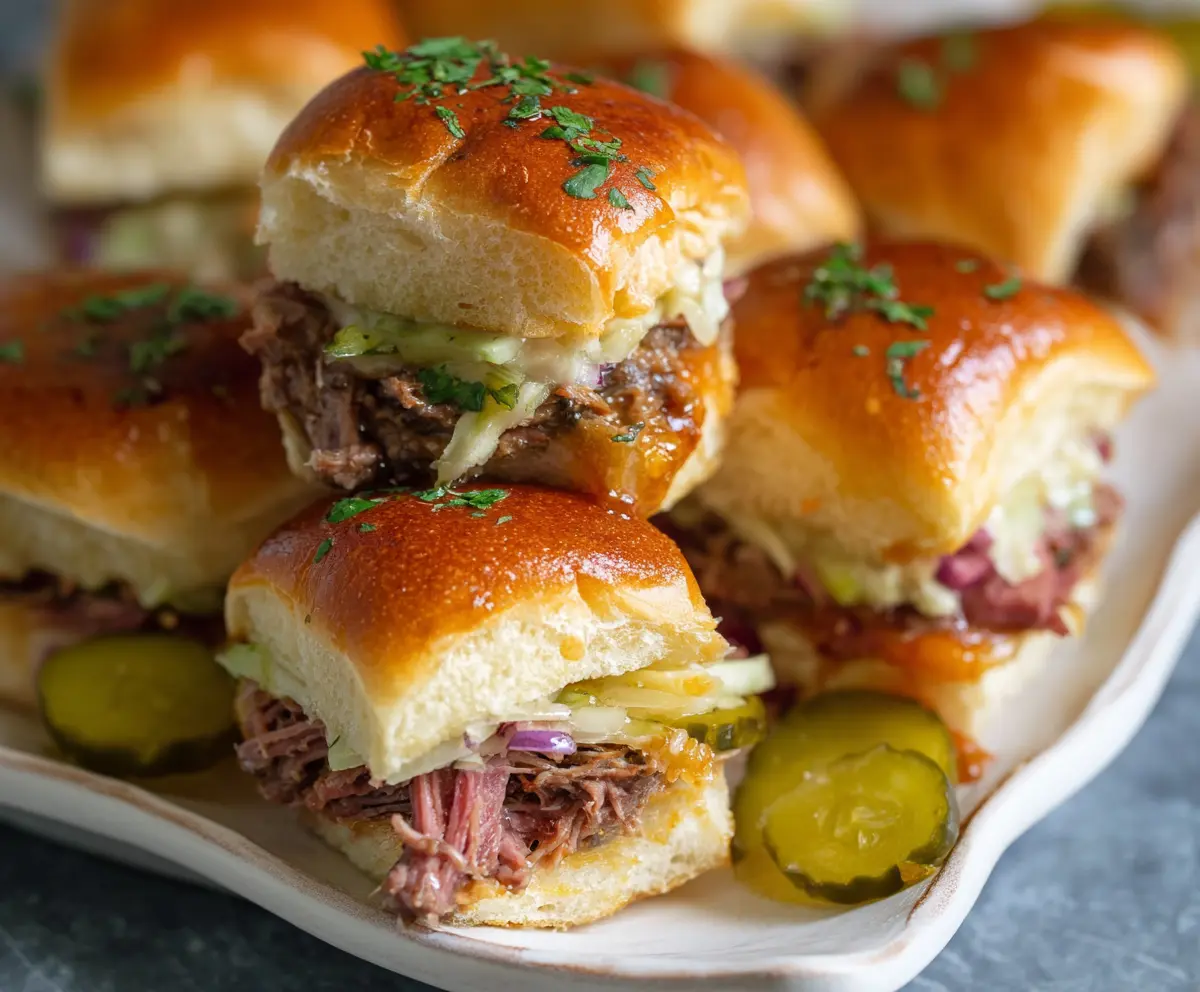
Cuban sliders are tasty little sandwiches filled with juicy pork, ham, cheese, and pickles, all tucked in fluffy bread. They’re perfect for parties or a fun snack at home!
These mini delights pack a flavorful punch, and I can never eat just one. Trust me, they disappear fast! 🥪 I love serving them with a side of mustard for dipping—yum!
Key Ingredients & Substitutions
Slider Buns: I recommend using soft dinner rolls or Hawaiian rolls for the perfect balance of sweetness and texture. If you’re looking for a lighter option, you could try whole wheat slider buns or even lettuce wraps for a low-carb version.
Roasted Pork: The star of the show! Look for slow-roasted pork, which you can find at a deli or grocery store. If you don’t have pork, shredded chicken or turkey can work in a pinch for a different twist.
Deli Ham: Ham brings that classic Cuban flavor. If you’re not a fan or prefer a healthier option, turkey or grilled vegetables can replace ham without losing too much flavor.
Swiss Cheese: Swiss is traditional, but feel free to use provolone or even pepper jack for a little extra kick. If you’re dairy-free, there are good plant-based cheese alternatives available.
Dill Pickles: Dill pickles add that tangy crunch. If you prefer, bread-and-butter pickles could add a nice sweetness. You can also skip the pickles if you prefer a milder flavor.
How Do You Make Perfect Cuban Sliders Without Soggy Bread?
The key to avoiding soggy sliders is layering and baking them correctly. Start by keeping the bottom buns dry. Use just enough mayonnaise and mustard to coat without soaking. When assembling, stack the pork, ham, and cheese to create a buffer against moisture from the pickles.
- Assemble buns with the spreads first.
- Layer ingredients tightly, using cheese to insulate against moisture.
- Cover tightly with foil to avoid directly steaming them, then bake so the tops get a bit crispy.
Lastly, enjoy them right after baking, as using leftovers can lead to soggy bread! If you have any remaining sliders, store them in an airtight container and reheat in the oven for a crisp texture.
How to Make Cuban Sliders
Ingredients You’ll Need:
For the Sliders:
- 12 slider buns (soft dinner rolls or Hawaiian rolls)
- 1 lb roasted pork, thinly sliced or shredded
- 1/2 lb deli ham, thinly sliced
- 12 slices Swiss cheese
- 1/2 cup dill pickle slices
For the Condiments:
- 1/4 cup yellow mustard
- 1/4 cup mayonnaise (optional)
For the Glaze:
- 2 tablespoons butter, melted
- 1 tablespoon Dijon mustard
- 1 tablespoon Worcestershire sauce
- 1 teaspoon garlic powder
For Garnish:
- 1 tablespoon fresh parsley, chopped
How Much Time Will You Need?
This flavorful recipe takes about 30 minutes in total! You’ll spend approximately 10 minutes prepping the ingredients and assembling the sliders, and about 20 minutes baking and getting them golden and delicious. Don’t forget to let them cool for a few minutes before digging in!
Step-by-Step Instructions:
1. Preheat the Oven:
Start by preheating your oven to 350°F (175°C) to get it ready for baking those sliders.
2. Prepare the Buns:
Carefully slice the slider buns horizontally without fully separating them. Keep the batch intact for easy assembly. This will make building your sliders quick and fun!
3. Make the Glaze:
In a small bowl, mix together the melted butter, Dijon mustard, Worcestershire sauce, and garlic powder. This tasty glaze will bring extra flavor to the tops of the sliders!
4. Spread the Condiments:
Take the bottom half of the buns and spread them evenly with mayonnaise (if you’re using it) and yellow mustard. This not only adds flavor but also helps to keep the buns moist.
5. Layer the Fillings:
Now, it’s time for the good stuff! Layer the sliced roasted pork evenly over the bottom buns, followed by the ham slices. Then, place a slice of Swiss cheese over the ham on each slider. Finally, add the dill pickle slices evenly on top of the cheese to give it that classic Cuban flavor!
6. Combine the Buns:
Carefully place the top half of the buns over all those delicious layers. You’re almost there!
7. Apply the Glaze:
Brush the prepared glaze generously over the top of the buns. This will create a beautiful golden crust as they bake.
8. Bake the Sliders:
Cover the tray tightly with aluminum foil and place it in the preheated oven. Bake for about 15 minutes, or until the cheese is nicely melted and the sliders are heated through.
9. Brown the Tops:
After 15 minutes, remove the foil and bake for an additional 5 minutes to let the tops get a little brown and crispy. Yummy!
10. Serve:
Remove the sliders from the oven, cut them apart with a sharp knife, and garnish with chopped fresh parsley for a pop of color. Serve warm with extra pickles and mustard on the side if desired.
Enjoy your delicious Cuban Sliders, which are perfect for gatherings or simply as a tasty snack!
Can I Use Different Meats in These Sliders?
Absolutely! While traditional Cuban sliders use roasted pork and ham, you can substitute with shredded chicken, turkey, or even a plant-based alternative if you prefer a vegetarian option. Just keep the flavors balanced!
Can I Prepare These Sliders Ahead of Time?
Yes! You can assemble the sliders up to a day in advance. Just cover them tightly with plastic wrap or foil and refrigerate. When you’re ready to bake, allow them to come to room temperature, then bake as directed.
How Do I Store Leftover Sliders?
Store any leftovers in an airtight container in the refrigerator for up to 3 days. To reheat, place them in a preheated oven at 350°F (175°C) for about 10 minutes, or until warmed through. This helps keep the buns from getting soggy.
Can I Make These Sliders Gluten-Free?
Yes, you can easily make these sliders gluten-free by using gluten-free slider buns. Just double-check the labels on all the other ingredients, like cheese and condiments, to ensure they’re gluten-free as well!