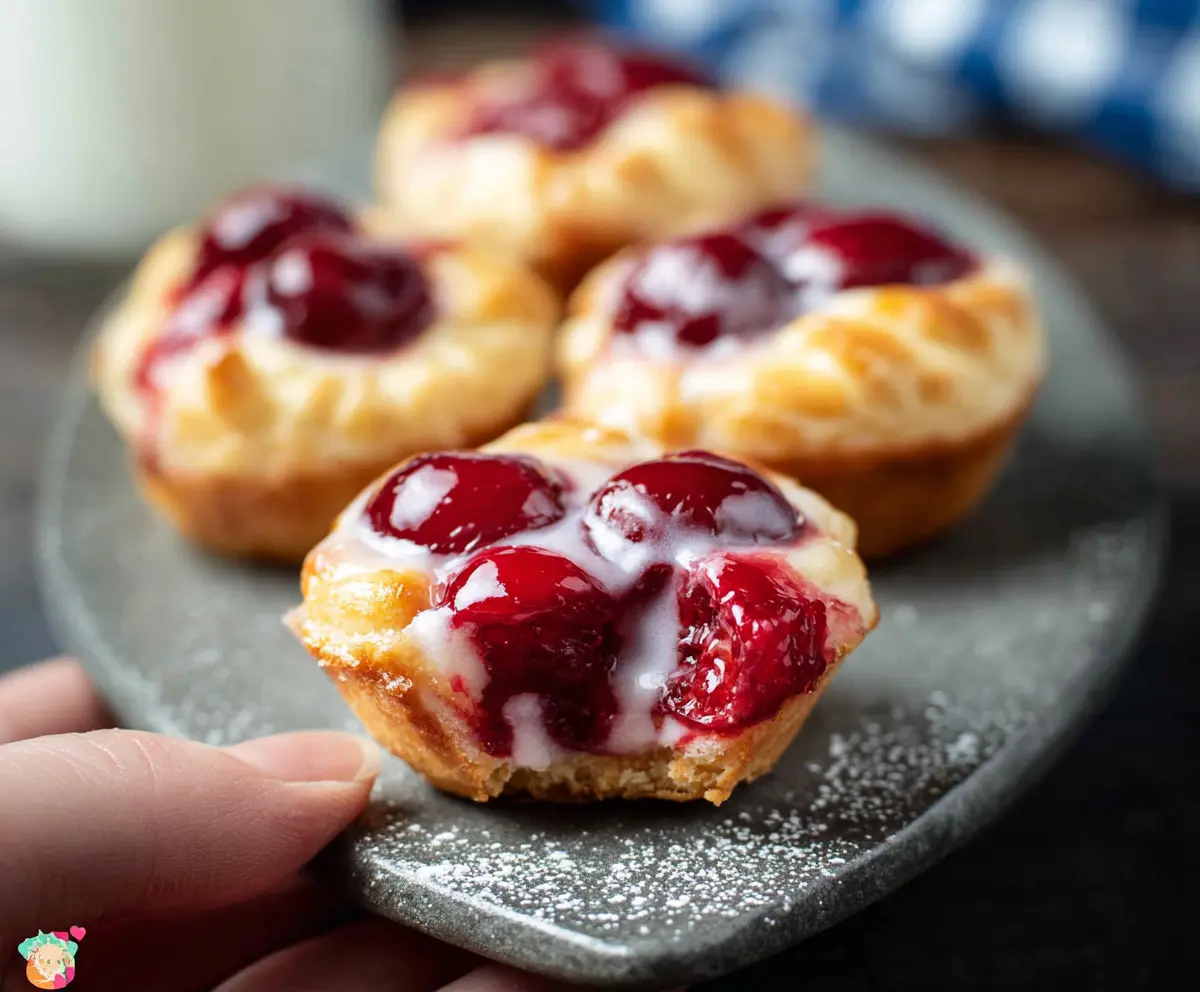
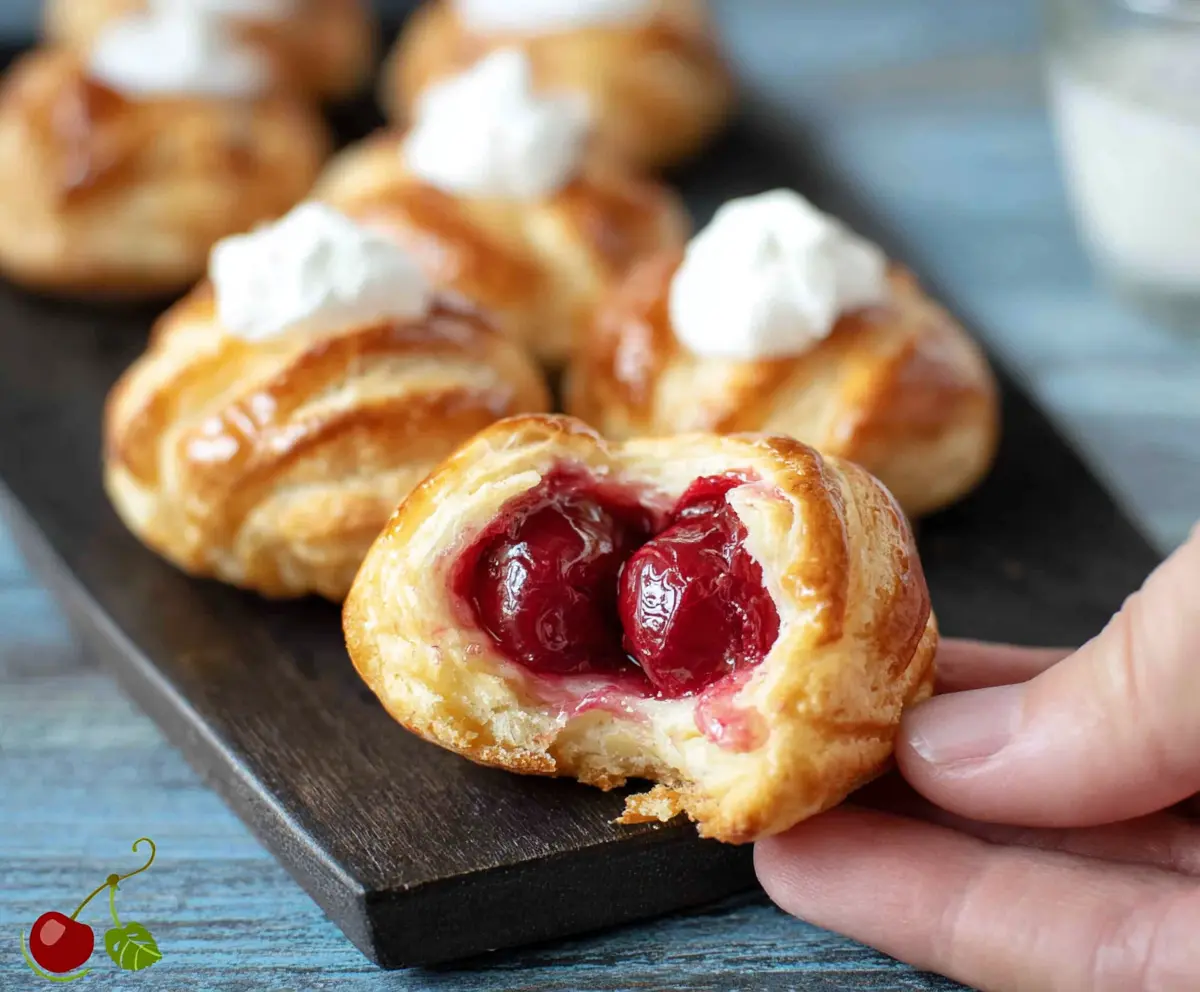
Cherry Pie Bites are cute, little pockets of happiness filled with sweet cherry filling and wrapped in a flaky crust. They’re perfect for snack time or dessert!
Making these bites is super easy, and they’re great for sharing—if you want to! I usually grab a few and enjoy them with a scoop of ice cream. Yum!
Ingredients & Substitutions
Pie Crusts: Refrigerated pie crusts make life easier! If you’re feeling adventurous, you can make your own from scratch or use puff pastry instead. Just be sure to adjust the baking time based on what you choose.
Cherry Pie Filling: Canned cherry pie filling is super convenient. If it’s cherry season, consider using fresh cherries! Just cut them up and mix with a bit of sugar and cornstarch to thicken. You could also use other fruits like blueberries or apples!
Cream Cheese: This adds a creamy layer to the bites. If you want a lighter option, try using mascarpone or even Greek yogurt. You can skip it altogether if you prefer just cherry filling.
Egg Wash: The egg wash gives that golden shine, but if you are vegan, you can use almond milk or a simple cornstarch-water mix instead.
How Do I Get the Perfect Mini Pie Crusts?
Creating the mini pie crusts can be tricky, but here are some tips to make it easier:
- Use a round cookie cutter or glass to cut even circles from the pie crusts. Aim for about 2-3 inches in diameter.
- Gently press the dough circles into the muffin tin. Make sure to press the edges up slightly for a nice cup shape.
- Don’t worry if the dough tears a little; you can patch it with extra dough. It will still taste great!
- Brush the edges lightly with the beaten egg for a beautiful brown color.
Taking your time with these crusts will pay off when you see the finished product! Enjoy your baking!
Cherry Pie Bites
Ingredients You’ll Need:
- 1 package refrigerated pie crusts (usually 2 crusts in a package)
- 1 can (21 oz) cherry pie filling
- 4 oz cream cheese, softened
- 1/4 cup granulated sugar
- 1 teaspoon vanilla extract
- 1 egg, beaten (for egg wash)
- 1/2 cup powdered sugar (for glaze)
- 2 tablespoons milk (for glaze)
How Much Time Will You Need?
This recipe takes about 15 minutes for prep and then around 15-18 minutes to bake. After that, just let the bites cool for a few minutes before you serve them. In total, you’re looking at about 40 minutes from start to finish. So, in no time, you’ll have delicious cherry pie bites ready to enjoy!
Step-by-Step Instructions:
1. Preheat and Prepare Your Muffin Tin:
First, turn your oven to 375°F (190°C) and get it nice and hot! While it’s warming up, lightly grease a mini muffin tin to prevent sticking. You want those cherry pie bites to come out smoothly!
2. Make the Pie Crust Cups:
Unroll the refrigerated pie crusts and use a round cutter (or a glass) to cut out small circles, about 2-3 inches across. You’ll need enough circles to fit into each mini muffin cup, with a bit of overhang for that rustic look. Carefully press these circles into each cup, forming little crust cups. Don’t worry if they aren’t perfect—they’ll taste delicious either way!
3. Mix the Cream Cheese Filling:
In a medium bowl, combine the softened cream cheese, granulated sugar, and vanilla extract. Use a mixer or a whisk to beat this mixture until it’s smooth and creamy. This sweet, creamy layer is what makes these bites special!
4. Fill the Crusts:
Now it’s time to layer the goodness. Spoon about 1 teaspoon of your cream cheese mixture into the bottom of each pie crust cup. Then, add about a tablespoon of cherry pie filling on top of the cream cheese. The cute little layers add flavor and an appealing look!
5. Seal and Brush:
If there’s any excess dough hanging over the edge of the cups, you can gently fold it over for a nice finish. Grab that beaten egg and brush it lightly over the exposed dough edges. This will give them a lovely golden color when baked.
6. Bake to Perfection:
Place your mini muffin tin in the preheated oven and bake for 15-18 minutes. Keep an eye on them! You’re looking for a golden brown crust and bubbly filling. The aroma will be mouthwatering!
7. Cool and Prepare the Glaze:
Once they’re baked, take them out and let them cool in the tin for about 5 minutes. Afterwards, carefully transfer them to a wire rack to cool down a bit more. While they’re cooling, whisk together the powdered sugar and milk in a small bowl until smooth for your glaze.
8. Drizzle and Serve:
Finally, drizzle that tasty glaze over the warm cherry pie bites. You can serve them warm or at room temperature. Enjoy every delicious bite of your cherry pie bites—they’re perfect for any occasion!
Happy baking!
Can I Use Frozen Pie Crusts Instead of Refrigerated?
Absolutely! Just make sure to thaw the frozen pie crusts according to the package instructions before rolling them out. They work just as well and can save you some prep time!
What If I Don’t Have Cream Cheese?
No worries! You can skip the cream cheese altogether and just use cherry pie filling for a more straightforward version. Alternatively, try using mascarpone or a nut-based cream for a different twist!
How Should I Store Leftovers?
Store any leftover cherry pie bites in an airtight container in the fridge for up to 3 days. Before eating, you can warm them up in the oven at a low temperature or in the microwave for a few seconds to regain that freshly baked taste.
Can I Make These Ahead of Time?
Yes, you can prepare the crust cups and the cream cheese mixture in advance. Assemble them right before baking for the best results. Just store everything separately in the fridge until you’re ready to bake!