Bloomin’ grilled apples come off the grill soft in the center, caramelized at the edges, and just sturdy enough to hold their shape when you fan them open. The slices catch the cinnamon butter in every cut, so each bite tastes like warm baked apples with a little extra smoke from the fire. Served with vanilla ice cream, they turn into the kind of dessert people hover around before the plates even hit the table.
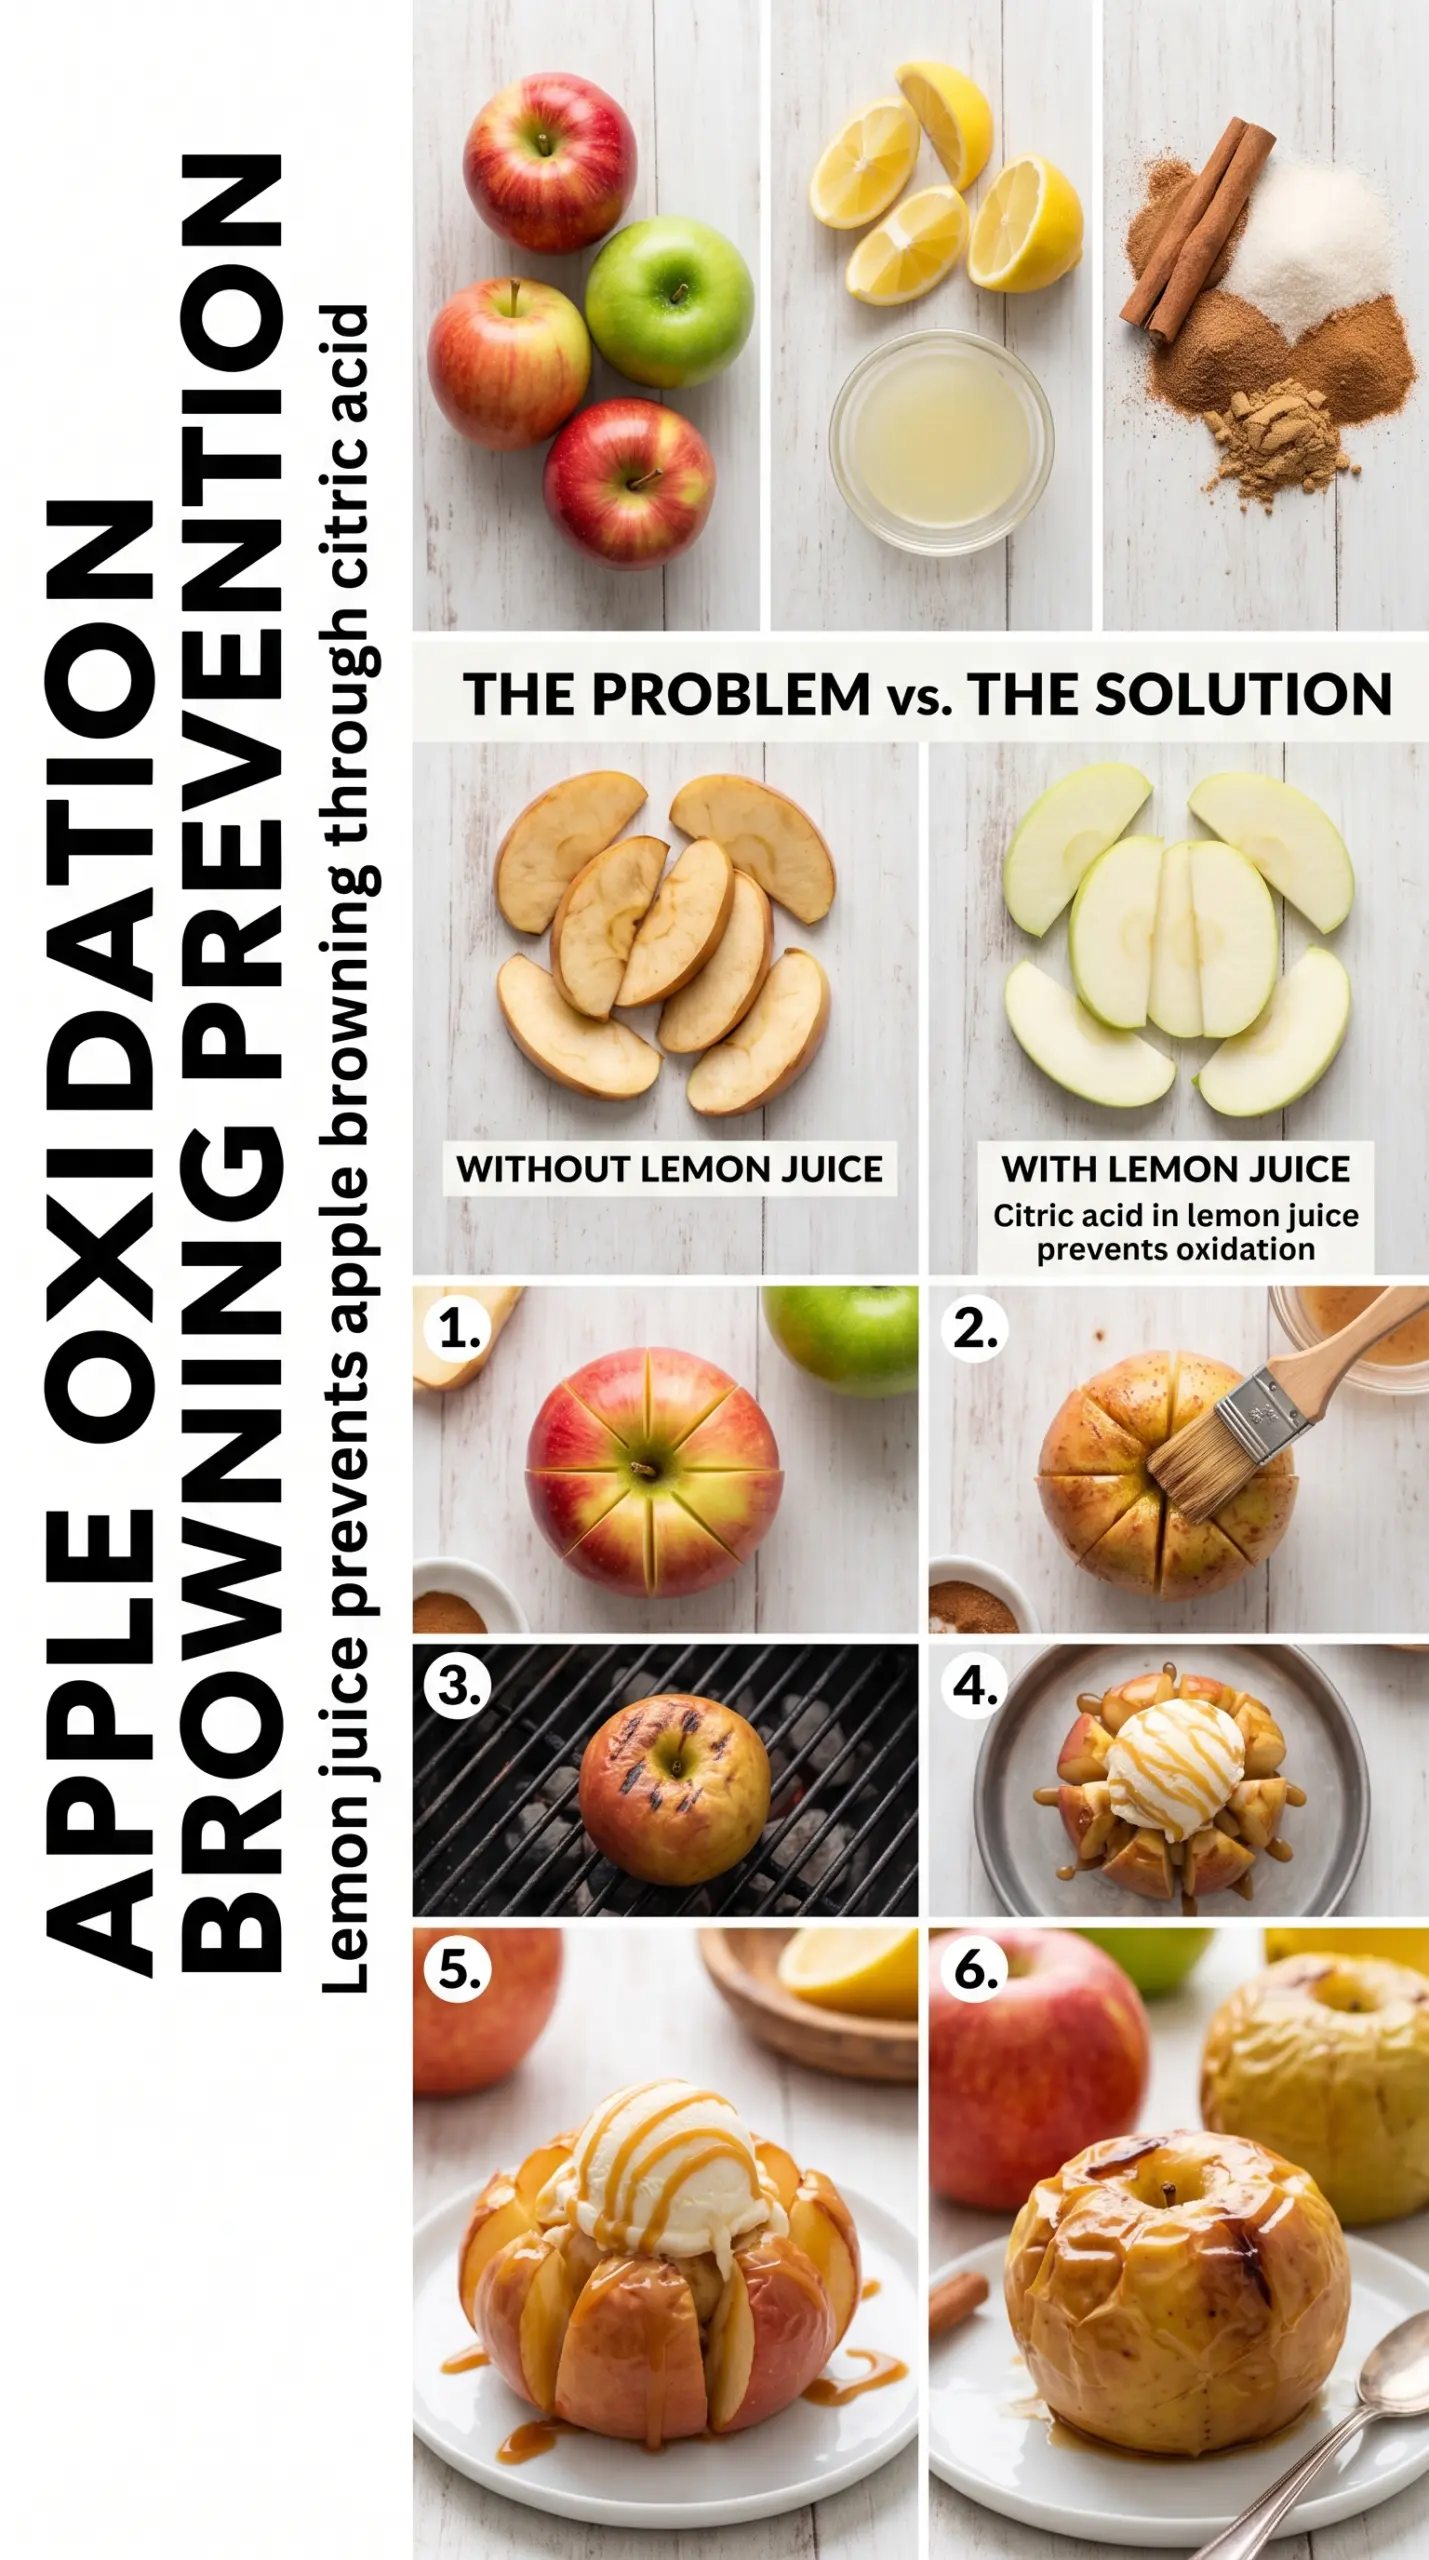
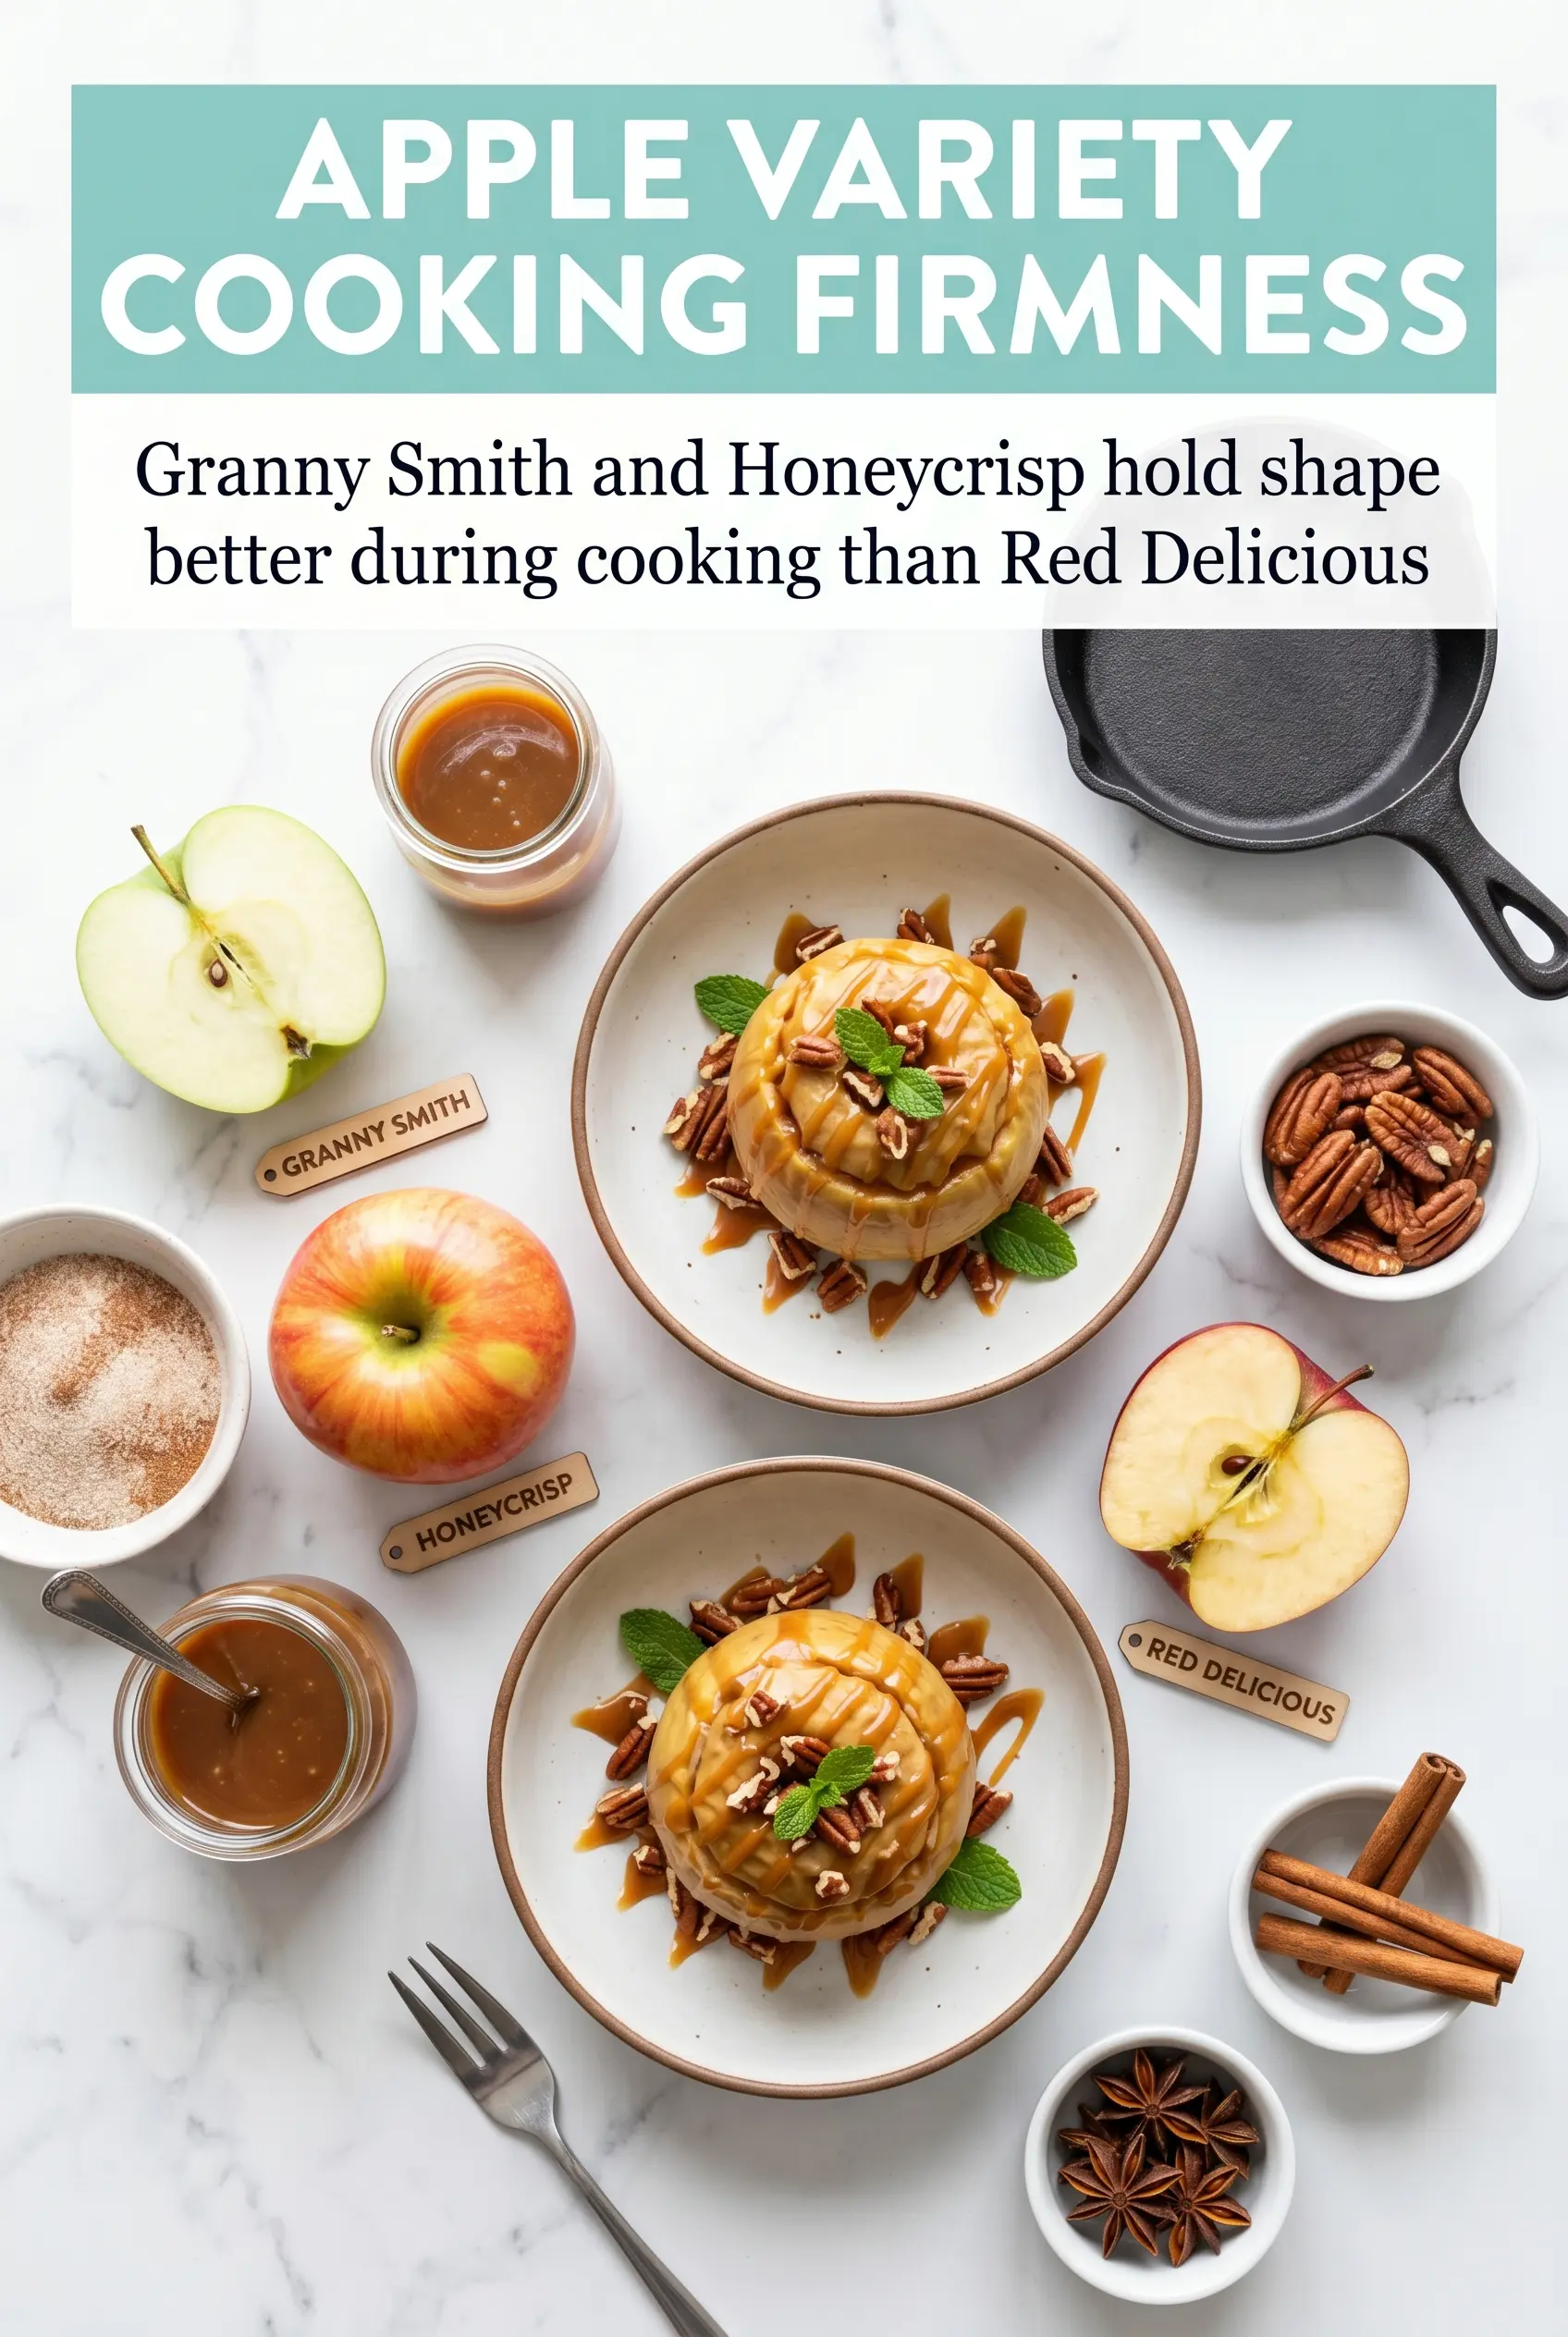
What makes this version work is the shape. Cutting the apple into thin vertical slices without going through the bottom gives the heat and butter a place to get in, while the foil around the base helps the fruit steam just enough to tenderize before the sugars fully caramelize on top. Granny Smith keeps its tart edge and stays firm; Honeycrisp gives a sweeter finish and a little more juice. Either one holds up better than a soft baking apple would.
Below, I’ve included the small details that keep the apples from collapsing, plus a few smart swaps if you want to change the spice, the fruit, or how you serve them.
The apples fanned open perfectly on the grill and the cinnamon butter soaked into every slice. I used Honeycrisp, and they stayed tender without turning mushy.
Save these bloomin’ grilled apples for the dessert that brings caramelized fruit and warm cinnamon butter together in one skillet-grill finish.
The Cut That Keeps These Apples Standing Up on the Grill
The trick here isn’t just slicing the apple thin. It’s stopping the knife before it hits the bottom so the fruit stays anchored while the heat moves through the cuts. That gives you the blooming effect without losing the apple to the grates or ending up with a pile of soft wedges.
Foil around the base does two jobs at once: it protects the cut end from direct flame and it traps enough steam to tenderize the fruit before the sugars on top start to darken. If the grill is too hot, the outside will brown before the center softens. Medium heat is the sweet spot because it lets the apple cook through while the cinnamon butter turns glossy and sticky instead of burning.
What the Butter, Sugar, and Apple Each Bring to the Fire
- Apples — Granny Smith gives you the sharpest contrast against the sweet topping and stays firm after grilling. Honeycrisp is a little sweeter and juicier, which works well if you want a softer, dessert-forward finish. Avoid apples that go mealy when heated; they lose that clean fan shape.
- Butter — Melted butter carries the cinnamon and brown sugar into the slices and helps the top caramelize. I use real butter here because it browns and perfumes the apples in a way margarine can’t match. If you need dairy-free, use a plant-based butter with a similar fat content so the sugar still melts into a glaze.
- Brown sugar — This is what turns the butter into a syrup that clings. White sugar will sweeten, but it won’t give you the same molasses note or the same sticky finish.
- Cinnamon — Cinnamon matters more than usual because the grill gives it a deeper, toastier edge. Fresh cinnamon reads cleaner and warmer, while an old jar can taste flat. If you want to change the spice, add a pinch of nutmeg or cardamom, but keep cinnamon in the mix for the classic apple-pie feel.
How to Grill the Apples So They Caramelize Instead of Collapse
Scoring the Apple Without Splitting It
Set each apple upright and cut thin slices from top to bottom, stopping just short of the base. The cuts should be close together, but the apple still needs a solid bottom so it can fan open instead of falling apart. If you slice all the way through, the grill heat will separate the pieces and you’ll lose the bloom.
Brushing on the Cinnamon Butter
Mix the melted butter, brown sugar, and cinnamon until the sugar starts to loosen and look syrupy. Brush it into the cuts and over the top, then gently nudge the slices apart with your fingers so the mixture can run between them. If the sugar sinks to the bottom of the bowl, stir again before brushing; otherwise the first apple gets all the spice and the last one gets mostly butter.
Using the Foil to Control the Heat
Wrap only the bottom of each apple in foil and leave the top exposed. That keeps the cut base from scorching while the exposed slices take on color and caramelization. Place them over medium heat and close the lid. If your grill runs hot, move the apples to a cooler zone after a few minutes so the top doesn’t burn before the center softens.
Knowing When They’re Done
Grill for 12 to 15 minutes, checking for tender slices that still hold their fan shape. A knife should slide in with little resistance, but the apple shouldn’t slump when you lift it. If the top looks dark before the fruit feels tender, the heat is too aggressive and you need to lower it or move them off direct flame.
How to Change These Grilled Apples Without Losing the Point
Dairy-Free Grilled Apples
Swap the butter for a good dairy-free baking stick or plant butter. You’ll still get the glossy coating and caramelized top, but the flavor will be a little less rich, so use a version with a clean buttery taste rather than a watery spread.
Less-Sweet, More Apple-Forward
Cut the brown sugar back to 2 tablespoons and add a pinch of salt. That keeps the glaze from turning candy-sweet and lets the tartness of the apple come through more clearly. This works best with Granny Smith.
Oven-Baked Version
If you don’t have a grill, bake the apples in a 400°F oven for about 18 to 22 minutes. You won’t get the same smoky edge, but the apples still soften and caramelize nicely. Put them in a small baking dish and baste once halfway through so the top doesn’t dry out.
Make-Ahead for a Crowd
Slice and fan the apples, then mix the butter topping ahead of time and keep both chilled separately. Assemble right before grilling so the cut surfaces don’t brown and the apples keep their shape. Once cooked, these are at their best right away, while the edges are still sticky and warm.
Serving and Holding
Serve the apples as soon as they come off the grill with vanilla ice cream. If you need to hold them for a few minutes, tent them loosely with foil so they stay warm without steaming themselves into mush. The ice cream should go on at the last second so it melts into the grooves instead of disappearing instantly.
Answers to the Questions Worth Asking
Bloomin' Grilled Apples
Ingredients
Equipment
Method
- Cut thin slices into the apples from top to bottom without cutting all the way through, keeping the bottoms intact like a blooming fan.
- Mix the melted butter, brown sugar, and cinnamon until thick and evenly combined.
- Fan the apple slices open slightly and brush all over with the cinnamon butter mixture, letting glaze fall into the crevices.
- Wrap the bottom of each apple in foil, leaving the top exposed so the slices can caramelize.
- Grill over medium heat for 12-15 minutes until the apples are tender and caramelized, with visible cinnamon-sugar browning on the cut edges.
- Serve the bloomin' grilled apples warm with vanilla ice cream right away for a melty contrast.