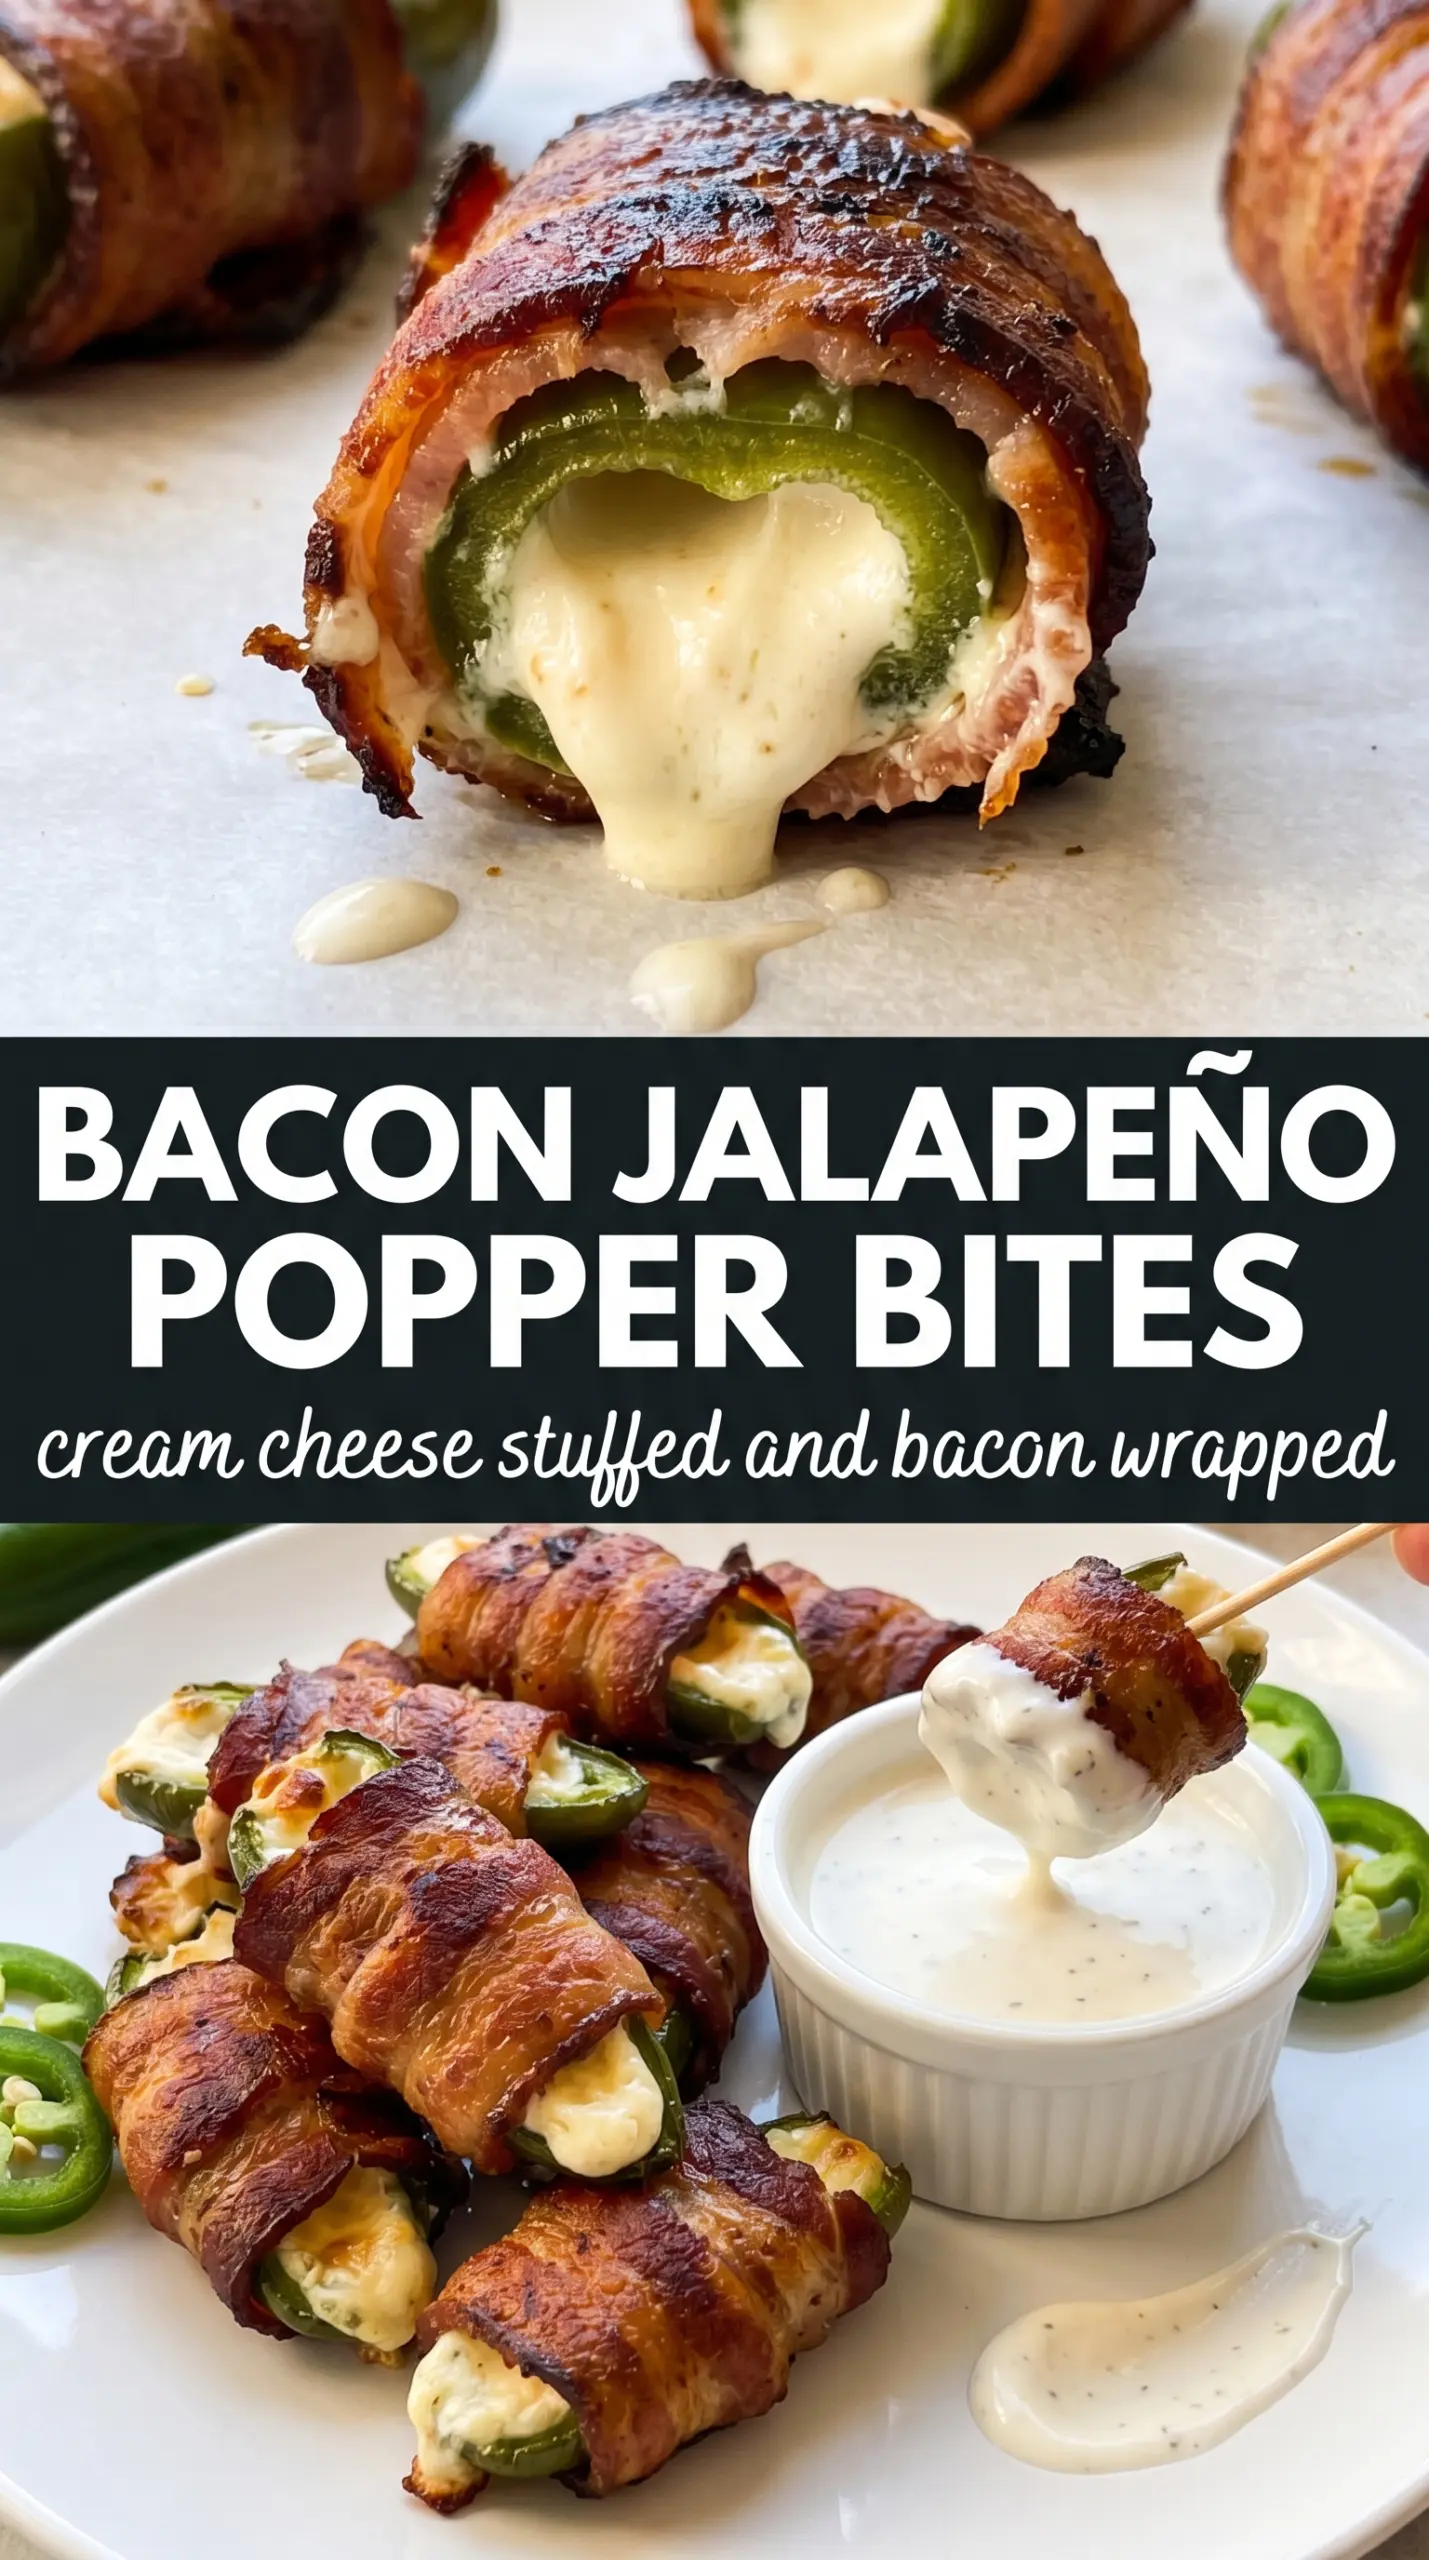
Bacon jalapeño popper bites come out with the best kind of contrast: crisp bacon on the outside, molten cheese in the middle, and just enough jalapeño heat to keep each bite interesting. When they’re done right, the bacon renders and tightens around the pepper instead of sliding off, and the filling turns creamy without leaking all over the pan.
The little details matter here. Softened cream cheese blends smoothly with cheddar so the filling stays thick and spoonable, while a wire rack lets the bacon crisp on all sides instead of steaming underneath the poppers. Thin-cut bacon works better than thick-cut because it finishes at the same pace as the peppers and filling.
Below, I’ve included the small adjustments that keep the bacon wrapped tightly, the easiest way to fill the peppers without making a mess, and a few variations if you want to change the heat level or make them fit different diets.
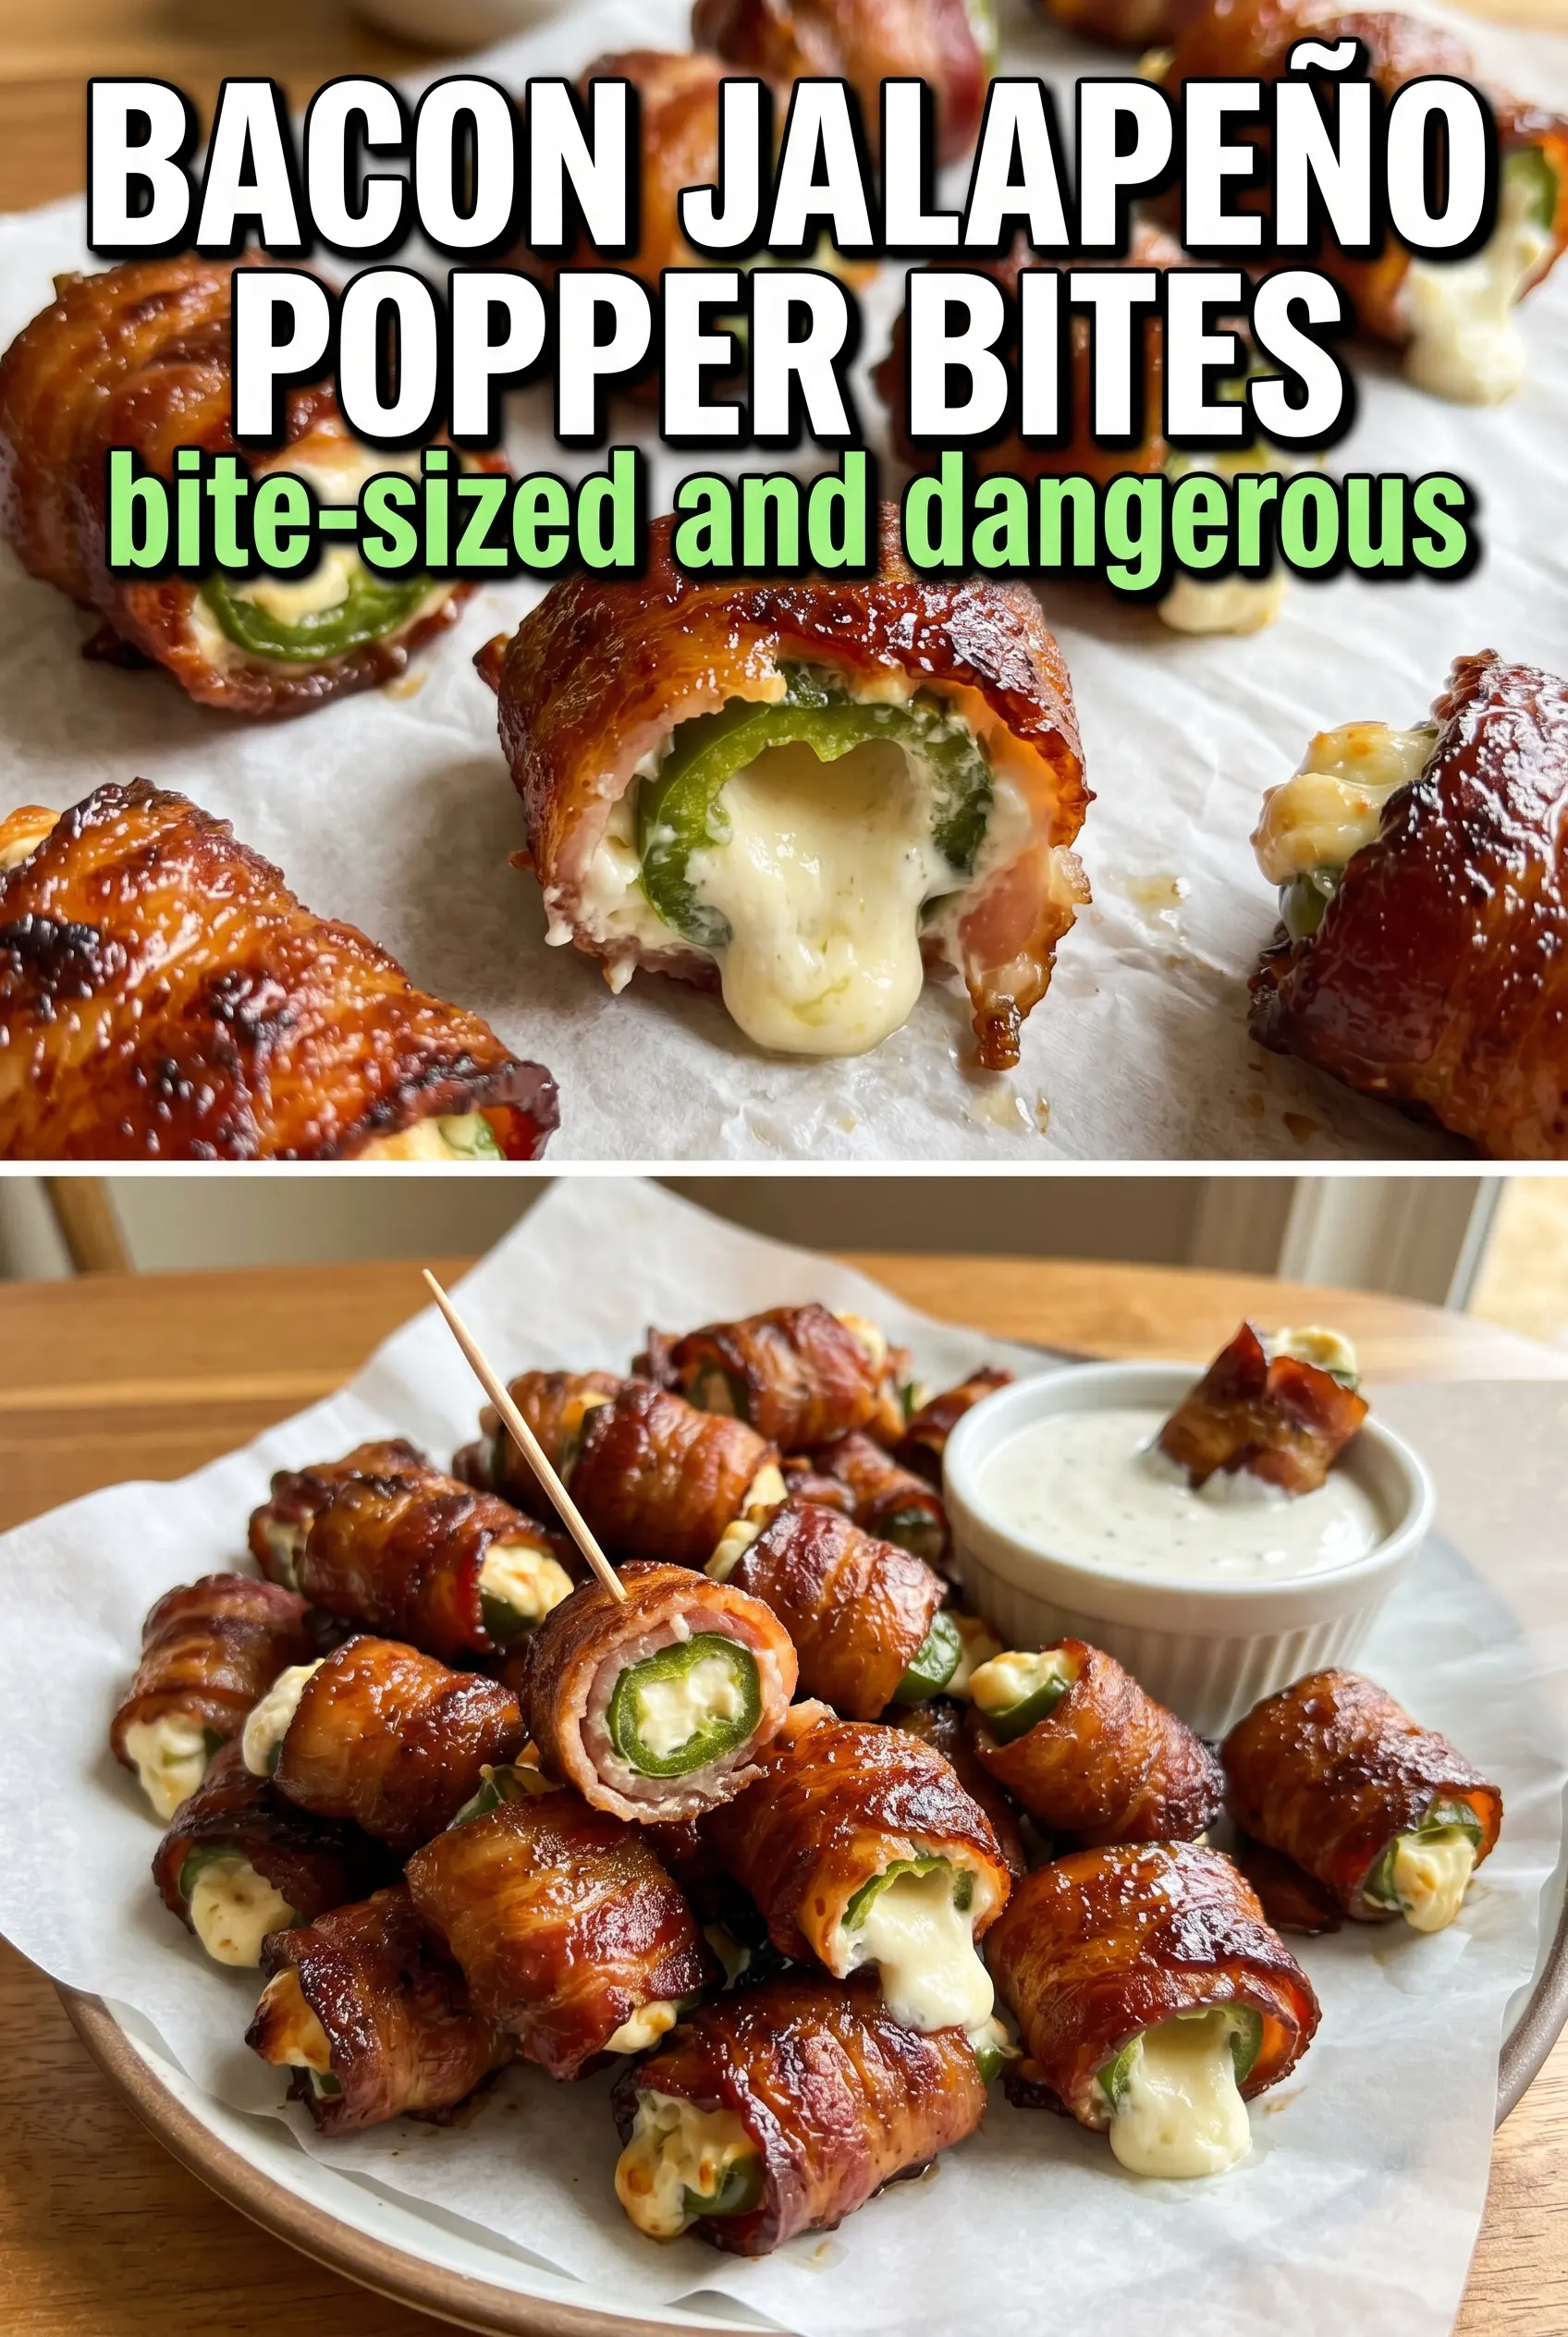
The bacon crisped up all the way around and the filling stayed creamy instead of running out. I drizzled a little honey at the end and it was the first tray to disappear at game night.
Crispy bacon-wrapped jalapeño popper bites with creamy cheddar filling are the kind of party snack people hover near.
The Bacon That Crisps Before the Filling Overflows
The biggest mistake with bacon jalapeño poppers is wrapping them with bacon that can’t finish in the same window as the peppers. Thick bacon needs too long, and by the time it crisps, the cheese has already leaked out and the jalapeños have turned soft. Thin-cut bacon solves that problem because it renders faster and tightens around the pepper as it cooks.
The wire rack matters just as much. It keeps the poppers lifted out of their own fat, so the bottoms don’t go soggy while the tops are browning. If you skip the rack, you’ll get softer bacon and a puddle of grease under the tray instead of that crisp, blistered finish everyone wants.
What the Cheese Filling Needs to Stay Creamy and Thick
- Cream cheese — This is the base that holds the filling together. It has to be softened first or it stays lumpy and won’t blend evenly with the cheddar. Full-fat cream cheese gives the cleanest, richest texture here.
- Sharp cheddar — Sharp cheddar brings the salty bite that keeps the filling from tasting flat. Pre-shredded cheese works, but freshly shredded melts more smoothly because it doesn’t carry the anti-caking starch.
- Garlic powder and smoked paprika — These seasonings do the work that raw garlic or fresh herbs don’t do well in this high-heat, short-bake recipe. Garlic powder distributes evenly, and smoked paprika gives the filling a little depth that plays nicely with the bacon.
- Thin-cut bacon — Cut the strips in half so they wrap neatly around each jalapeño half. If the bacon is too long or too thick, it won’t cook evenly and you’ll end up with loose edges or underdone spots.
- Jalapeños — Seed them well if you want moderate heat, but leave a few ribs in place if you like more kick. The peppers should be halved lengthwise and fairly uniform so they bake at the same pace.
Building the Bite So the Bacon, Pepper, and Cheese Finish Together
Mixing the Filling Until It Holds Its Shape
Stir the softened cream cheese, cheddar, garlic powder, and smoked paprika until the mixture looks evenly speckled and thick, not streaky. If the cream cheese is cold, it won’t combine cleanly and you’ll end up fighting little pockets of plain cheese while filling the peppers. The finished mixture should mound on a spoon instead of running off it.
Filling and Wrapping Without a Mess
Spoon or pipe the filling into each jalapeño half generously, but don’t overpack it past the rim. Too much filling spills out as the bacon tightens, and that’s what causes burnt cheese on the pan. Wrap each half-strip of bacon snugly around the pepper so the ends land underneath or are pinned with a toothpick, which keeps the bacon from unrolling as it cooks.
Baking on a Rack for Crisp Edges
Set the poppers on a wire rack over a baking sheet and bake at 400°F until the bacon is crisp and the filling is bubbling, about 18 to 22 minutes. The bacon should look browned and slightly lacquered, not pale and floppy. If the tops are getting dark before the bacon is done, the bacon was probably cut too thick or wrapped too loosely.
Finishing with Honey for Sweet Heat
A small drizzle of honey after baking gives the poppers a sharp little sweet edge that works especially well with the smoky bacon. Keep it light so the bacon still tastes savory and crisp. If you add the honey before baking, it can scorch and turn bitter on the pan.
Three Ways to Make These Popper Bites Fit Your Table
Milder Party Version
Remove every seed and white rib from the jalapeños, then choose smaller peppers if you can find them. You’ll get the same creamy bacon-cheese balance with less heat, which is the better move if you’re serving a mixed crowd.
Extra-Crisp Oven Method
If your bacon usually stays soft, start the poppers on the rack and finish them under the broiler for 1 to 2 minutes at the end. Watch them closely, because the line between crisp and burnt is short. This gives you deeper browning without drying out the filling.
Dairy-Free Adaptation
Use a sturdy dairy-free cream cheese and a good melting vegan cheddar-style shreds. The texture won’t be identical, and the filling may be a little softer, but the bacon still gives the bites enough structure to hold together. Keep the honey off if you want a fully dairy-free savory appetizer with cleaner contrast.
Storage and Reheating
- Refrigerator: Store leftovers in an airtight container for up to 3 days. The bacon will soften a bit, but the flavor holds up well.
- Freezer: These freeze best before baking. Assemble on a tray, freeze until firm, then move to a freezer bag and bake from frozen, adding a few extra minutes.
- Reheating: Reheat in a 375°F oven or air fryer until the bacon is hot and crisp again. The microwave will make the bacon rubbery and can cause the filling to separate.
Answers to the Questions Worth Asking
Bacon Jalapeño Popper Bites
Ingredients
Equipment
Method
- Preheat the oven to 400°F and line a baking sheet with a wire rack to elevate the bites for crisping.
- Mix cream cheese, shredded cheddar, garlic powder, and smoked paprika until fully combined and smooth.
- Fill each jalapeño half generously with the cream cheese mixture using a spoon or piping bag.
- Wrap each filled jalapeño half tightly with a half-strip of bacon and secure with a toothpick.
- Arrange the bacon-wrapped jalapeños on the wire rack and bake for 18–22 minutes, until the bacon is crispy and the filling is bubbling.
- Drizzle with honey if desired, then serve hot while the cheese is still actively bubbling.