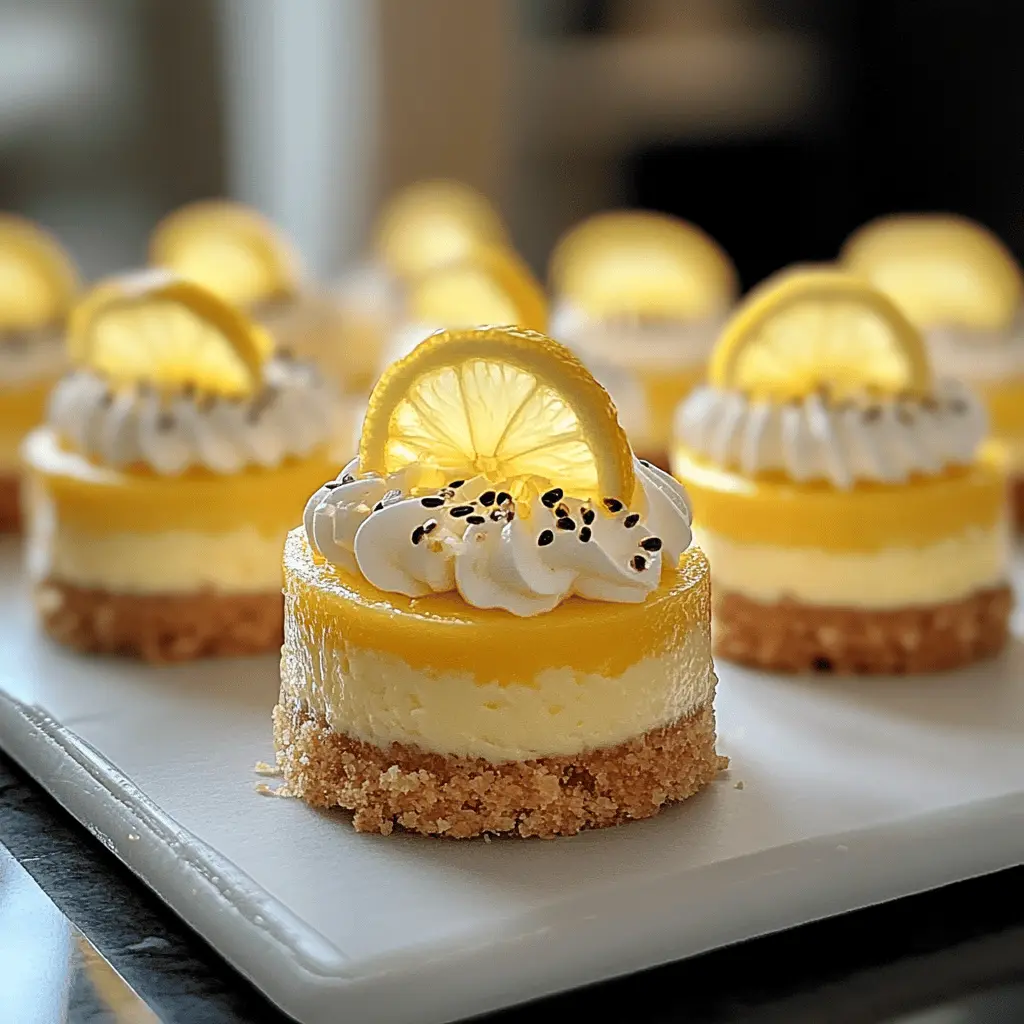
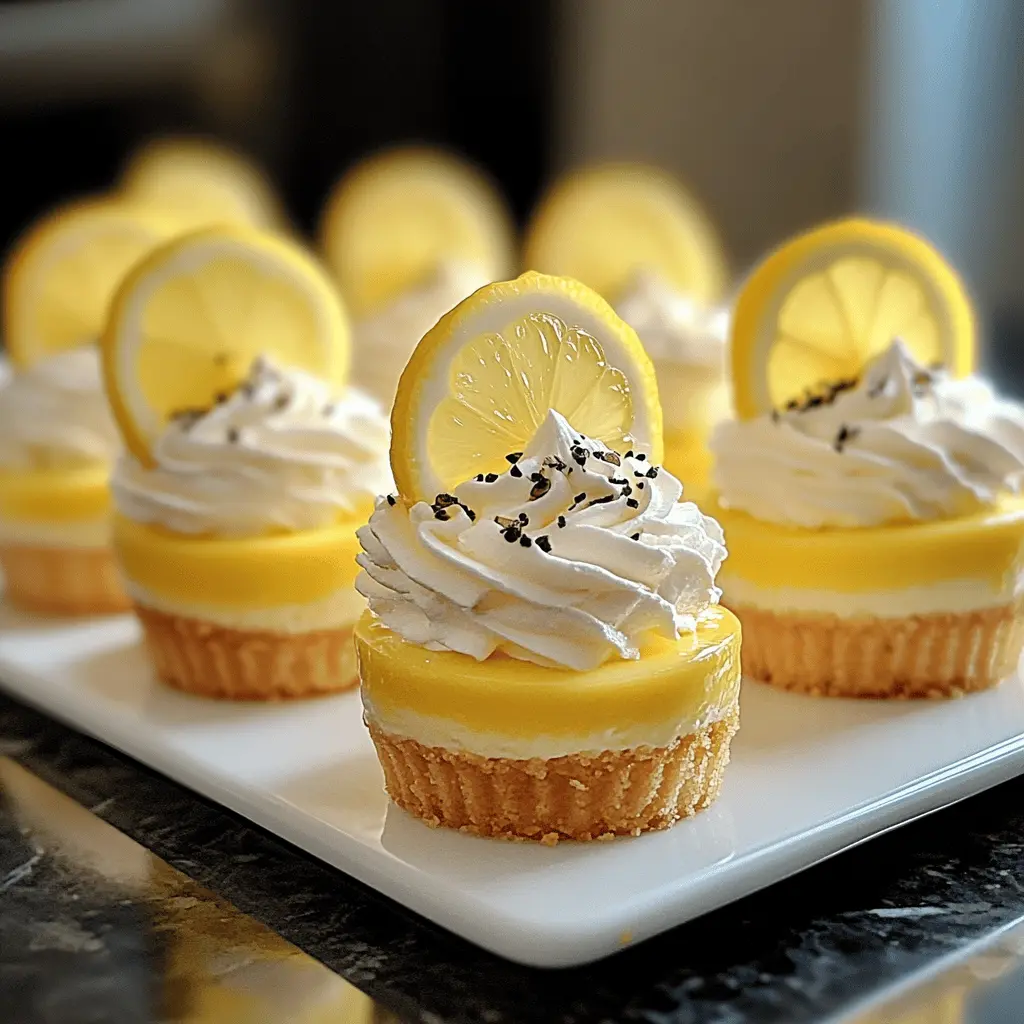
These mini lemon cheesecakes are perfect little bites of sunshine! With a creamy lemon flavor and a crunchy crust, they’re sure to brighten your day.
Making these cuties is a breeze! I love how they are just the right size for a sweet treat, and they feel fancy without all the fuss. Trust me, you’ll want to share… or not! 😄
Key Ingredients & Substitutions
Graham cracker crumbs: These provide a crunchy base for your cheesecakes. If you want a gluten-free version, you can use crushed almond flour or gluten-free cookies as a substitute.
Cream cheese: This is the star of the recipe. While full-fat cream cheese gives the best texture and flavor, you can go for reduced-fat cream cheese if you’re looking to cut calories.
Heavy whipping cream: For a rich topping, heavy cream is perfect. If you’re in a pinch, you could use whipped topping, but it won’t be as creamy. Alternatively, for a lighter choice, try using coconut cream.
Lemon juice and zest: Freshly squeezed lemon juice and zest brighten up the flavor. If fresh lemons aren’t on hand, bottled lemon juice can work as a substitute, but fresh is always better for taste.
How Do I Achieve the Perfect Cheesecake Texture?
Getting that creamy and smooth texture for your mini cheesecakes is crucial. Here are the steps to help you succeed:
- Make sure your cream cheese is softened to room temperature. This helps avoid lumps when mixing.
- Beat the cream cheese well with the sugar until smooth before adding any other ingredients. This is key for a creamy texture.
- When adding the eggs (if using), mix just until combined to prevent overmixing, which can lead to cracks or a dense texture.
- Don’t overbake! A slight jiggle in the center means they are done baking and will set as they cool.
How to Make Mini Lemon Cheesecakes
Ingredients You’ll Need:
For the Crust:
- 1 cup graham cracker crumbs
- 1/4 cup unsalted butter, melted
- 1/4 cup granulated sugar
For the Cheesecake Filling:
- 8 oz cream cheese, softened
- 1/2 cup granulated sugar
- 1/4 cup sour cream
- 1/4 cup lemon juice (freshly squeezed)
- Zest of 1 lemon
- 1 tsp vanilla extract
For the Whipped Topping:
- 1/2 cup heavy whipping cream
- 2 tbsp powdered sugar
For Garnish (Optional):
- Lemon slices
- Poppy seeds or edible flowers
- Fresh mint leaves
How Much Time Will You Need?
You will need approximately 30 minutes for preparation and about 15-20 minutes for baking. After baking, allow for at least 2 hours of chilling time in the refrigerator. Total time: around 2.5 to 3 hours waits to enjoy these delightful treats!
Step-by-Step Instructions:
1. Preheat the Oven and Prepare the Muffin Tin:
Start by preheating your oven to 325°F (160°C). While the oven is heating, line a muffin tin with cupcake liners to make it easy for you to remove the cheesecakes later.
2. Make the Crust:
In a medium bowl, mix together the graham cracker crumbs, melted butter, and 1/4 cup of granulated sugar until everything is well blended. This mixture should feel slightly moist but crumbly. Now, take about 1 tablespoon of this mixture and press it firmly into the bottom of each cupcake liner to create the crust.
3. Prepare the Cheesecake Filling:
In a large mixing bowl, beat the softened cream cheese with 1/2 cup of granulated sugar until the mixture is smooth and creamy. This step is important for a good texture. Then, add in the sour cream, lemon juice, lemon zest, and vanilla extract. Mix everything together until the filling is completely smooth and well combined.
4. Assemble the Mini Cheesecakes:
Now it’s time to fill those crusts! Carefully spoon the cheesecake batter over the prepared crust in each cupcake liner, filling them about 3/4 full to allow space for the cakes to rise slightly as they bake.
5. Bake and Cool:
Pop the muffin tin into your preheated oven and bake for about 15-20 minutes. You want the cheesecakes to be set but still a little jiggly in the center. When they’re done, turn off the oven, and let them cool inside for about 10 minutes. After that, take them out and let them cool at room temperature before transferring them to the refrigerator. Chill for at least 2 hours to make sure they’re completely set.
6. Prepare the Whipped Cream:
Once your mini cheesecakes are chilled, it’s time to prepare the whipped cream. In a mixing bowl, whip the heavy cream with the powdered sugar until stiff peaks form. This means when you lift the mixer, the whipped cream should hold its shape without flopping over.
7. Add the Final Touches and Serve:
Dollop or pipe the whipped cream on top of each mini cheesecake to give them a lovely finish. For a special touch, garnish each cheesecake with a slice of lemon, a sprinkle of poppy seeds or edible flowers, and a fresh mint leaf if you’d like. Now they’re ready to impress!
8. Enjoy:
Serve the mini lemon cheesecakes chilled and enjoy every refreshing bite! They’re perfect for any occasion or just a sweet treat to brighten your day.
Can I Use Another Type of Crust?
Absolutely! If you prefer a different flavor, try using vanilla wafer crumbs, Oreo cookies, or even a nut crust. Just make sure to follow similar mixing and pressing steps for whatever alternative you choose.
How Can I Make These Mini Cheesecakes Gluten-Free?
To make these mini cheesecakes gluten-free, simply substitute the graham cracker crumbs with a gluten-free cookie crumb or almond flour. Be sure to check that all other ingredients, especially the sour cream and any garnishes, are also gluten-free!
What’s the Best Way to Store Leftovers?
Store any leftover mini cheesecakes in an airtight container in the refrigerator for up to 3 days. You can enjoy them cold, or let them sit at room temperature for a few minutes before serving for a softer texture.
Can I Make These Mini Cheesecakes Dairy-Free?
Yes! For a dairy-free version, use vegan cream cheese and substitute sour cream with plain coconut yogurt or another dairy-free yogurt. Make sure to check labels for any other non-dairy options!