This No Bake Peanut Butter Chocolate Lasagna is a treat you’ll love! It’s layered with creamy peanut butter, rich chocolate, and fluffy whipped topping. No oven needed, just some chilling time!
I mean, who can resist chocolate and peanut butter? It’s like the dream team. Whenever I make this, I find it gone in minutes—definitely a crowd-pleaser! 🌟
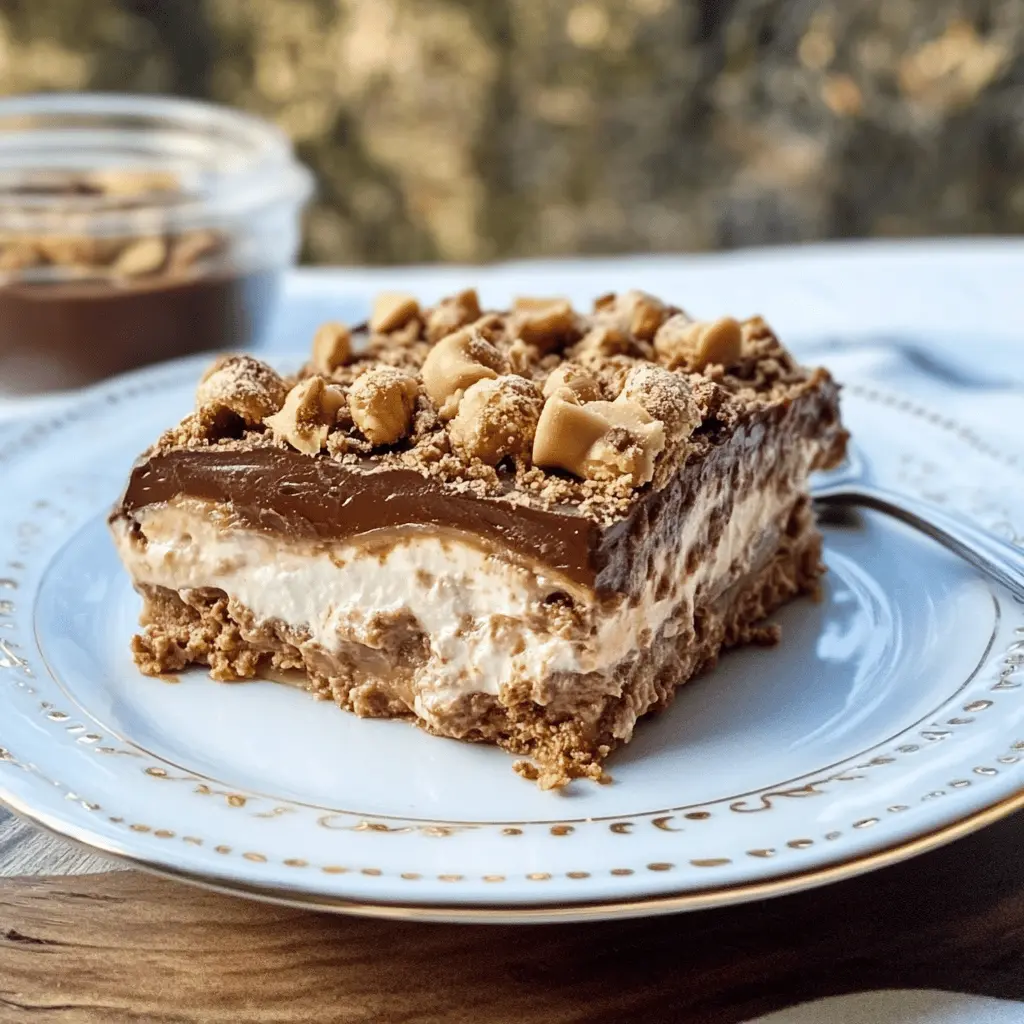
Key Ingredients & Substitutions
Chocolate Graham Crackers: These create the essential crust layers for the lasagna. If you can’t find them, regular graham crackers work fine, or try chocolate wafer cookies for a similar taste.
Heavy Cream: This is key to getting that fluffy whipped texture. If you’re looking for a lighter option, you could use whipped topping or coconut cream for a dairy-free version.
Powdered Sugar: This sweetens the cream without the graininess of granulated sugar. If you’re watching sugar intake, try swapping it out for a sugar substitute or use less sugar to taste.
Creamy Peanut Butter: I love a smooth peanut butter for this dish. Natural peanut butter is also an option, but you might need to stir it well before using, as it behaves differently in recipes.
Instant Chocolate Pudding Mix: This gives the dessert its rich chocolate flavor. If you want to switch it up, vanilla pudding works too or even a combination of both chocolate and vanilla for visual appeal!
How Do You Get the Whipped Cream Just Right?
Whipping cream is a crucial step that can be tricky. To achieve the perfect peaks:
- Start with cold heavy cream; place your mixing bowl and whisk in the fridge for 10 minutes before whipping.
- Beat on medium speed until soft peaks form, then add the powdered sugar gradually.
- Once you’ve added the sugar, increase the speed to high until stiff peaks form.
- Be careful not to over-whip, as it can turn into butter!
Tips for Layering the Lasagna?
Layering is what creates those beautiful, tasty sections. Here’s how to do it right:
- Begin with a solid base of chocolate graham crackers, making sure they are tightly packed together.
- Spread each layer evenly, using a spatula, to avoid gaps and keep everything unified.
- Don’t forget to press down lightly on each layer to ensure everything sticks together.
With these tips, you’re well on your way to crafting a delightful No Bake Peanut Butter Chocolate Lasagna that’s sure to impress! Enjoy your delicious creation!

No Bake Peanut Butter Chocolate Lasagna
Ingredients You’ll Need:
For the Layers:
- 1 package (12 oz) chocolate graham crackers
- 2 cups heavy cream
- 1 cup powdered sugar
- 1 cup creamy peanut butter
- 1 tsp vanilla extract
- 1 cup milk
- 2 boxes (3.4 oz each) instant chocolate pudding mix
For the Topping:
- 1 cup chopped peanuts (optional, for garnish)
- 1/2 cup chocolate syrup (for drizzling)
- 1 cup mini marshmallows (optional, for added texture)
How Much Time Will You Need?
The total time needed for this tasty dessert is about 15 minutes for preparation and a minimum of 4 hours of chilling time in the fridge. If you have the time, letting it sit overnight improves the flavors even more. Trust me, it’s worth the wait!
Step-by-Step Instructions:
1. Whip the Cream:
Start by pouring the heavy cream into a medium bowl. Use an electric mixer to whip it until soft peaks form. Then, gradually add the powdered sugar while continuing to whip until stiff peaks form. This fluffy mixture is going to be a big part of your lasagna’s creaminess, so make sure it looks great! Set this whipped cream aside.
2. Make the Peanut Butter Mixture:
In another bowl, mix the creamy peanut butter and vanilla extract together until it’s smooth and well combined. Gently fold in half of the whipped cream mixture you made earlier, mixing it together carefully so it stays light and fluffy. Set this peanut buttery goodness aside for now.
3. Prepare the Pudding:
Get a separate bowl and whisk together the milk and instant chocolate pudding mix. Keep whisking until the mix thickens up and becomes smooth. This chocolaty layer will add a delicious contrast to the creamy peanut butter layer.
4. Assemble the Lasagna:
Now it’s time to put everything together in a 9×13 inch dish! Start with a layer of chocolate graham crackers at the bottom. Next, spread half of the peanut butter mixture over the top of the graham crackers. Then, add another layer of chocolate graham crackers, followed by the chocolate pudding mixture you prepared. Finally, top it all off with the remaining whipped cream mixture. You can really see the layers starting to come together!
5. Final Touches:
Add a final layer of chocolate graham crackers on top and drizzle it generously with chocolate syrup. This is where you can also sprinkle the chopped peanuts and toss on some mini marshmallows if you like a little extra crunch and sweetness.
6. Chill and Serve:
Cover the dish with plastic wrap and place it in the fridge to chill for at least 4 hours, or ideally overnight. This will help all the flavors meld together beautifully. When you’re ready to serve, slice it up and enjoy the delightful layers of chocolate and peanut butter goodness!
Can I Use Different Types of Crackers?
Absolutely! While chocolate graham crackers give a nice flavor, you can substitute them with regular graham crackers or even Oreos for a different taste profile. Just keep in mind that the flavor will change slightly depending on your choice.
Can I Make This Recipe Vegan?
Yes! To make this lasagna vegan, use dairy-free whipped cream made from coconut cream, substitute peanut butter with nut butter, and use plant-based milk like almond or oat milk. For the pudding, look for vegan instant pudding mix, which is often made with cornstarch instead of dairy.
How to Store Leftovers?
Store any leftovers covered in the refrigerator for up to 5 days. It’s best to keep it in an airtight container to maintain freshness. If you notice the texture changing, consider adding a little more chocolate syrup or drizzling extra peanut butter before serving!
Can I Add More Layers or Ingredients?
Definitely! Feel free to get creative by adding layers of fruit, like sliced bananas or strawberries, between the layers. Just be sure to adjust the balance of moist ingredients so that the layers don’t become soggy. More texture can also be added by including crushed cookies or candies between the layers!